Trigger Functions
Trigger Functions
About this Chapter
This chapter provides an introduction to the trigger functions of the instrument.
Triggering tells the instrument when to begin displaying the w aveform. You can
use fully automatic triggering, take control of one or more main trigger functions,
or you can use dedicated trigger functions to capture special waveforms.
Trigger Event
The trigger event establishes the time-reference point in the waveform record. All
waveform record data is located in time with respect to that point. The instrument
continuously acquires and retains enough sample points to fill the pretrigger
portion of the waveform record. That is the part of the waveform that is displayed
before, or to the left of, the triggering event on screen. When a trigger event
occurs, the instrument is acquiring samples to build the posttrigger portion of the
waveform record, that is, the part displayed after or to the right of the trigger
event. After a trigger is recognized, the instrument will not accept another trigger
until the acquisition is complete.
Trigg er Modes
The trigger mode determines how the instrument behaves in the absence of a
trigger event. You can use the following settings for updating the trigger condition
by pressing the Trigger button and then selecting TRIGGER OPTIONS and
then TRIGGER CONDITIONS.
Automatic Auto Level trigger mode e nables the instrument to set the trigger
level automatically and track with changes in signal amplitude.
Normal trigger mode enables the instrument to acquire a waveform only
when it is triggered. If no trigger occurs, the last waveform record acquired
remains on the display. If no last waveform exists, no waveform is displayed.
Auto trigger mode enables the instrument to acquire a waveform even if a
trigger does not occur. Auto mode u
ses a timer that starts when the acquisition
is started, and the pretrigger information is obtained. If a trigger event is not
detected before the timer times out, the instrument forces a trigger. The length
of time it waits for a trigger event depends on the time base setting.
Auto mode, when forcing triggers in the absence of valid triggering events,
does not synchronize the waveform on the display. The waveform will appear
to move across the screen. If valid triggers occur, the display will become
stable.
Single Shot trigger mode allows you to set the instrument to capture (an
d
stop) only one trigger event by pressing the front panel Single button. You
can also stop single shot triggering by selecting a different trigger mode in the
Trigger > TRIGGER OPTIONS > Trigger Conditions menu.
Read the Getting Started section for a complete description of the Trigger button
menu. (See page 2, Front Panel Navigation.)
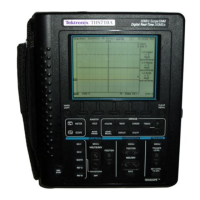
60 THS3000 Series Oscilloscopes User Manual

 Loading...