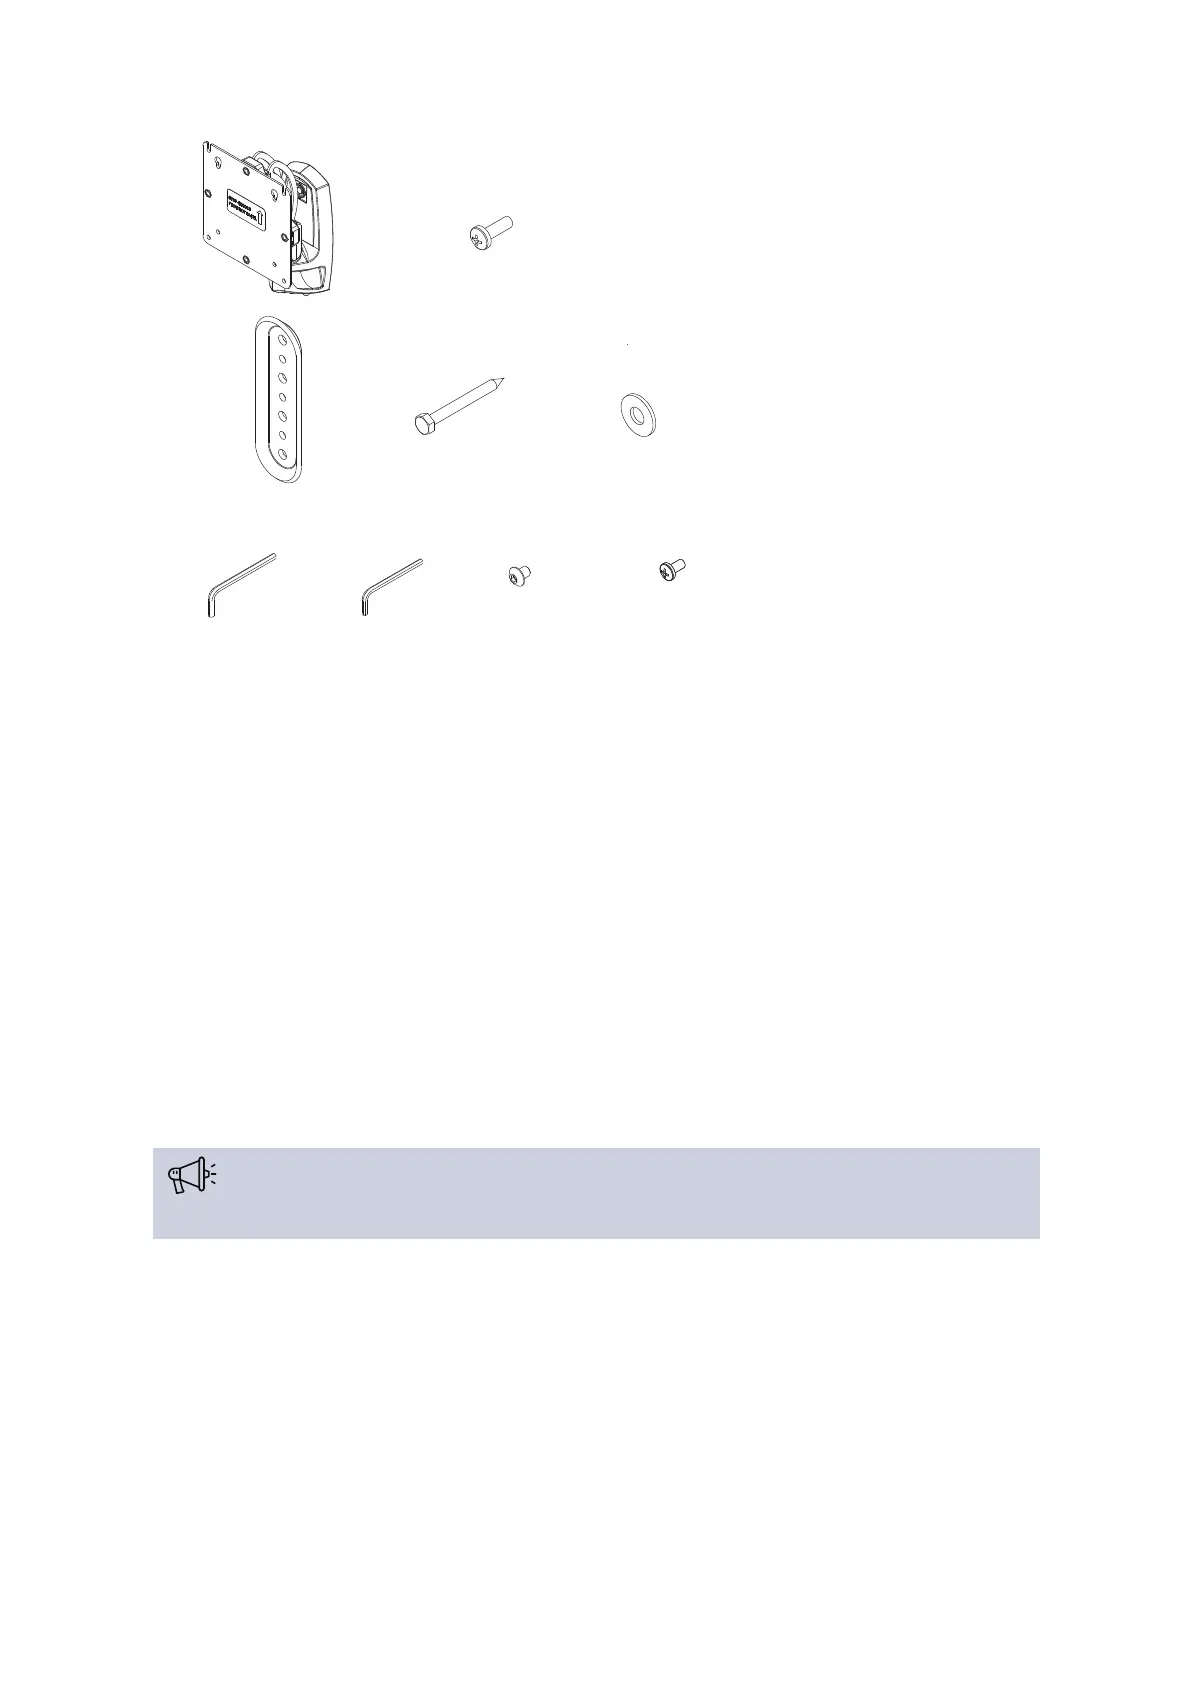
B (4)
M4x14mm
E (1)
[wall bracket]
F (2)
1/4 x 2 1/2”
G (2)
1/4”
3/16”
P (1)
1/8”
Q (1)
A (1)
[monitor arm]
M (1)
#10-32 x 3/8”
N (1)
M4 x 4mm
Figure 1-17 Lingua RAD mount parts
Attach Lingua RAD Mount To The Wall
Follow the procedure described below to attach the RAD mount to a wall:
1. Determine the mounting location on the wall.
2. Use a stud finder to locate 2" x 4" wood stud
3. Use wall bracket (E) to mark and drill two 1/8 x 2 1/2” holes in wall at desired mounting location.
(See Figure 1-18 )
4. Use two 1/4-2 1/2” hex head lag screws (F) and two 1/4” washers (G) to install wall bracket (E) onto
wall.
Over-tightening screws (F) may cause bracket to compress into soft wall surface resulting in
difficult mount installation or improper engaging of set screw in Step 6.
5. Hang monitor arm (A) over wall bracket (E).
6. Secure monitor arm to wall bracket (E) by tightening set screw. Ensure set screw engages back side
of wall bracket (E) to properly secure mount.
MOUNT THE RADIATO RS 46