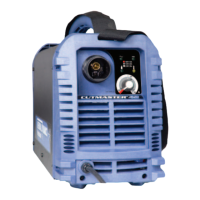
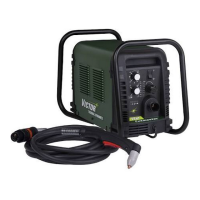
CUTMASTER 40MM
Manual 0-5085 5-13 SERVICE
3. Open or improperly connected ribbon cable to J2
connector on Main PCB 1
a) Inspect connection and check continuity. Re-
place if open.
4) Defective Main PCB 1.
a) Replace Main PCB 1.
F. UNDER PRESSURE FAULT. AC LED ON,
FAULT Indicator and 60 PSI LED flashing.
1. Air pressure source to unit is too low.
a) Set input pressure source to 90-100 PSI.
2. Regulator set too low.
a) Adjust unit regulator to increase pressure.
3. Defective Logic PCB 3
a) Measure for 5VDC on the Logic PCB 3 be-
tween J3-3 to J3-1. Replace Logic PCB 3 if
voltage is not present or low.
b) Measure for voltage on the Logic PCB 3 be-
tween J3-2 to J3-1. If the voltage is between
3-4.5VDC, replace the Logic PCB 3.
4. Defective Pressure Transducer
a) Replace Pressure Transducer
G. INPUT POWER FAULT. AC LED ON,
FAULT Indicator and 65 PSI LED flashing.
1. Primary line voltage out of tolerance range.
a) Connect unit to voltage with unit specifica-
tions. See section "2.04 Power supply speci-
fications". If using a generator, connect unit
to a wall receptacle to see if problem is cor-
rected.
2. Defective Main PCB 1
a) Measure voltage on Main PCB 1 between test
point GND1 to J2-22.
400 VAC input = approximately 2.6 VDC
If voltage is less than 2VDC, replace Main PCB 1.
3. Defective Ribbon cable.
a) Check continuity of the ribbon cable connect-
ing between the Main PCB 1 and the Logic
PCB 3.
4. Defective Logic PCB 3.
a) Replace Logic PCB 3.
H. PARTS-IN-PLACE (PIP) FAULT. The
FAULT Indicator and 70 PSI LED flashing,
After 20 seconds fan MOT 1 turns ON.
1. Shield Cup loose
a) Hand tighten the shield cup to close the PIP
switch.
2. Torch not properly connected to power supply
a) Insure torch ATC is securely fastened to unit.
3. Problem with torch and leads PIP circuit
a) Disconnect the Torch from the unit and check
continuity of torch PIP circuit at ATC pins 1 &
2. If open, check torch and leads for open lead
or PIP switch.
4 Torch Switch
3 Torch Switch
2 PIP
1 PIP
Pilot Lead
Art # A-08124
4. Defective Logic PCB 3
a) Measure the voltage on Main PCB 1 between
J2-17 to test point GND1 for 12VDC. If the
voltage is less than 2VDC, replace Logic PCB
5. Defective Main PCB 1
a) Replace Main PCB 1
 Loading...


