FFS2000 Series Chapter 6: Fiber Preparation
Page 32 TTN047338-D02
Chapter 6 Fiber Preparation
Before preparing the fiber make sure that the splicer workstation meets the following criteria:
Individual stations of the splicer are prepared, and all surfaces are clean.
The inserts in the FHBs, the Graphite V-Grooves, and Cleave Inserts are of the appropriate size for the
fiber to be spliced.
Top and bottom TMS blades are of the appropriate size for the fiber to be spliced.
Filament is of appropriate size for the fiber to be spliced and has been calibrated.
Recoat mold size is of appropriate size for the fiber to be spliced.
The appropriate Splice File is loaded in the GUI (full filename and path displayed across the top of the
GUI window).
6.1. Loading the Fiber
Place both Fiber Holding Blocks into the Dunking Jigs on either side of the Cleaning Can with the Fiber Clamps
open and the Cleave Lever in the forward position, pointing towards the user. This will activate the internal
vacuum pump. Take the first fiber and have approximately 100 mm projecting from your right hand towards the
left hand side of the machine. Load the Fiber into the right FHB by lowering it into the Fiber Clamp, still with 60-
80mm of fiber overhanging the left end of the right FHB. The Vacuum will keep the Fiber in place, but if necessary
a finger can be placed on top of the fiber as it is slid through. Draw the fiber to the right, observing the ‘curl’ of the
fiber, and rotating it between thumb and forefinger so that the fiber coming out of the left side of the FHB is facing
downwards. It is important that the curl does not rise up from the FHB, or that the fiber does not point towards the
back of the machine or towards the user. Keep drawing the fiber back until the end of the fiber is level with the
outside edge of the Clean Lamp indicator. Lower the Fiber Clamp in place and repeat the process for the left
FHB.
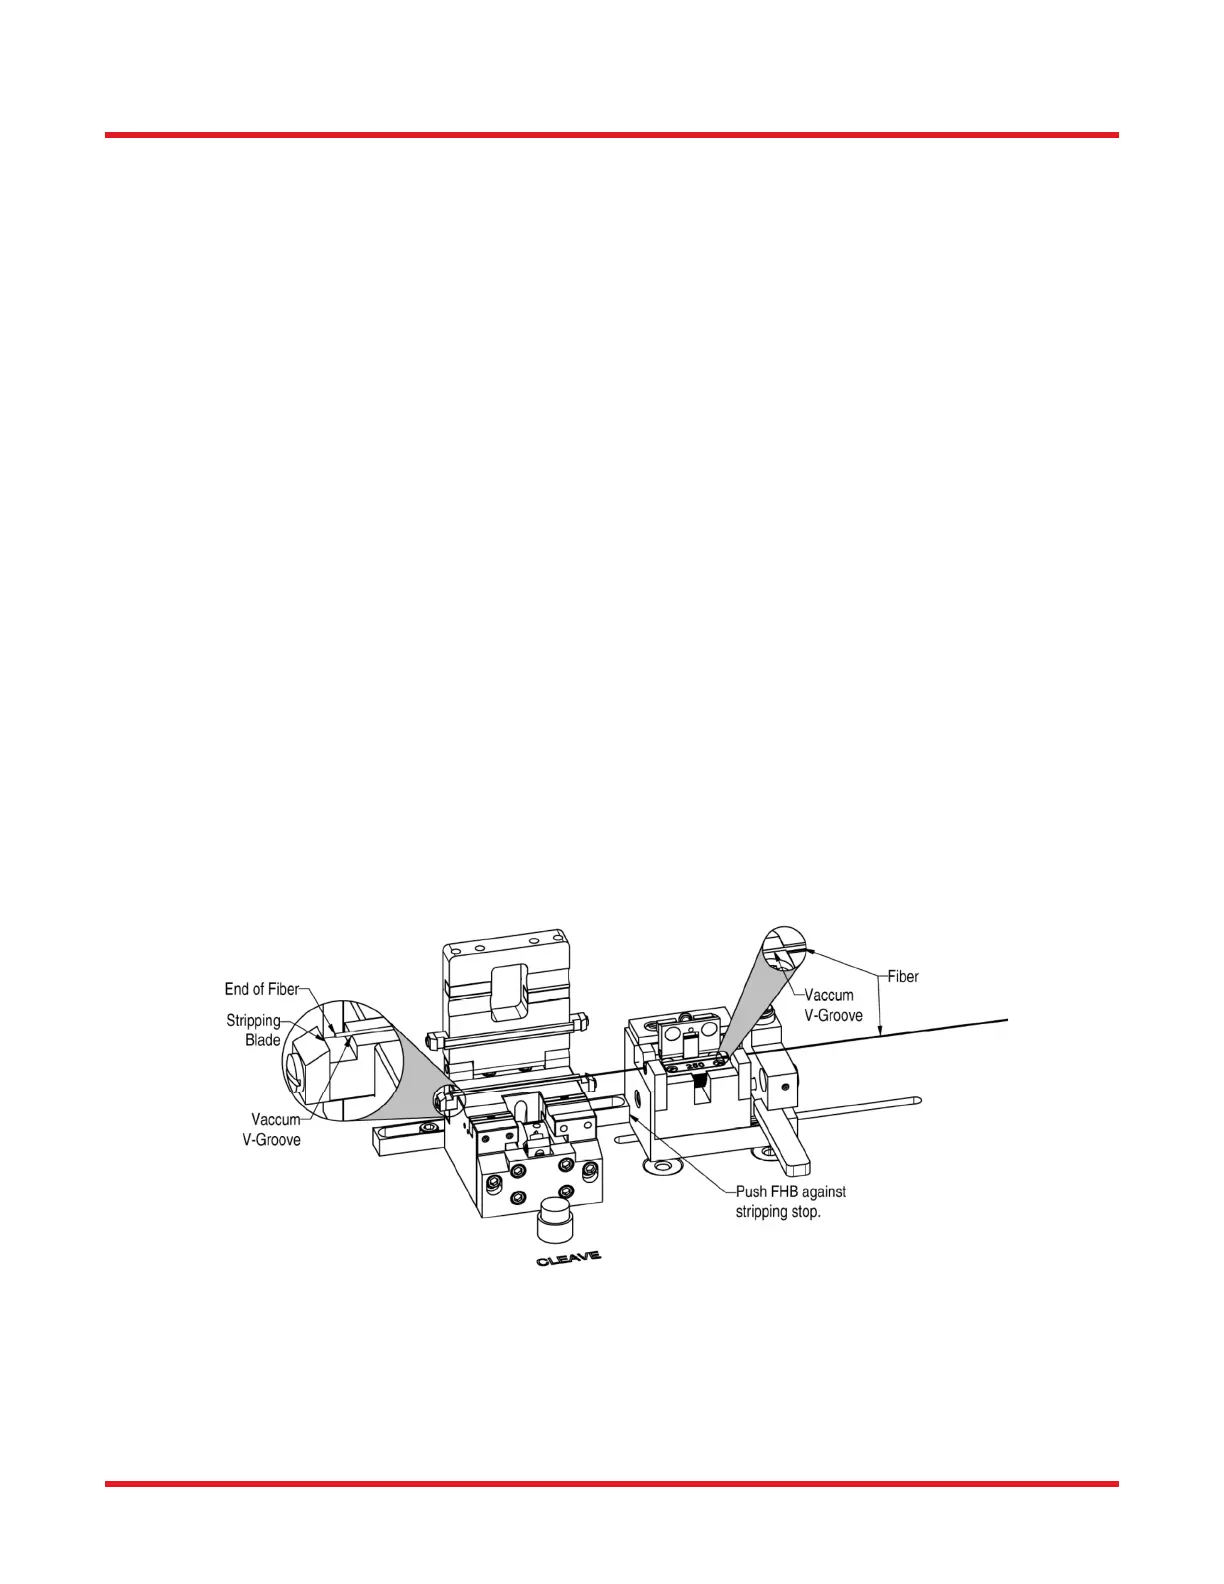
Checking the Fiber Length at the Stripping and Cleaving Stations
In order to set the length accurately, it is important that the user checks that the fiber does not overlap the Stripper
Blades on the far side of the Stripper, and also that the fiber does not fall short of the Cleave Insert (there should
be minimum of 3-4mm of fiber sitting in the Cleave Insert). The process is illustrated in Figure 37.
Figure 37 Checking the Fiber Length
Open the Cleave Lid of the Cleave Block. Place the right FHB with its locating posts in the right Stripping slot.
Raise the ‘inside end’ (the face of the FHB towards the Cleave Block) of the FHB slightly and push the FHB
towards the Stripping Stop. Drop the FHB to the surface of the machine; at this point the vacuum to the V-grooves
of the FHB and the bottom TMS blade will turn on. Ensure that the Cleave Lever still points towards the user; if it
doesn’t, bring it forward now. Then smooth the fiber in place with a finger. At this point verify that the fiber is not
 Loading...