FFS2000 Series Chapter 11: Maintenance
Page 68 TTN047338-D02
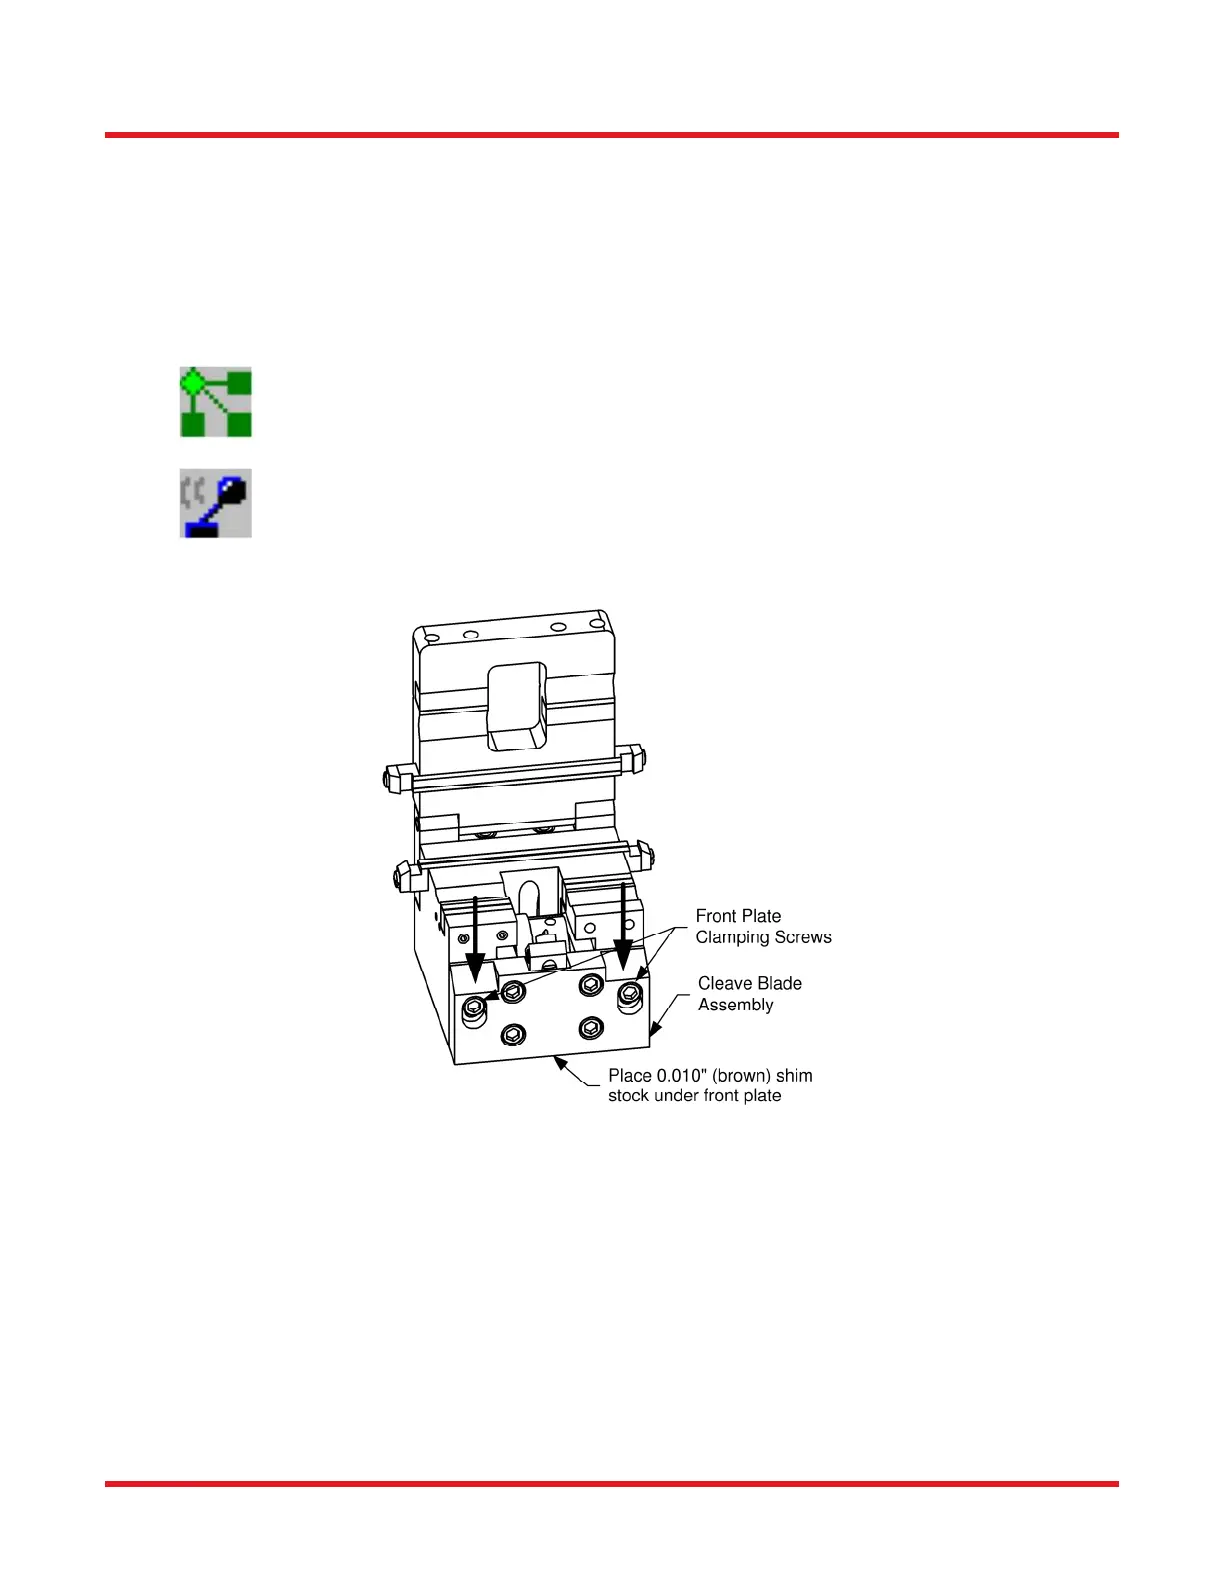
the blade is now at the top (see 11.3.8 ). If the blade has already been flipped, and two shims have already been
added, then a new cleave blade must be installed.
Apply downward pressure to the front plate assembly and retighten the clamping screws, securing the
front plate. Check that the front plate is flush side-to-side with the main stripper/cleaver base. Adjust if
necessary.
Home the cleave blade by sending the command:
MOTORTO (11 0)
from the command line. Alternatively, assign the macro “Home Cleave Blade.txt” to the user macro
by selecting Splice | User Macro Path 1… from the menu bar, and then execute by clicking on
the User Macro icon. The cleave blade can also be homed by running the reset macro (click the reset
icon).
Run some test cleaves to check both the left and right side cleave quality and to ensure that the blade is
striking the fiber in the middle of its oscillation cycle. Adjust if necessary (see Section 11.3.7).
Figure 58 Adjusting the Cleave Blade
11.3.7. Check/Adjust Cleave Blade Forward Move
During a cleave, the cleave blade first advances forward to a position just short of the fiber, then begins oscillating
back and forth while advancing further forward towards the fiber. The blade should touch the fiber and initiate the
cleave roughly in the middle of this oscillation cycle. Run some test cleaves to check cleave quality and to ensure
that the blade is striking the fiber somewhere near the middle of its oscillation cycle.
If the cleave blade is not striking the fiber near the middle of its oscillation cycle, then the initial cleave blade
advance must be adjusted in the cleave macro. This is accomplished as follows:
 Loading...