FFS2000 Series Chapter 11: Maintenance
Rev B, July 21, 2017 Page 65
thorough cleaning, use the soft brush provided in the tool kit and wet the bristles with acetone. Make sure to clean
both the top and bottom inserts, including bottom V-groove and all blades.
Note: Do not clean the TMS inserts while vacuum is on. Wear safety glasses and be very careful when “brushing”
with acetone, as acetone may “spray” from the brush.
11.3.4. Change/Align TMS Inserts
The top and bottom TMS (Thermo-Mechanical Stripper) inserts contain a matched set of stripping blades at each
end. Make sure to keep top and bottom sets together to ensure optimal performance.
Note: Changing strippers means changing the entire TMS insert (both top and bottom). Do not attempt to adjust
the blades at the ends of the TMS insert. The stripper blades are precision-aligned at Thorlabs. Any misalignment
will result in poor stripping performance and possibly fiber damage.
Remove the TMS Inserts
1. Make sure power to the main unit is turned off.
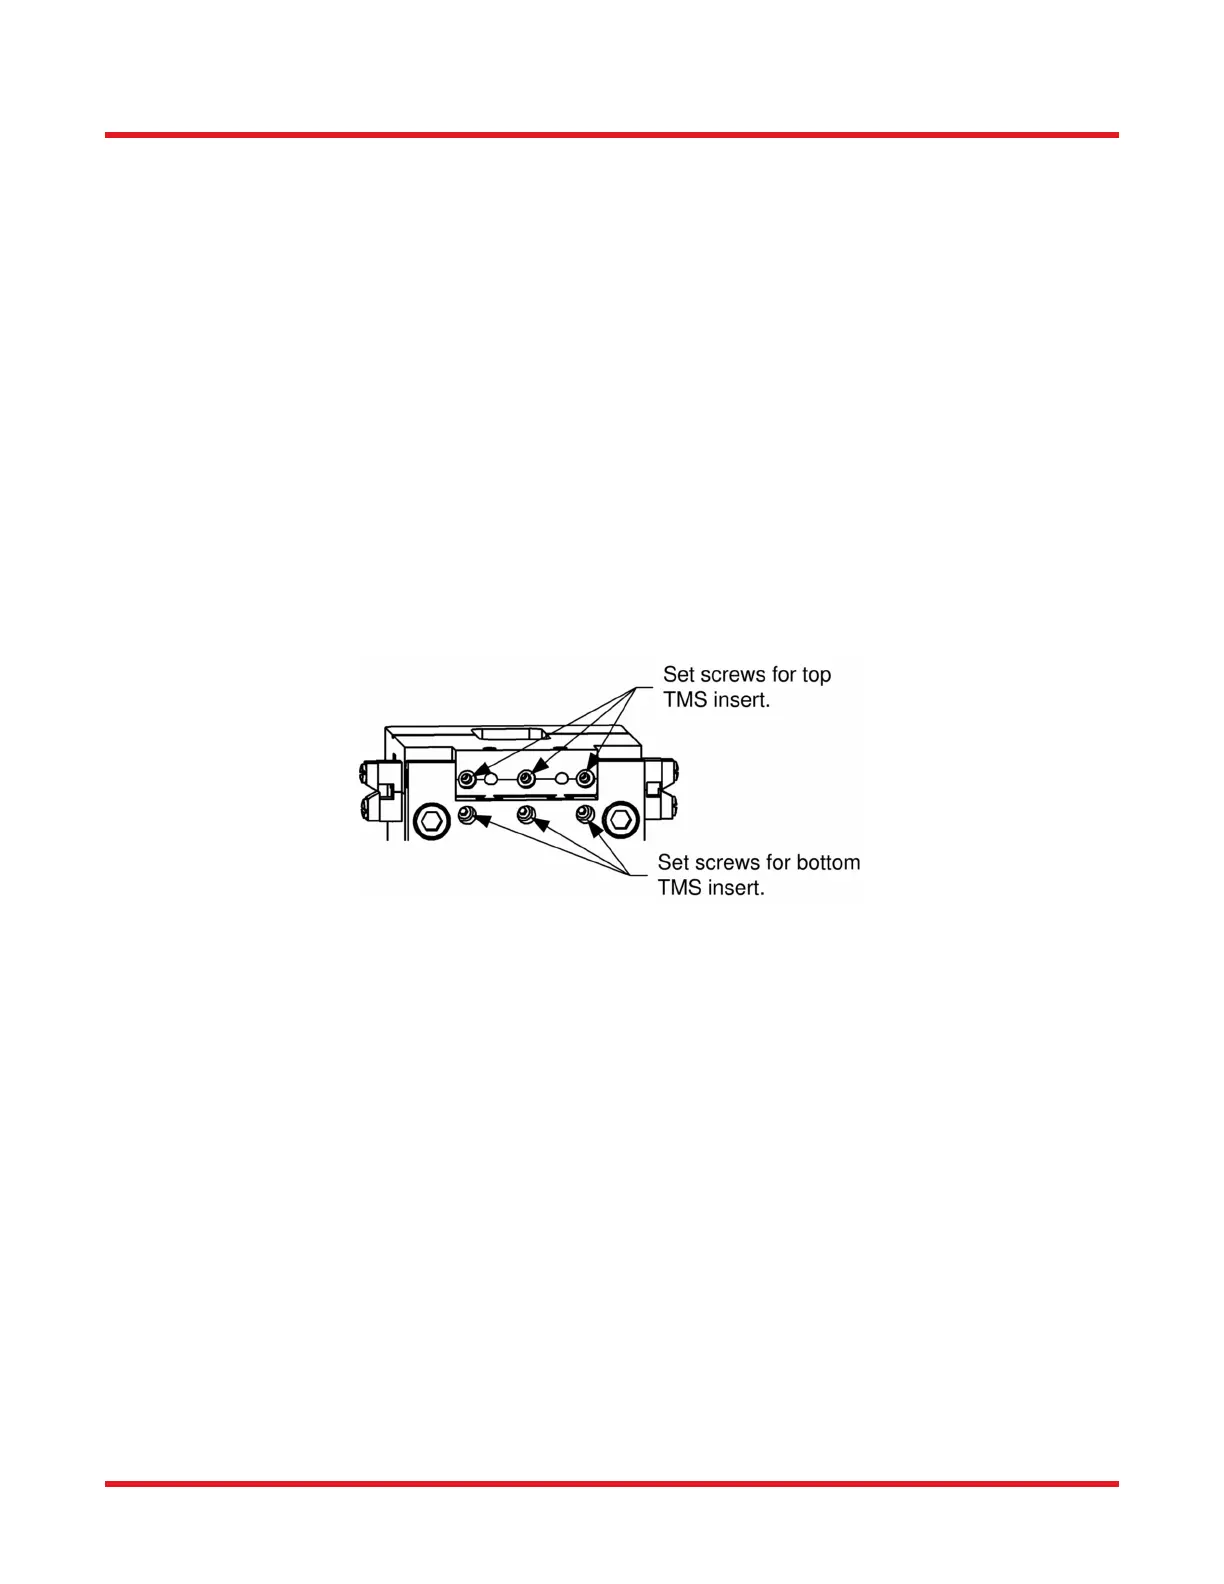
2. Close the stripper top. The top insert is held in place by three set screws accessible from the back of the
stripper block. Back off one full turn on the set screws, using a 0.035" hex key. The bottom insert does
have provisions for holding with set screws, but these are typically not required. Make sure the bottom set
screws are backed off at least one full turn.
Figure 55 Set Screw Location on Back Side of Stripper Block
3. Open the stripper top. The top insert should lift or slide easily out of its channel. Remove the bottom insert
by simultaneously lifting straight up on the protruding ends of the insert.
4. Clean the top and bottom channels where the insert sits by blowing with clean, dry (canned) air.
 Loading...