CTV-ADF001D-EN (10 Oct 2014) 1
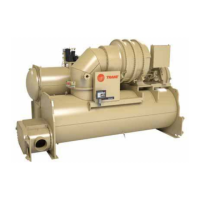
CenTraVac™ Installation Completion Check Sheet and
Request for Trane Service
Important: A copy of this completed form must be submitted to the Trane service office that will be responsible for the
start-up of the chiller. Start-up will NOT proceed unless applicable items listed in this form have been
satisfactorily completed.
To: __________________________________________________ Trane Service Office: ____________________________________
S.O. Number: ________________________________________ Serial Numbers: ________________________________________
Job/Project Name: ______________________________________________________________________________________________
Address: _______________________________________________________________________________________________________
The following items are being installed and will be completed by: __________________________________________________
Important: Start-up must be performed by Trane or an agent of Trane specifically authorized to perform start-up and
warranty of Trane
®
products. Contractor shall provide Trane (or an agent of Trane specifically authorized
to perform start-up) with notice of the scheduled start-up at least two weeks prior to the scheduled start-up.
Equipment not started by Trane is not warranted by Trane.
Check box if the task is complete or if the answer is “ yes.”
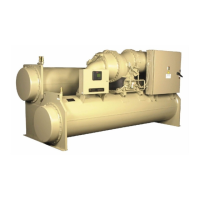
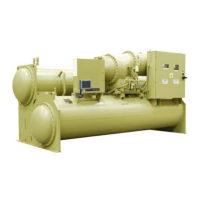
1. C e n Tr a V a c
In place and piped.
Note: Do not insulate the CenTraVac chiller or adjacent piping prior to the chiller commissioning by Trane service
personnel. The contractor is responsible for any foreign material left in the unit.
2. Piping
Chilled water piping connected to: Condenser and heat recovery condenser (as applicable)
piping connected to:
CenTraVac
Air handling units
CenTraVac
Pumps
Pumps
Cooling tower
Heating loop (as applicable)
Make-up water connected to cooling tower
Pumps run, air bled from system
Water supply connected to filling system
Strainers cleaned
Systems filled
Rupture disk or RuptureGuard™ ventilation piping
installed
3. Flow balancing valves installed
Leaving chilled water
Leaving condenser water
Optional heat recovery or auxiliary condenser water
4. Gauges, thermometers, and air vents
Installed on both sides of evaporator
Installed on both sides of condenser and heat
recovery condenser (as applicable)
5. Wiring
Compressor motor starter has been furnished by Trane, or has been configured and installed in compliance with
the appropriate Trane Starter by Others specification (available from your local Trane Sales Office)
Full power available
Chilled water pump (connected and tested)
Interconnecting wiring, starter to panel (as required)
Condenser water pump (connected and tested)
External interlocks (flow switch, pumps auxiliary, etc.)
Cooling tower fan rotation checked
Chiller motor connection (remote starters)
Heat recovery condenser water pump (as applicable)
Note: Do not make final remote starter-to-
compressor motor connections until
requested to do so by the Trane service
representative!
115 Vac power available for service tools
All controls installed and connected
All magnetic starters installed and connected