47
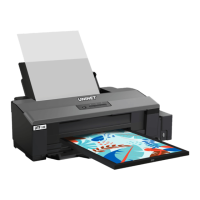
c. Fill & Stroke. Use this to change the line style of the cut. For the most part, you should
leave these settings at their defaults. If you are having trouble seeing your cut line, you
can change the color of it here.
d. Style. Here you can designate whether any object should be Print, Cut, or both. By
default, all images imported using the import icon will be set to Print. Also, all objects
drawn using the rectangle or circle tool will be set to Cut. However, this tab will allow
you to adjust this if necessary.
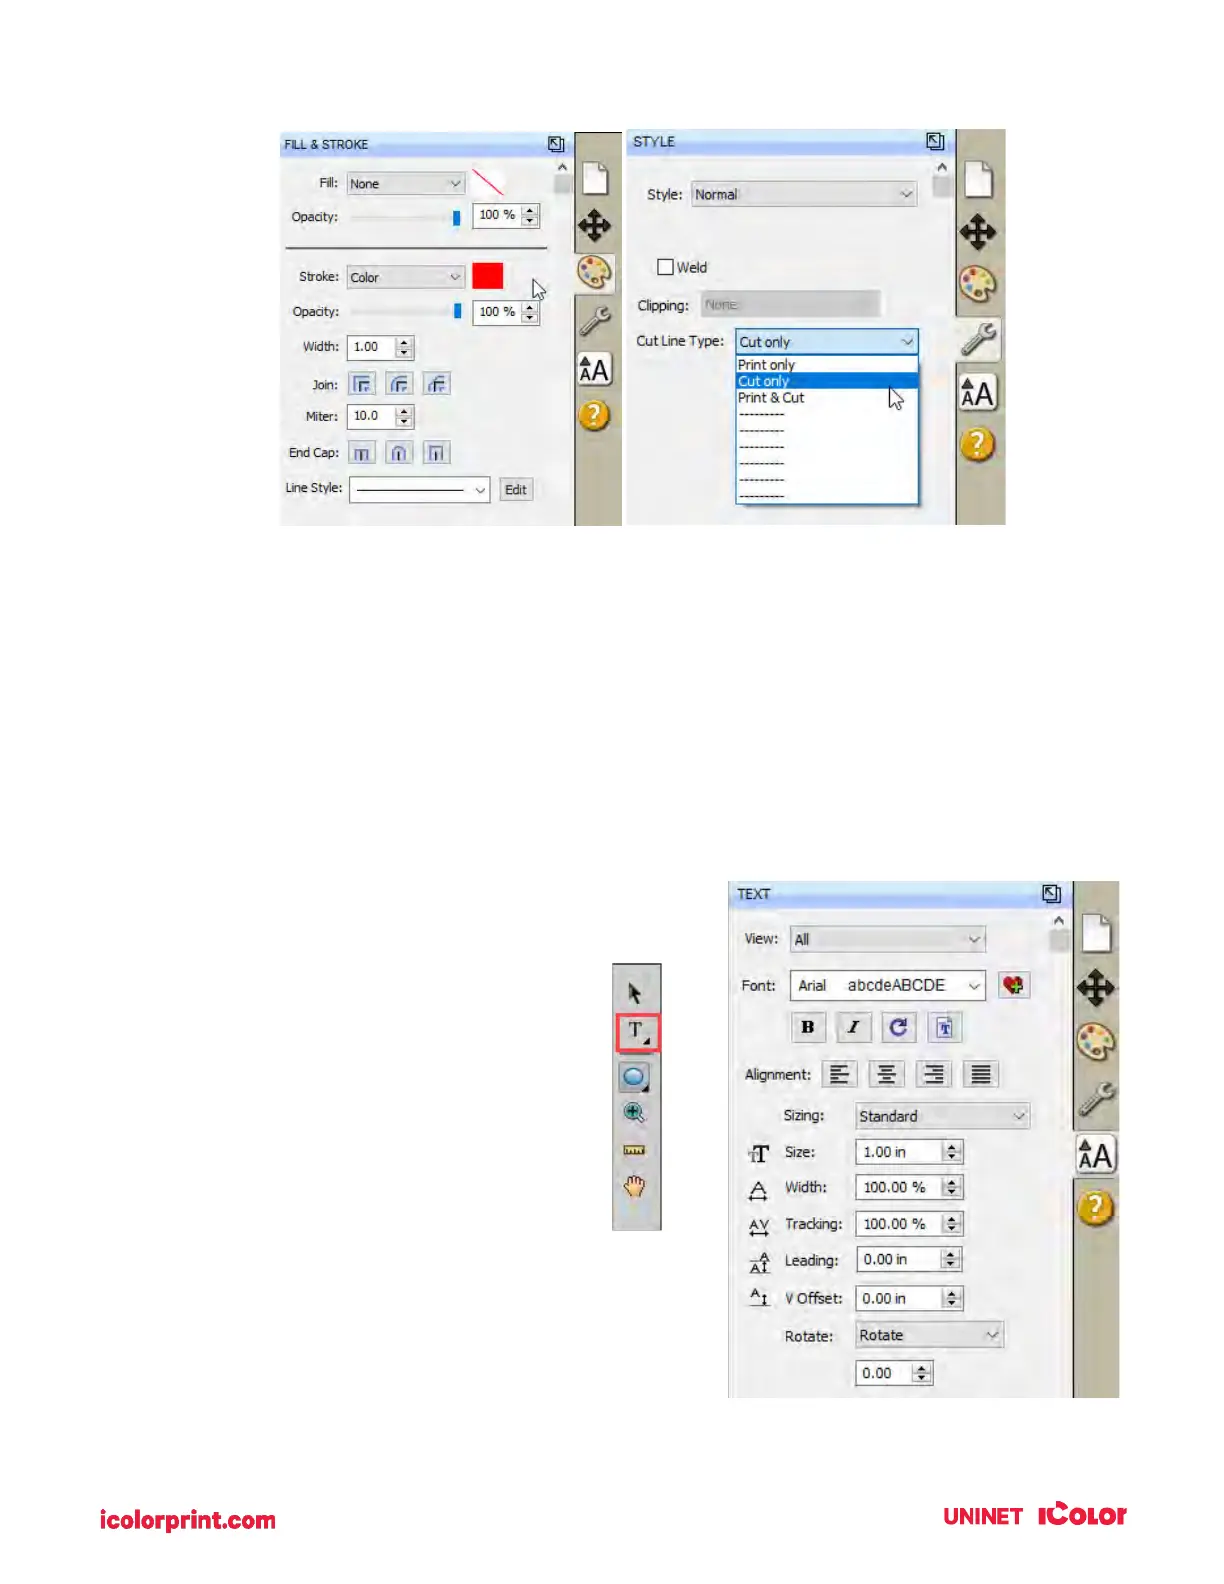
e. Text. The text tab allows you to adjust the font, size, and other properties of text.
Text can be added using the Text tool from the left side toolbar.
6. Library. The library contains some
preset shapes that you can apply to your
document as cut objects or print objects.
7. Page Layout. This area shows your
actual image. You can move objects here
by clicking and dragging. You can also
see where the cut will be made with your
print. In the example above the cut, the
line is highlighted red and inset (over
bled) slightly so there will unprinted area
on the label.
 Loading...