Installation
February 2011 2-52 P/N 06-237041-001
2-11 INSTALLING THE LARGE CAPACITY BATTERY CABINET
A separate Large Capacity Battery Cabinet, P/N 74-6000000-514, may be used to house up to two
12V, 40-AH sealed lead-acid batteries. The enclosure is designed to be surface-mounted using
hardware similar to that used to mount the Main and Expansion Enclosures.
Note: Wiring for the batteries to the PMU Board must be sized accordingly to prevent unacceptable
voltage drops.
The Large Capacity Battery Cabinet may be installed by performing these steps:
1. Prepare the battery cabinet by removing knockouts from the enclosure to enable the connection
between the conduit and enclosure. Consult approved electrical installation drawings for
connection information.
2. Remove the front door by first unlocking it and then rotating the door approximately 90 degrees
from its closed position.
3. Lift up the door to allow the door's hinge pins to clear the mating-hinge sockets on the enclosure.
4. Determine the desired wall location for the battery cabinet.
5. Mark and pre-drill holes for four mounting bolts using the dimensions shown in Figure 2-43. Be
certain to allow room for ventilation on both sides of the cabinet.
Note: The installer must supply the mounting bolts (up to size 1/4-20).
6. Insert the mounting screws into the top and bottom mounting holes and tighten securely.
7. Lastly, insert the batteries into the cabinet and replace the front door. Refer to Section 2-7.5,
Connecting Standby Batteries To PMU Board to make DC power connections.
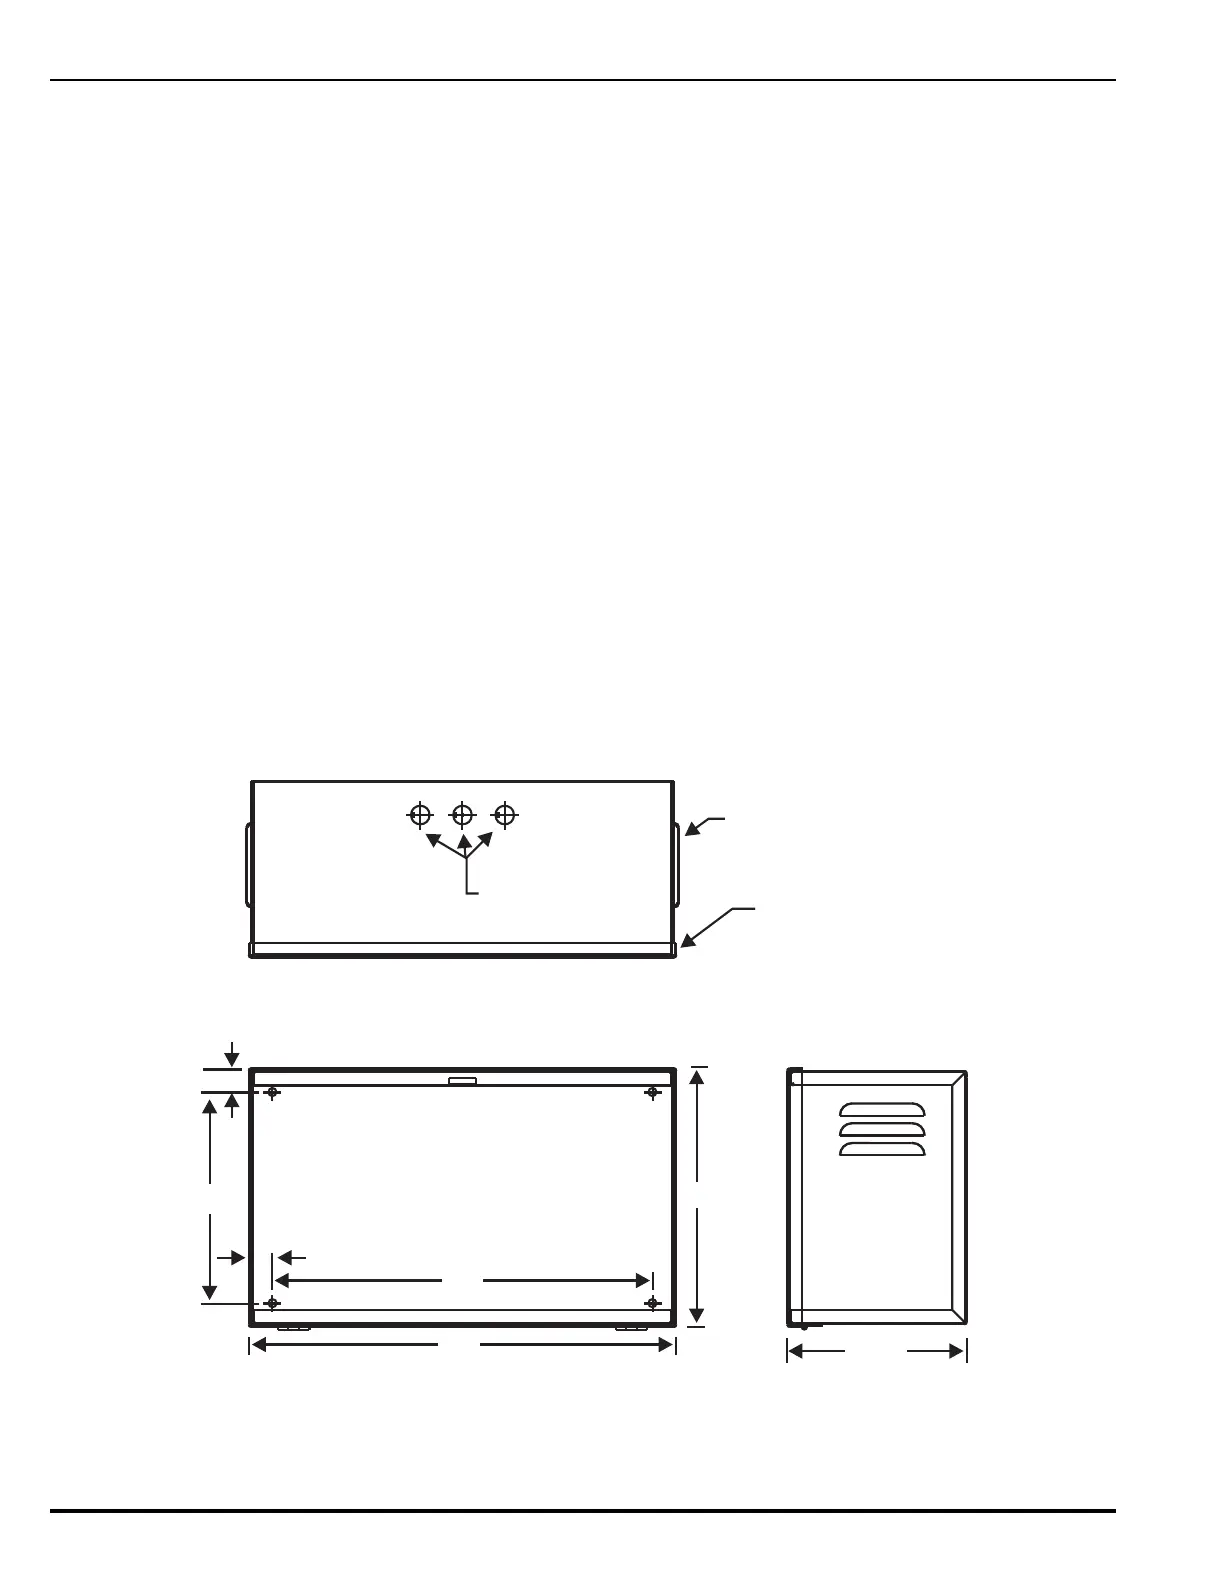
Figure 2-43. Mounting Dimensions for Large Capacity Battery Box
*****
KNOCKOUTS FOR
.50 CONDUIT
(3 PLACES)
VENT BOTH
SIDES
8.25“
18“
0.94“
20“
12“
10“
0.94“
DOOR
 Loading...