P/N 06-237041-001 xi February 2011
Figure Name Page Number
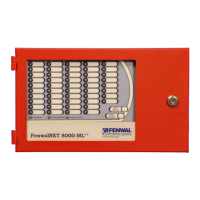
1-1 Full FenwalNET 8000-ML Fire Suppression System Application.............................................. 1-3
1-2 Cutout Showing PMU Audible Trouble Sounder Mounted on Inside of Enclosure .................... 1-5
1-3 Illustration of Typical 3-Tiered Main Enclosure Configurations................................................ 1-6
1-4 Illustration of Typical 2-Tiered Main Enclosure Configurations................................................ 1-7
1-5 Large Expansion Enclosure (a) and Small Expansion Enclosure (b)......................................... 1-7
1-6 Illustration of Remote Enclosure ............................................................................................. 1-8
1-7 Keypad/Display......................................................................................................................... 1-9
1-8 FenwalNET 8000-ML Main Controller Board Layout................................................................ 1-10
1-9 Power Supply/PMU Assembly Layout ....................................................................................... 1-12
1-10 Power Management Unit (PMU) Board...................................................................................... 1-13
1-11 Expansion Card Cage .............................................................................................................. 1-14
1-12 FenwalNET 8000-ML Expansion Backplane ............................................................................. 1-15
1-13 Remote LED Annunciator Module ............................................................................................ 1-19
1-14 Remote Display Control Module (RDCM).................................................................................. 1-20
2-1 Mounting Dimensions for 3-Tiered (a) and 2-Tiered (b) Main and Expansion Enclosures ........ 2-5
2-2 Rough Openings for 3-Tiered (a) and 2-Tiered (b) Main and Expansion Enclosures................. 2-6
2-3 Semi-Flush Mounting of 3-Tiered and 2-Tiered Main & Expansion Enclosures ........................ 2-7
2-4 Power Supply Unit.................................................................................................................... 2-8
2-5 Installing A Power Supply Unit into the Enclosure Top Tier .................................................... 2-9
2-6 Installing A PMU Board into the Enclosure Top Tier ................................................................ 2-10
2-7 Connecting Power Supply Wiring Harness to PMU Board ......................................................... 2-11
2-8 Power Supply Wiring Harness Connections .............................................................................. 2-11
2-9 Wiring Diagram for Power Management Unit (PMU) Board....................................................... 2-12
2-10 Cutout Showing Audible PMU Trouble Sounder Mounted on Inside of Enclosure .................... 2-13
2-11 Audible PMU Trouble Sounder Wiring Diagram ....................................................................... 2-14
2-12 AC Connections to PMU Board .............................................................................................. 2-16
2-13 AC Voltage Protection Cover ..................................................................................................... 2-16
2-14 Installing A Main Controller Board with Keypad/Display into the Enclosure Top Tier .............. 2-18
2-15 Wiring Diagram for Main Controller Board............................................................................... 2-19
2-16 Internal 24 Vdc Power Connections .......................................................................................... 2-20
2-17 Internal Communication Connections....................................................................................... 2-21
2-18 Installing the Expansion Card Cage ..........................................................................................2-23
2-19 Inserting an Expansion Card into Card Cage Slot ..................................................................... 2-24
2-20 Installing the Add-On Power Supply/PMU Assembly with Bracket ............................................ 2-25
2-21 Installing the Battery Tray into Bottom Tier ............................................................................. 2-26
2-22 Standby Battery Connections.................................................................................................... 2-27
2-23 Auxiliary Power Output Terminals............................................................................................2-29
2-24 Wiring Diagram for CLASS-A and CLASS-B Signaling Line Circuits ........................................ 2-31
2-25 Wiring Diagram for CLASS-A, Style 7 Signaling Line Circuit..................................................... 2-32
2-26 Measuring CLASS-B SLC Wiring Resistance ............................................................................. 2-33
2-27 Measuring CLASS-B SLC Wiring Capacitance........................................................................... 2-33
2-28 Measuring CLASS-A SLC Wiring Resistance ............................................................................. 2-34
2-29 Measuring CLASS-A SLC Wiring Capacitance........................................................................... 2-34
2-30 Wiring Diagram for Notification-Appliance Circuits .................................................................. 2-35
2-31 Wiring Length vs. Notification-Appliance Current ..................................................................... 2-36
2-32 Wiring Diagrams for Solenoid-Based Releasing Devices............................................................ 2-39
2-33 Wiring Diagrams for Initiator-Based Releasing Devices............................................................. 2-41
2-34 Relay Outputs Diagram............................................................................................................. 2-42
2-35 City Tie Wiring Diagram ........................................................................................................... 2-43
2-36 RS-232 Communications Ports.................................................................................................2-44
2-37 USB Communications Ports ..................................................................................................... 2-45
LIST OF FIGURES
 Loading...