Installation
P/N 06-237041-001 2-47 February 2011
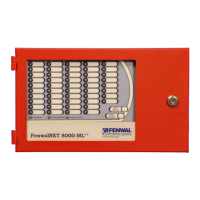
2-10.1 Installing the Remote Enclosure
The Remote Enclosure houses either the Remote Display Control Module or the Remote LED
Annunciator Module and mounts to the wall (surface or semi-flush mounting).
2-10.1.1 PREPARATION
Before you begin installation of the Remote Enclosure, prepare the enclosure by doing the following:
1. Remove knockouts from the enclosure to enable the connection between the conduit and the
enclosure. Consult approved electrical installation drawings for connection information.
2. Route properly-sized conduit from the enclosure to locations designated on the approved layout
drawings for peripheral devices.
3. Route the properly-sized and required wiring through conduit from the enclosure to the field
devices. Observe the wiring manufacturer’s recommended minimum bending radii for all
internal-control-unit and external wiring. Use appropriate equipment to check and record the
wiring for insulation resistance to earth ground. Measure and record the wiring resistance for all
external circuits.
4. Remove the keys from the envelope taped to the top of the Remote Enclosure.
5. Remove the Remote Enclosure door first by unlocking it and then lifting the door up to allow the
door’s hinges to clear the mating-hinge pins on the enclosure.
6. Remove the separately packaged installation hardware and documentation from inside the
enclosure. Set the door aside in a safe location to prevent damage.
7. Locate the top of the cabinet approximately 66 in. above the floor so that the display is positioned
at a convenient height for viewing system events and for entering operator commands.
2-10.1.2 SURFACE MOUNTING ON WALL
To surface mount the Remote Enclosure, do the following;
1. Mark and pre-drill holes for four mounting bolts using the dimensions shown. Two keyhole slots
(at the top) and two holes (at the bottom) are located in the enclosure’s rear panel that serve as
a template for surface mounting. (Refer to Figure 2-39.)
Note: The installer must supply the mounting bolts (up to size 1/4-20).
2. Insert the upper two fasteners in the wall. Leave approximately 1/4” of the screws protruding.
3. Slip upper keyholes of the enclosure over the protruding screws. Tighten the screws.
4. Insert and tighten the two lower screws.
5. Attach wiring conduit to the enclosure via the enclosure knockouts and pull the required number
of wires through the conduit to the enclosure. Leave approximately 2 to 3 feet of wire length in
the enclosure for field wiring connections.
6. With the enclosure secured to the wall, power and RS485 cables can be connected. Refer to the
wiring diagram shown in Figure 2-41.
 Loading...