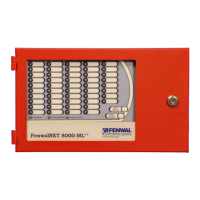
Installation
February 2011 2-2 P/N 06-237041-001
• Installation/Configuration Kit, P/N 74-800000-008, containing:
– User Disk, P/N 06-220289-001, that includes
– Installation, Operation, and Maintenance Manual, P/N 06-237041-001
– FenwalNET 8000-ML Configuration Software User’s Guide, P/N 06-237042-001
– Installer’s Wiring Diagram, P/N 06-237045-001
2-2.1.2 ADDITIONAL ITEMS
The additional items below are available separately from the standard control unit:
• Battery Tray, P/N 74-800030-006
• Large Capacity Battery Cabinet , P/N 74-600000-514
• Expansion Card Cage Assembly, P/N 74-800010-001
•Expansion Cards
• Standby Batteries
• Add-On Power Supply/PMU Assembly, P/N 74-800030-003
• Expansion Enclosures
• Remote Enclosure
•Dead Front Cover
2-2.2 Materials/Tools Required
The materials listed below are NOT supplied with the system, but may be needed for installation.
• The FenwalNET 8000-ML Configuration Software (may be downloaded at no cost from
the secure “Distributor Extranet” link on www.fenwalfire.com)
• 1/4” mounting bolts to mount the control unit cabinet (recommended)
• Electrical conduit for AC input power and field circuits
• Electrical junction boxes (as required)
• Wire-nuts and crimp-on terminals (as required)
• Basic electrician hand tools
• Wrist ground strap
2-2.3 Determining Wall Location
The control unit can be surface or semi-flush mounted. For either mounting configuration, locate the
top of the cabinet approximately 66 in. above the floor so that the control unit’s display is positioned
at a convenient height for viewing system events and for entering operator commands (or in
accordance with field wiring).
Choose a location in an area that allows easy access for operation and maintenance of the system. If
a location has been designated by an architect and/or fire-prevention authority, plan your installation
according to that location. It is important that the location of the system be clean, dry, vibration-free,
and maintained within the environmental limits.
2-2.4 Removing Knockouts From Enclosure
Remove knockouts as required for conduit connections. Consult approved electrical installation
drawings for connection information.
 Loading...