22 D292469I
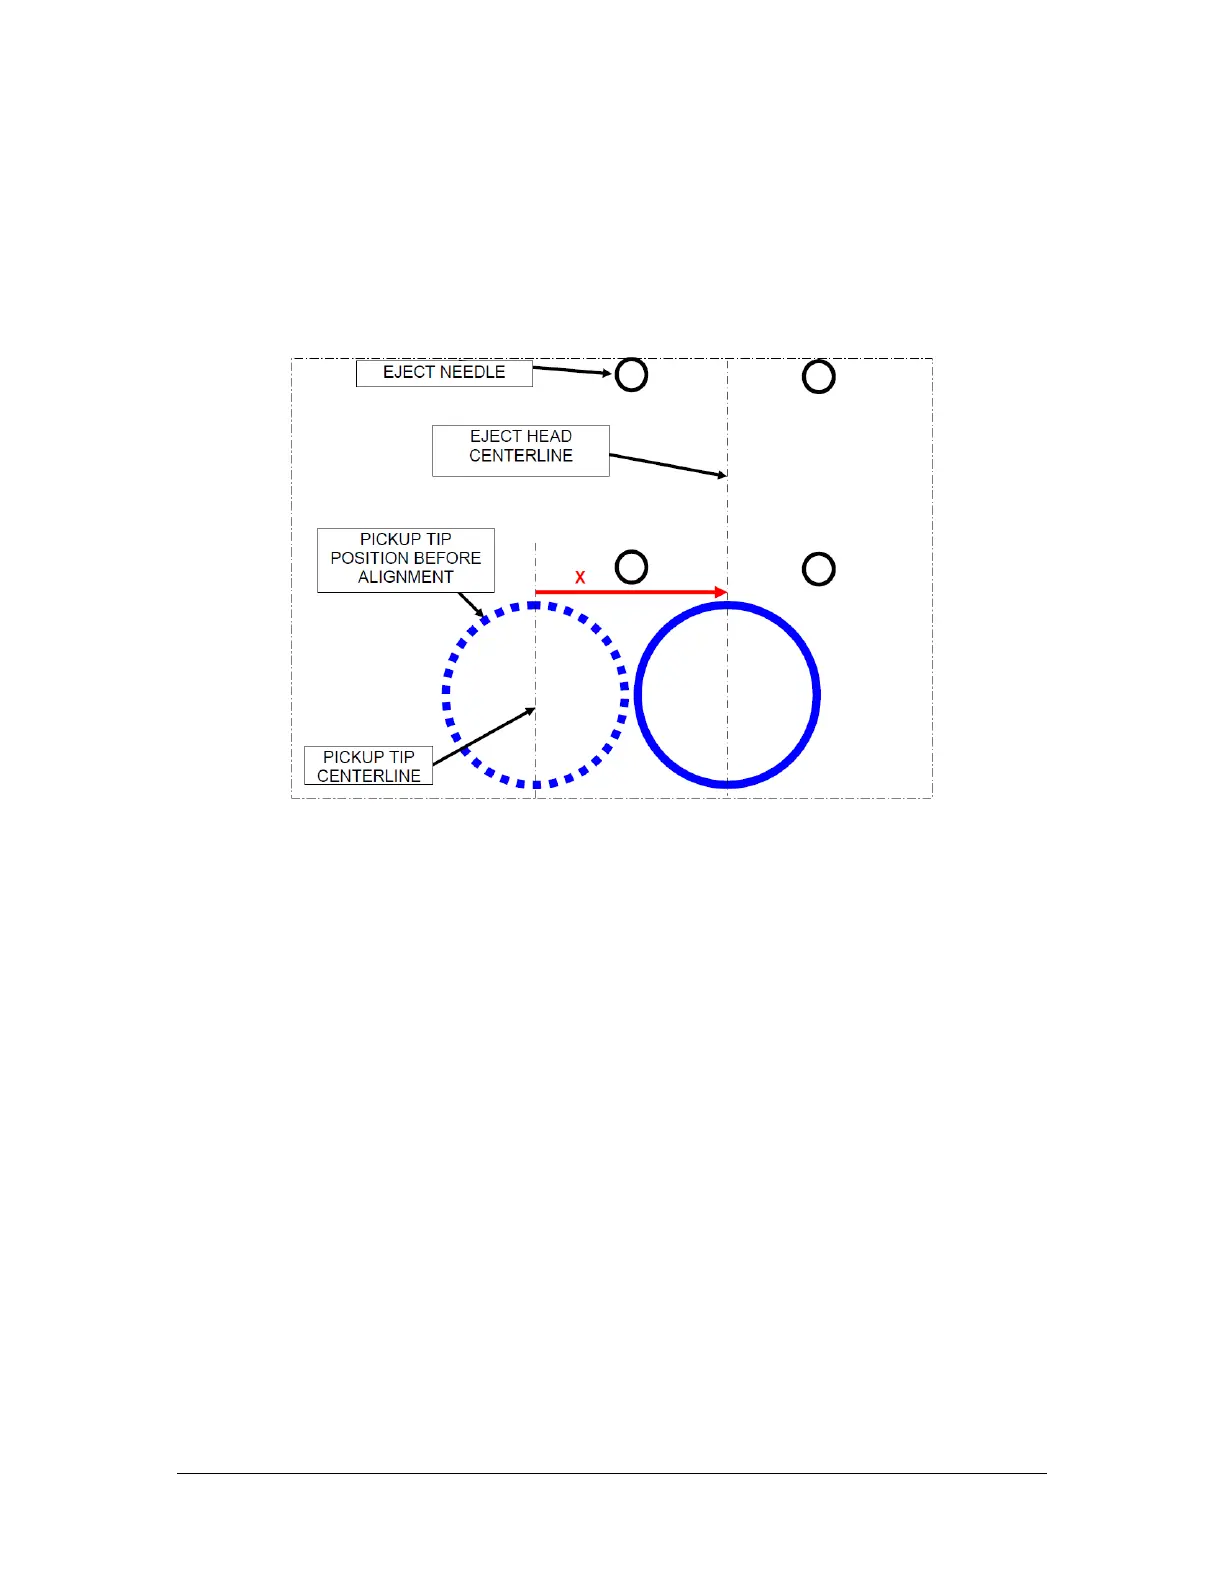
6. Press the ← or → keys to move the pick position left or right.
7. Press the NO key to terminate the cycle. The Arm will move to the right to the
Wait position. A circular mark from the Pickup Tip on the tape should be visible
at this time.
8. Repeat this step until the pickup tip X position is centered with the Eject Needle
positions.
9. Align the Eject Head [Y] position to the Pickup Tip.
a. Press the Eject Test key twice. Each needle should rise, penetrate the
tape and retract, leaving a mark. This mark needs to be aligned with the
center of the pickup tip.
If the needle does not leave a mark, raise the needle height by turning
the Stop Ring on the Eject Actuator counter clockwise. This is the large
ring just below the Eject Head.
NOTE: This ring has a nylon tipped Setscrew that should be snugged up to ensure it
does not vibrate out of adjustment.
If using motorized ejector (DES-AUM), the needle height can only be
adjusted during the eject step of a single step cycle. Press the foot pedal
to start a cycle and step through until the LCD reads Lift Eject Needles
XXXX. Press the +/- keys until the desired eject height is shown, then
step on the foot pedal again to raise the needles. Press NO to cancel the
cycle and lower the needles.
b. Adjust the Eject Head position in the “Y” direction by turning the Eject
Head Assembly Positioning Screw with a 7/64 Allen key. The screw is
 Loading...