4. Reattach the front cover and tighten the fixing screws for the cover.
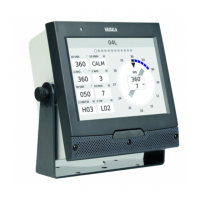
5. Remove the protective film before taking the display into use. See Figure 10 (page 26).
The display has now been mounted as a panel display.
4.8 Powering
After all the installation steps, connect the power source.
When the power supply is connected, the display is ready for operation. The device does
not have a power switch.
The display is protected from overvoltage and undervoltage.
When using the power supply, take the following into account:
• The power supply is intended for indoor use only. Make sure the selected power supply
is suitable for your operating needs.
• The negative side of the DC output is solidly connected to the protective earth (PE)
conductor of the supplying AC network.
During device power-up the red LED indicator behind the front cover blinks. When the
application starts, the LEDs turn o automatically.
As soon as the display is powered, the screen lights up and the display starts to collect,
process, and show data according to the preset configuration. If the software configuration
is not correct for your needs, edit the configuration.
More information
‣
Introduction to advanced settings (page 53)
4.9
Verification
Wait a while and when enough data has been collected, verify that data is visible in all data
fields, including the average data fields. Check that no alarms are displayed.
More information
‣
Possible problem situations (page 83)
4.10
Calibration
The touch screen has been calibrated to the position accuracy of less than 1 mm. If required,
you can recalibrate the touch screen.
More information
‣
Calibrating touch screen (page 48)
WID511 User Guide M211109EN-L
28