C
HAPTER
3. M
AINTENANCE
P
ROCEDURES
3-59
02.9628.0010 CONFIDENTIAL
7-Oct-97
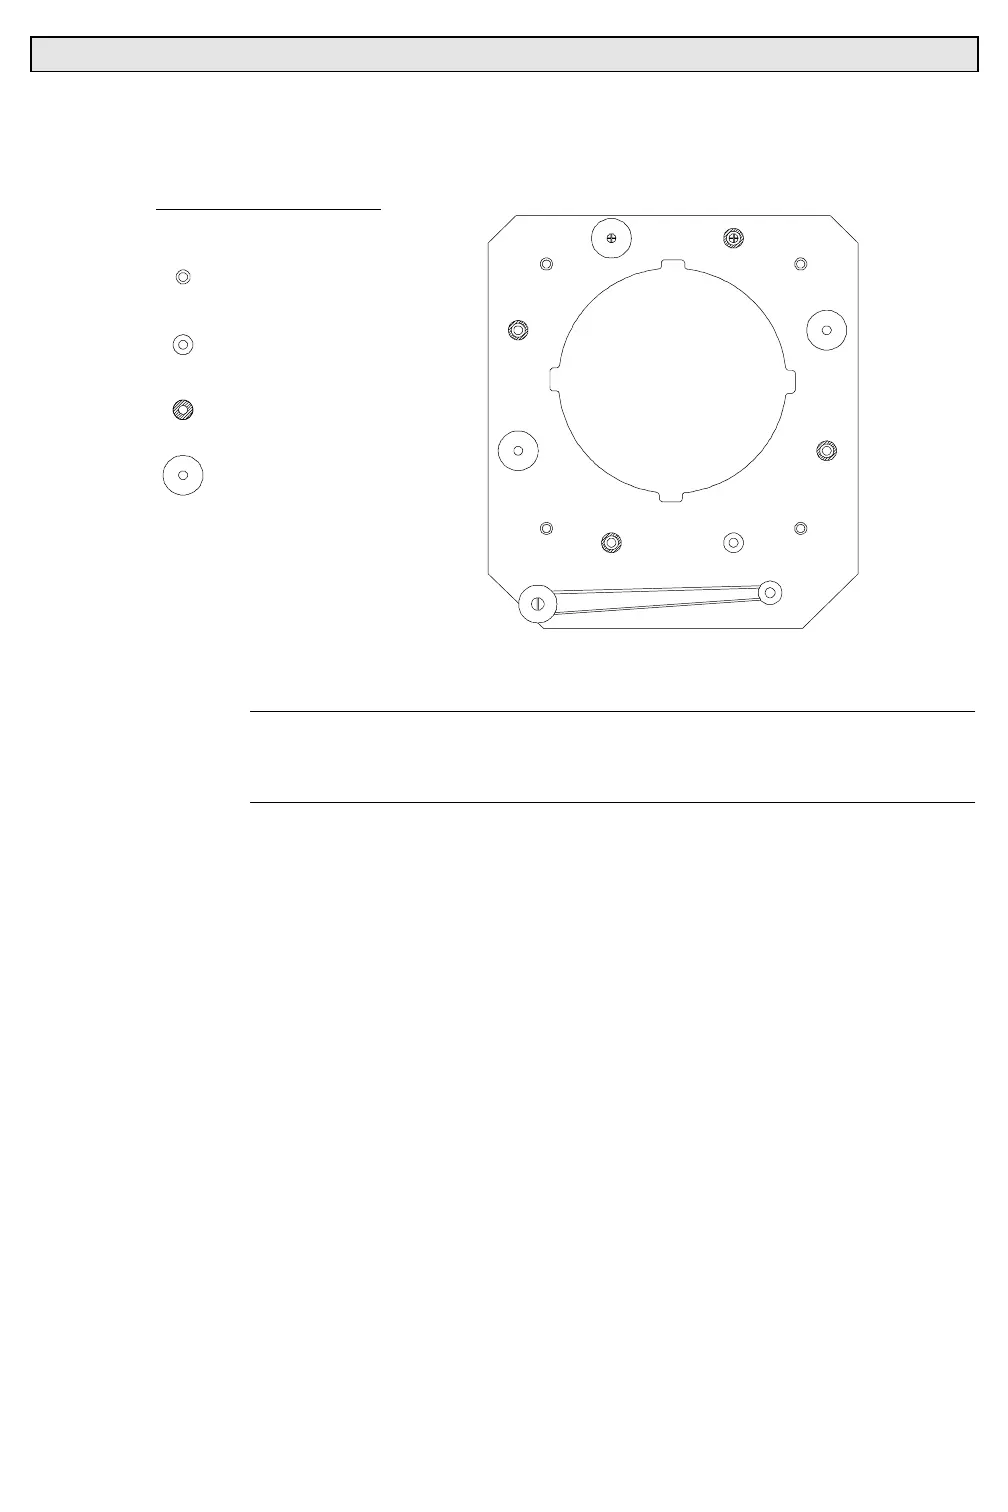
Step 8. Ensure remaining rollers and washers are still in place. Stage 4
should be as follows:
DISASSEMBLY STAGE 4
= ROLLER
= SMALL THIN WASHER
(10.9628.0101)
(10.9628.0106)
1
2
3
4
= LARGE THIN WASHER
(10.9628.0105)
5
7
6
8
= SMALL THICK WASHER
(10.9628.0109)
Step 9. Replace damaged iris leaves and nylon washers. Undamaged
leaves and washers can be reused during replacement.
Note
: Install a new belt or re-install the belt clamp in the same position on
old belt. Clamp ruins some of the belt’s teeth and will cause problems if
clamp is not re-installed in the same position.
Step 10. Re-assemble iris assembly by doing Steps 2 thru 7 in reverse.
a. Right-hand iris leaves are installed on standoffs 1, 2, 3, and
4 nub side up and in fully opened position.
b. Left-hand iris leaves are installed on standoffs 5, 6, 7, and 8
nub side down and in fully opened position. Nubs fit in
holes in actuator ring.