3-60
V
ARI
*L
ITE
®
-
VL4
W
ASH
L
UMINAIRE
S
ERVICE
M
ANUAL
CONFIDENTIAL 02.9628.0010
7-Oct-97
3.3.3.8 Dimmer/Filter/Douser Solenoid Assembly Removal
and Replacement
Parts
:
1 EA ASSY, VL4 SOLENOID (22.9628.0231)
Tools
:
Screwdriver, Phillips #1
Screwdriver, Phillips #2
Diagonal cutters
Nutdriver, 5/16 inch
Permanent ink marker
To remove and replace dimmer/filter/douser solenoid assembly:
Step 1. Remove power to luminaire.
Step 2. Remove dimmer/filter/douser assembly from luminaire head
(
Figure 3-7
).
Step 3. Remove douser tab plate.
a. At bulkhead cable anchors, remove cable tie securing wires
to cable anchors (
Figure 3-14
).
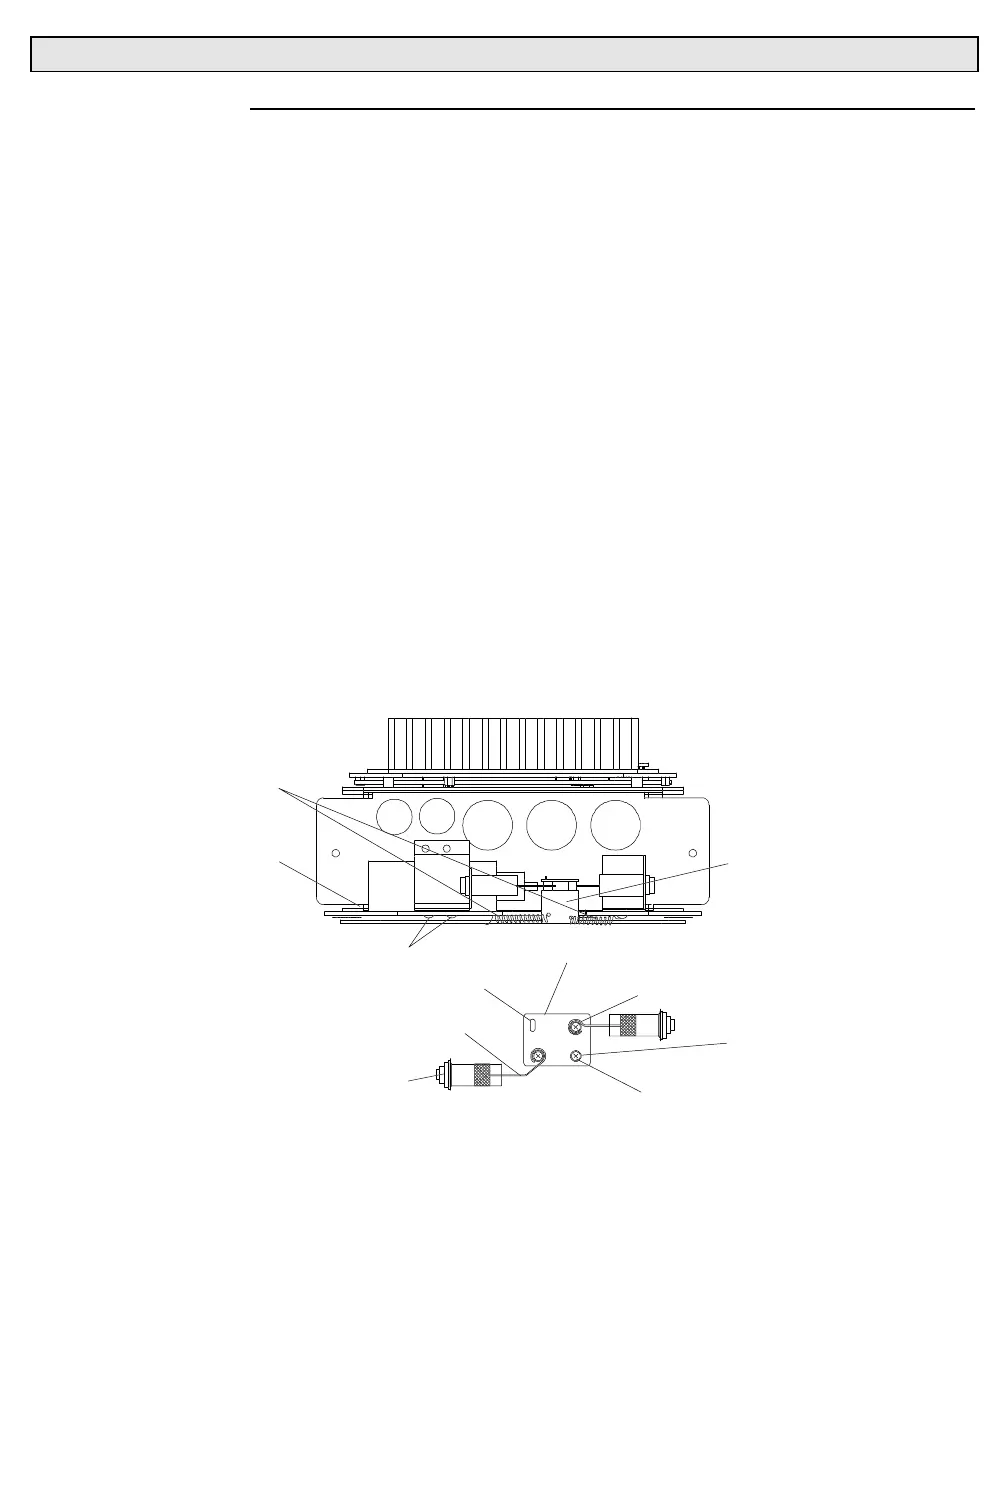
4-40X1/4"PPZ SCREWS
DOUSER RING TAB
SPRINGS
ROUTE SOLENOID
ASSEMBLY WIRES
IN SPACE
#4 LOCK WASHER
4-40X3/8"PPZ SCREW
DASHPOT EYELOT
DOUSER TAB PLATE
SLOT FOR SOLENOID PIN
DASHPOT
CONNECTING LINK
SOLREMV
Figure 3-14. Dimmer/Filter/Douser Solenoid Assembly Removal and Replacement
b. At douser tab plate, remove three 4-40x3/8"PPZ screws and
#4 internal tooth lockwashers that secure plate to douser
ring tab.
c. At dashpots, remove eyelets from standoffs on douser tab
plate and remove tab plate.