(4)Select the Preferred communication method: “Email”, “GPRS”;
(5)Click the OK button to send a remote hosting request.
⚫ Cancel remote service: Used to cancel the established hosting service.
Select Cancel Remote Service, click the OK button to send a command to cancel the current remote service.
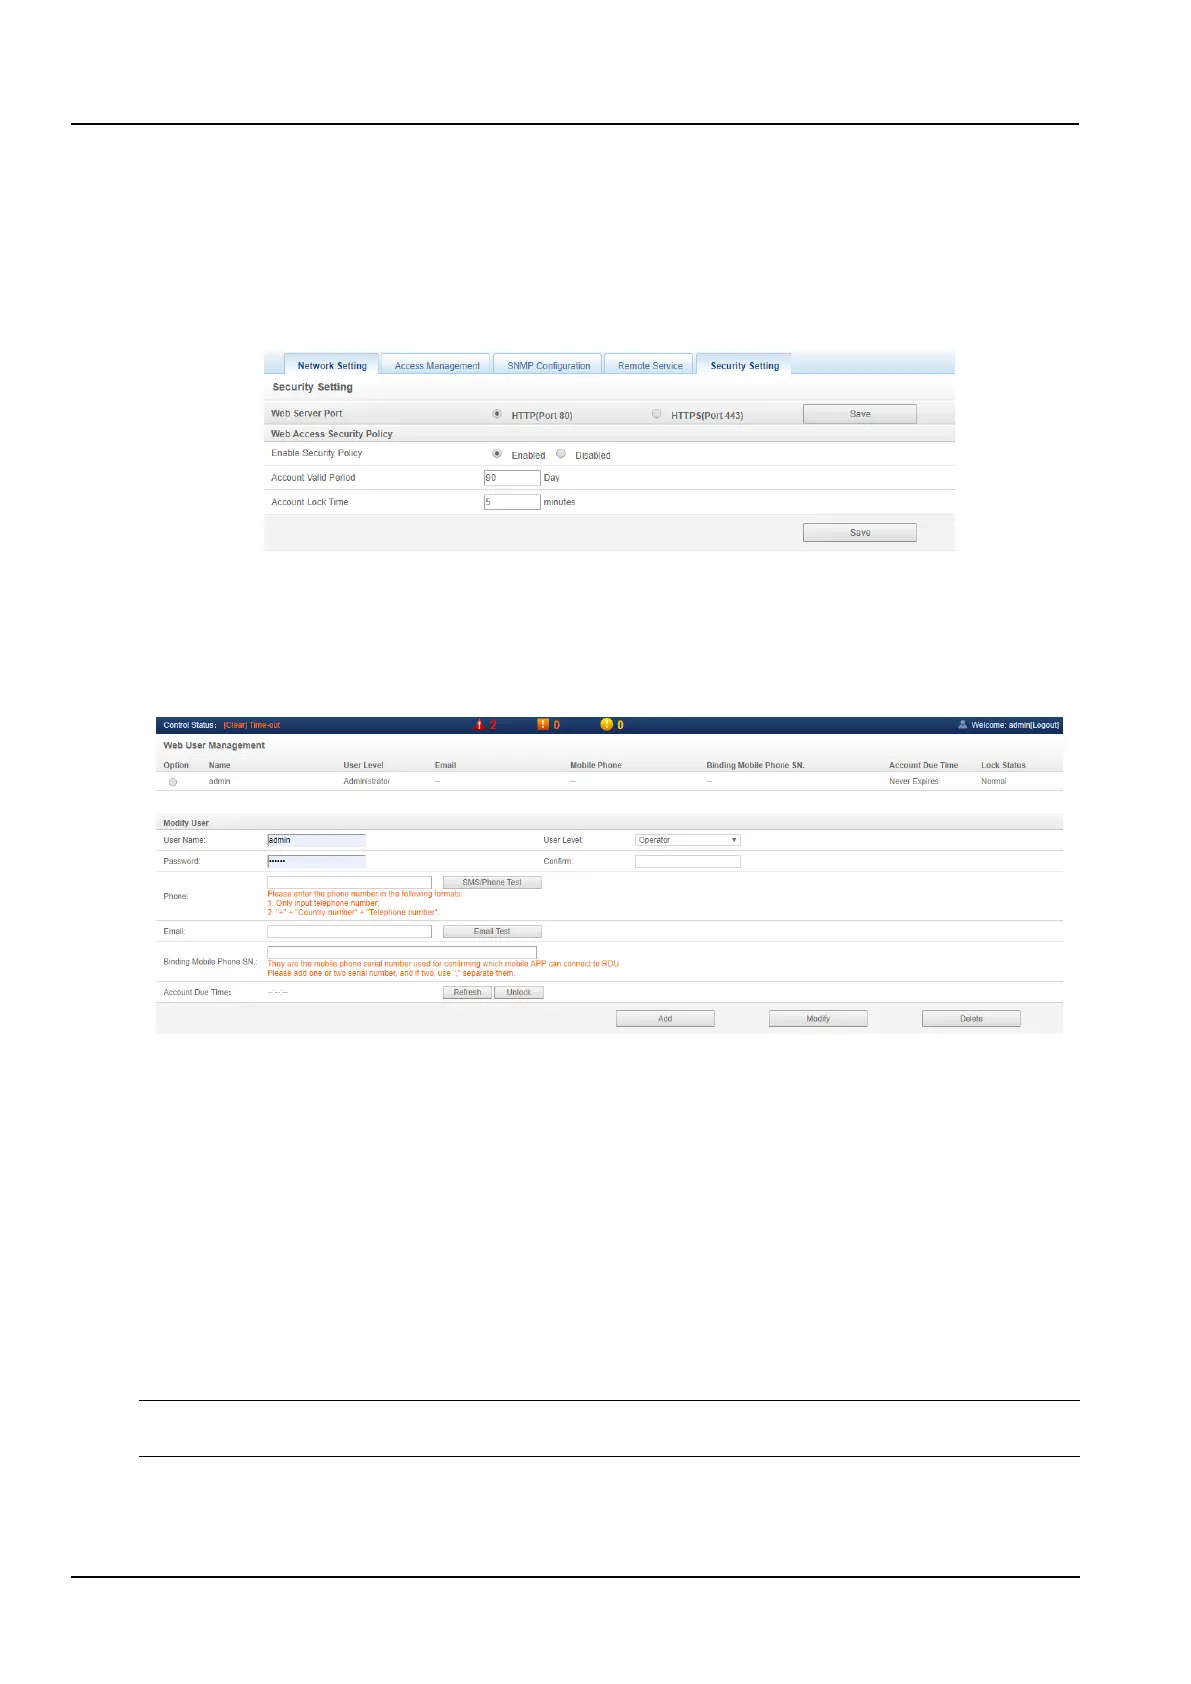
5) Security Settings
Click the Network Settings submenu under the System Options menu, then click the Security Settings button to
pop up the page as shown in the Figure 3-95.
Figure 3-95 Access control
Select the Web Server Port and Web access security policy, click the Save button to complete the configuration.
c) User Management
Click the User Management submenu under the System Options menu to pop up the page as shown in the Figure
3-96.
Figure 3-96 User Management
In the page shown in the Figure 3-96, the user can add users, modify users, and delete users.
⚫ Add users
(1)Enter the username in the text box of the User name;
(2)Select the user's level;
(3)Configure the user password, the password cannot be empty, and should be at least 6 letters or numbers;
(4)Re-enter the password in the Password text box;
(5)(Optional) Enter the user's phone number. The phone number can use the following numbers and characters:
0123456789, +;
(6)(Optional) Enter the email address;
(7)Click the Add button, the User Security Verification dialog box will pop up, enter the current user's login
password, and click the OK button to add a new user.
Notices
User names can only use English letters, numbers, and - and _, and the first character must be a letter or number.
⚫ Delete user
(1)Select the user to be deleted in the user list;