Vertiv | NetSure™ 8200 Series -48 VDC Power System Installation Manual (IM582140000) | Rev. A
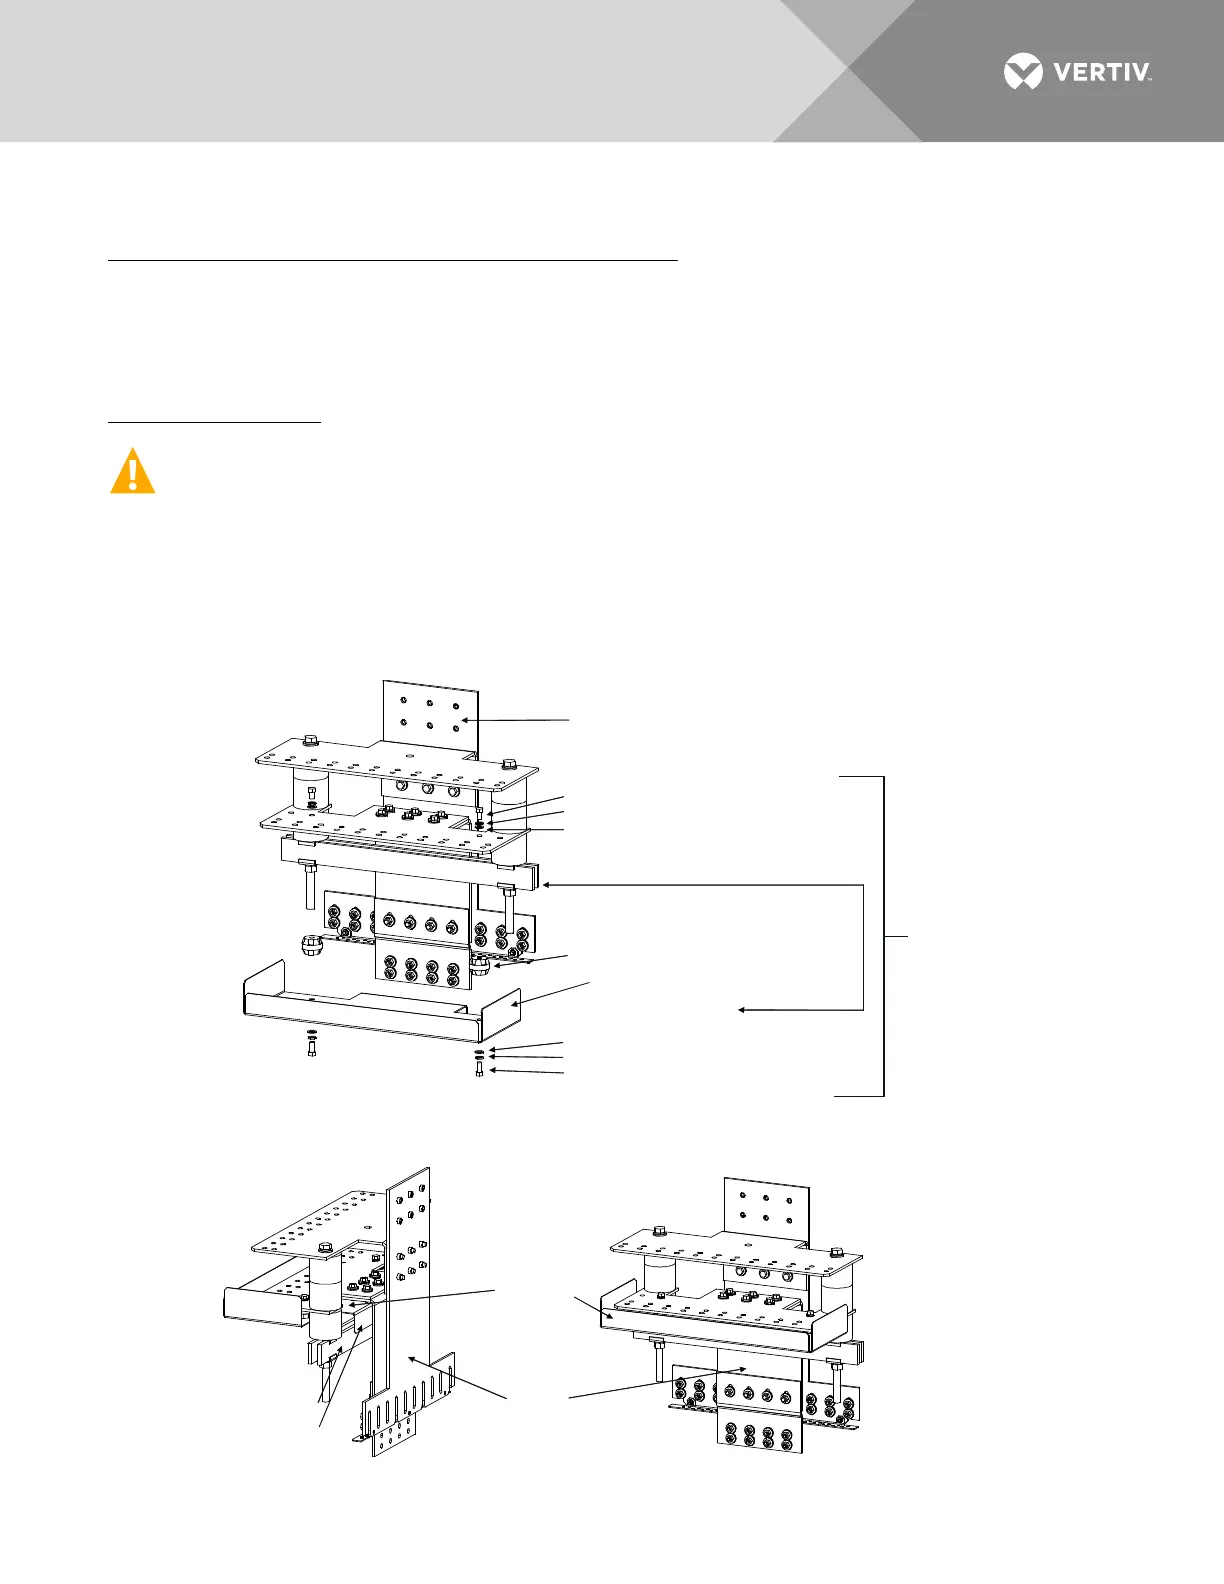
Installing Optional Power/Distribution Bay Busbar Shield Kit, P/N 528482 (if furnished)
Tools and Material Required to Install the Busbar Assembly
a) 9/16" Wrench (for 3/8" Hardware)
b) Torque Wrench
Installation Procedure
DANGER! Before performing this procedure, ensure that the power/distribution bay is COMPLETELY
DISCONNECTED from all power sources.
1. Assemble the "Busbar Shield Kit, P/N 528482" to each "External Top-Mount Horizontal Battery Input
Busbar Assembly, P/N 554873" as shown in Figure 31.
Figure 31:
Optional Power/Distribution Bay Busbar Shield Kit (P/N 528482)
P/N 554873
Busbar Assembly
Torque to 143 in-lbs.
3/8-16 x 5/8" Bolt, P/N 227646500 (one per side)
3/8" Lock Washer, P/N 215111300 (one per side)
3/8" Flat Washer, P/N 214112100 (one per side)
(support bar)
Insulator, P/N 245857100 (one per side)
Busbar Shield, P/N 528481
Note: Place Flap on Shield over Support Bar
(see assembled views)
3/8" Flat Washer, P/N 214112100 (one per side)
3/8" Lock Washer, P/N 215111300 (one per side)
3/8-16 x 7/8" Bolt, P/N 227646700 (one per side)
Torque to 143 in-lbs.
P/N 528482
Busbar
Shield
Kit
Assembled
Views
P/N 528482
Shield Kit
P/N 554873
Busbar
Assembly
Support Bar
Shield Lip

 Loading...


