Vertiv | NetSure™ 8200 Series -48 VDC Power System Installation Manual (IM582140000) | Rev. A
Switch Settings on SM-DUE
The SM-DUE installed in each secondary power/distribution bay and secondary power only bay contains DIP
switch SW1. Dip switch SW1 on the SM-DUE is used for parameter settings.
Procedure
1. Set DIP switch SW1 on each SM-DUE per site requirements. Refer to Figure 76 for SM-DUE and switch
SW1 location. Refer to Table 2 for switch settings.
NOTE!
Set each SM-DUE to a different communications address.
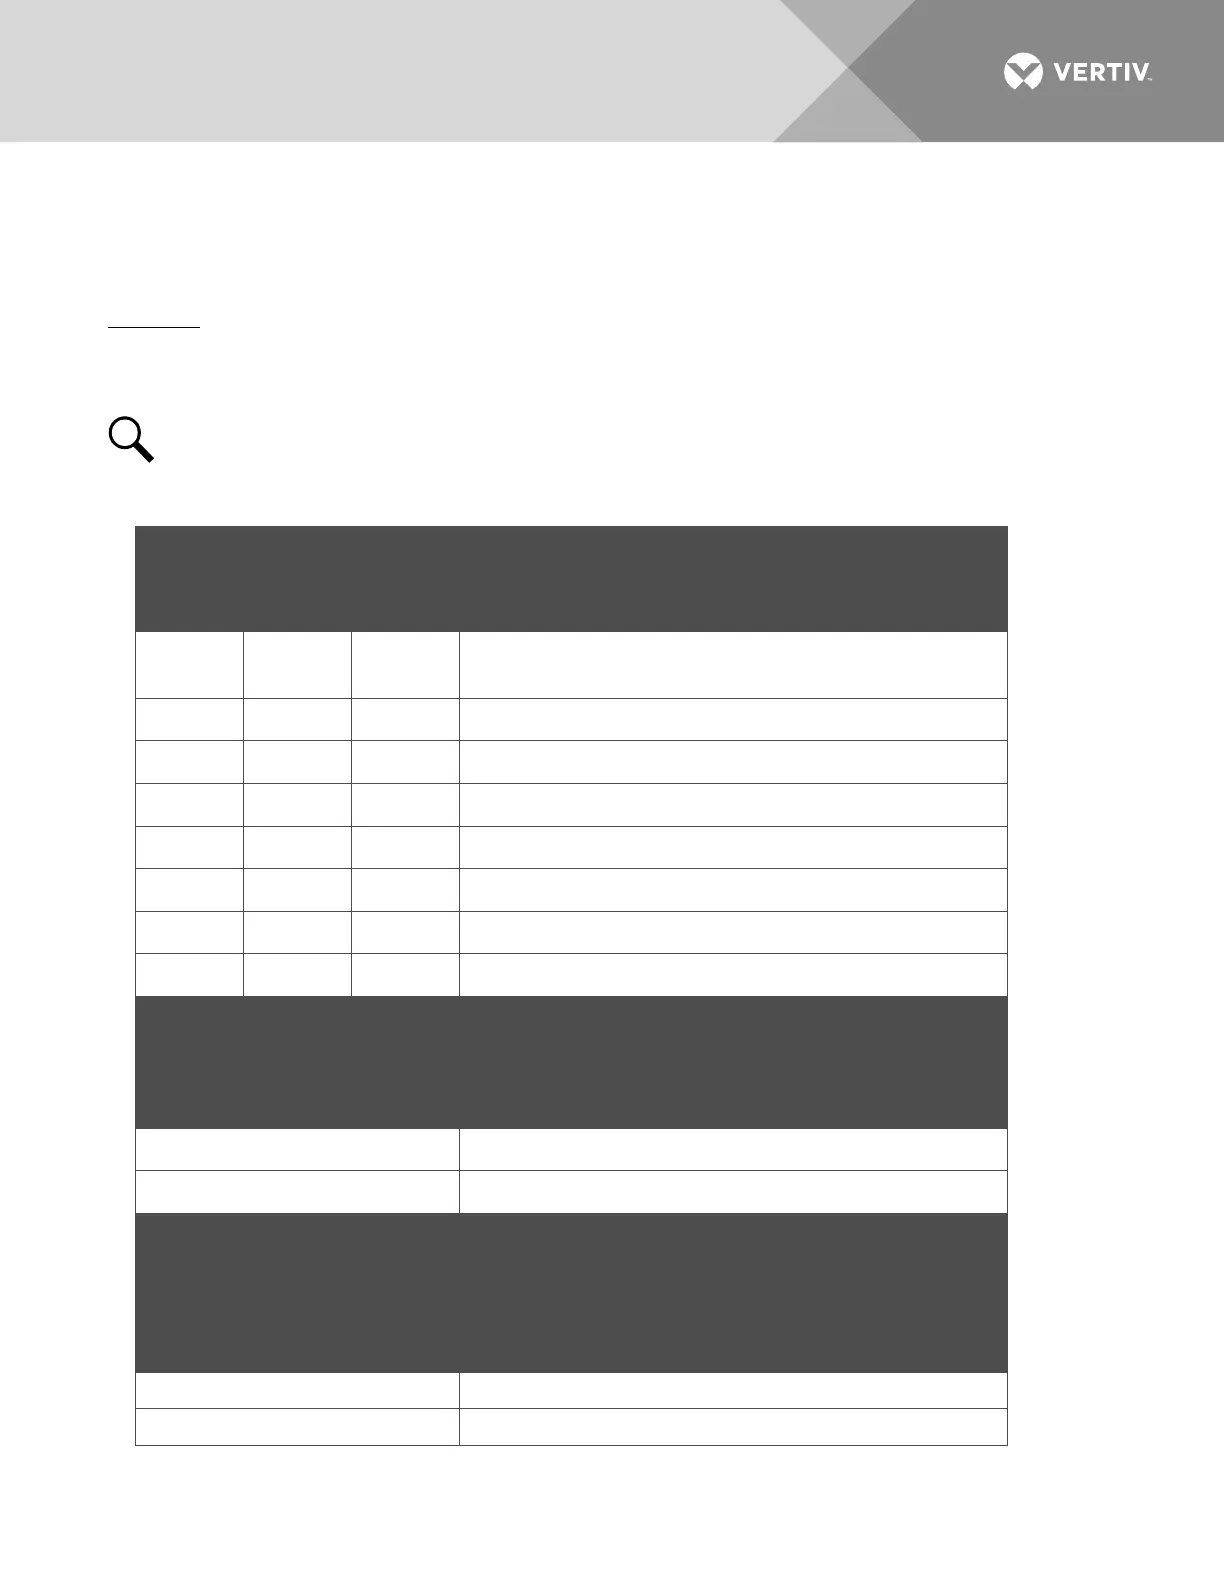
Table 2:
SM-DUE Switch Settings (cont’d on next page)
Communication Address
(Use Switch 1, 2, and 3 of SW1)
Function Descriptions
Off Off Off
SM-DUE #1
(Default Setting)
Off On Off
Off On On SM-DUE #4
On On Off
SM-DUE #7
Baud Rate for Serial Port
Communication
Function Descriptions
On
Parameter of Shunt Setting
Configured by Hardware or
Software
Function Descriptions
Shunt parameter is set through software. (Default Setting)
Shunt parameter is set through DIP switch.

 Loading...


