Vertiv | NetSure™ 8200 Series -48 VDC Power System Installation Manual (IM582140000) | Rev. A
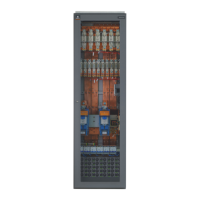
Placing and Securing List 116, 117, 118, and 122 Distribution Only Bays
• Refer to Figure 1 through Figure 18 as this procedure is performed. Figure 3 provides a hole drilling
pattern.
• Bays are typically placed next to each other and bolted together. Refer to “General Requirements” on
page 14, for bay line-up recommendations.
Procedure:
Preparing the Bays
1. Remove the two rear cover panels from each distribution only bay. These cover panels will be re-
installed after all mounting and electrical connection procedures have been completed. To do so:
Remove the screws securing the panel, and remove the panel.
2. Remove the two side cover panels from each distribution only bay, if equipped. Note that you may leave
the side cover panels on the "outside side" of the two end bays. To do so: Remove the screws and
ground washers securing the panel, and remove the panel.
Placing and Securing the Bay(s)
1. Prepare the “1st Distribution Only Bay’s” interconnect busbars.
NOTE! Apply electrical anti-oxidation compound to mating surfaces of busbars before connecting
together.
2. Place bay(s) in position. Note that clearance holes for 1/4” bolts are provided in the side rails of each
bay. These holes are for bolting the bays together.
3. Level bay(s) as required, using leveling feet in base plate. Adjust leveling feet so that all bays are even
at top, and bolt holes in the side of each bay line up with holes in the adjacent bay(s).
4. Secure the “1st Distribution Only Bay’s” interconnect busbars to the adjacent power/distribution bay’s
busbars (hand-tighten connections only).
5. Install and secure “2nd and Beyond Distribution Only Bays’” interconnect busbars (hand-tighten
connections only).
6. Bolt all bays together. Use 1/4” hardware, six places per pair of bays. Use a ground washer in two
locations with the 1/4" hardware bolting two bays together.
NOTE! A ground washer is an internal-external tooth, dish-type lock washer. When installing ground
washers, ensure that the ground washer is oriented so that the teeth dig into the paint on the metal part
the ground washer is secured to (concave side faces the metal part).
7. Install shims between bottom of each bay and the floor as required to distribute floor loading.
8. Secure bay(s) to floor using fastening hardware per site requirements.
9. Torque the bolts securing the “1st Distribution Only Bay’s” interconnect busbars to the adjacent
power/distribution bay’s busbars. Refer to the following illustrations for torque values.
10. Torque the bolts securing the “2nd and Beyond Distribution Only Bays’” interconnect busbars. Refer to
the following illustrations for torque values.

 Loading...


