Maintenance LTC Repair
wc_tx000427gb.fm 44
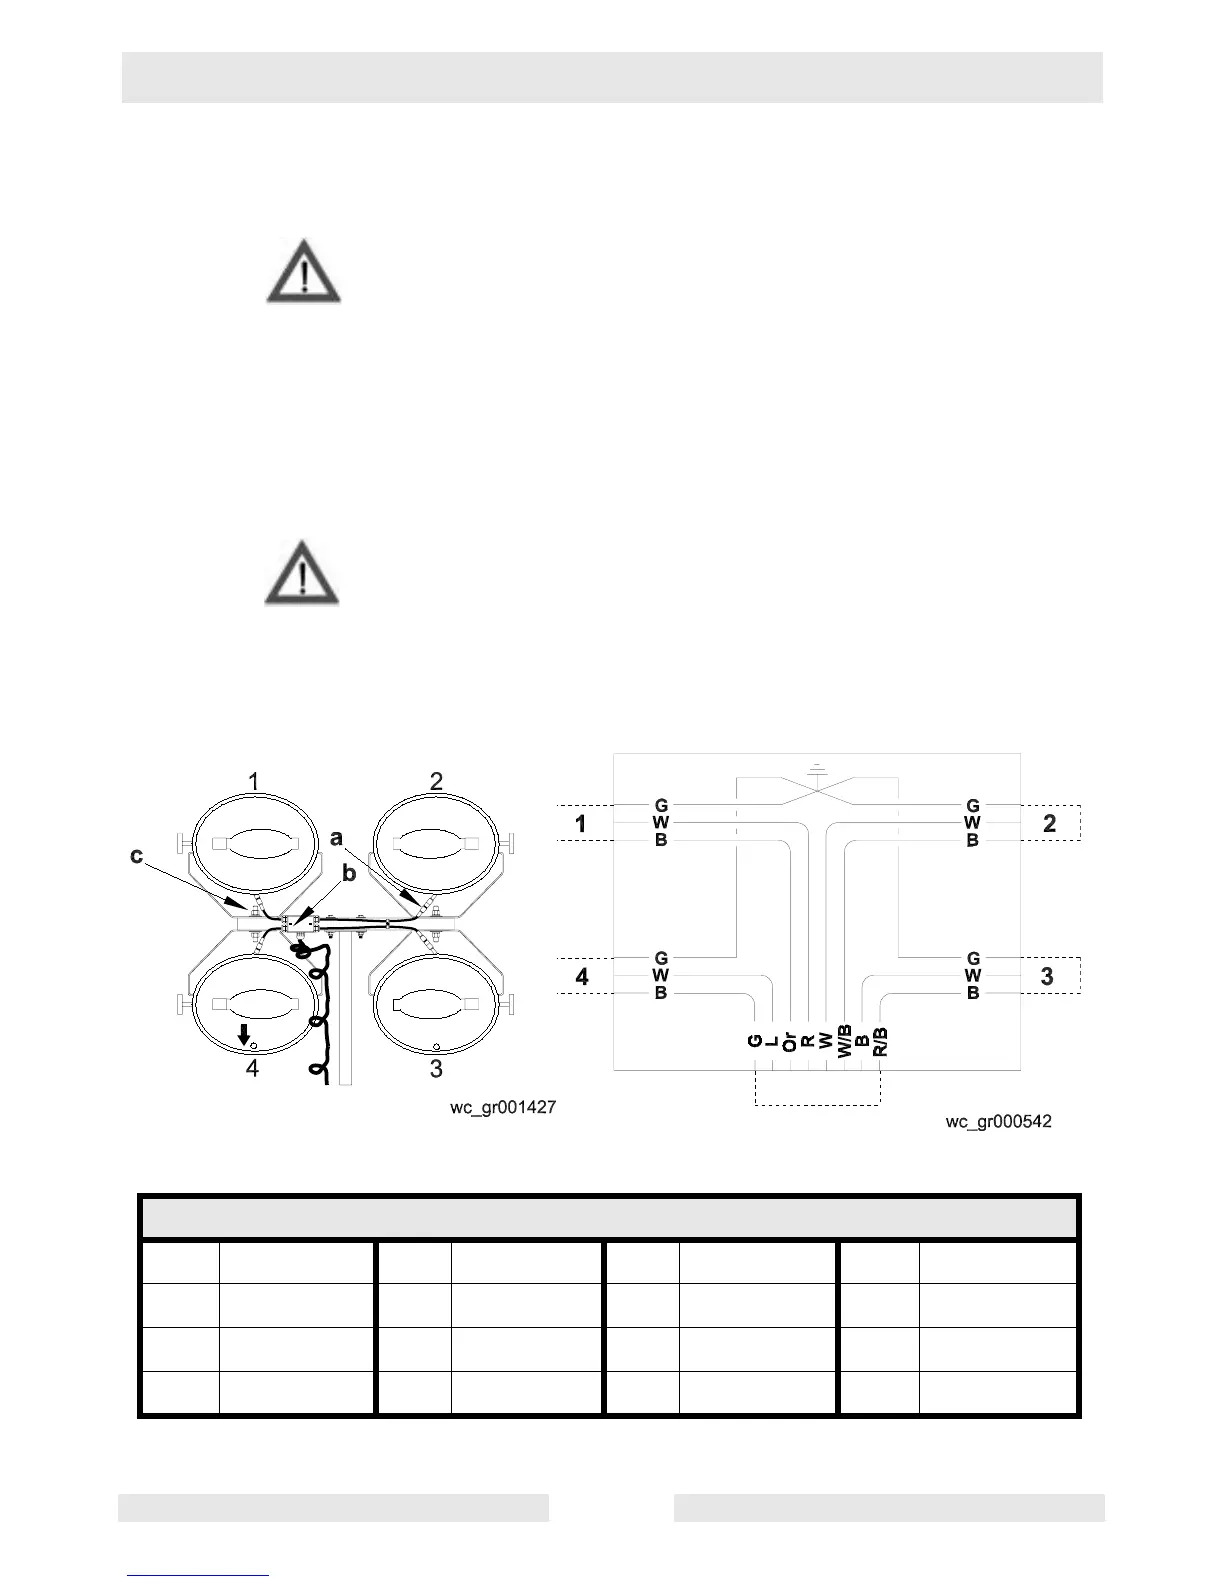
4.4 Installing / Removing Light Fixtures
See Graphic: wc_gr001427, wc_gr000542
ALWAYS turn off the light circuit breakers and shut down the engine
before disconnecting the light fixtures or changing the light bulbs.
Remove the light fixtures by disconnecting the electrical cords using
the quick disconnects (a). Remove the nuts (b) from the fixture
mounting brackets and remove both fixture and bracket from the stud.
CAUTION: Only a trained technician should be allowed to install and
remove the fixture wiring.
Note: When reinstalling the light fixtures, make sure the drain hole is
pointing down.
Bulbs become extremely hot in use! Allow the bulb and fixture to
cool 10-15 minutes before handling.
Numbering Sequence of Floodlights Connection Box Wiring for Floodlights
Wire Colors
B Black R Red Y Yellow Or Orange
G Green T Tan Br Brown Pr Purple
L Blue V Violet Cl Clear Sh Shield
P Pink W White Gr Gray LL Light blue
WARNIN