Electrical Troubleshooting Procedures LTC Repair
wc_tx000429gb.fm 128
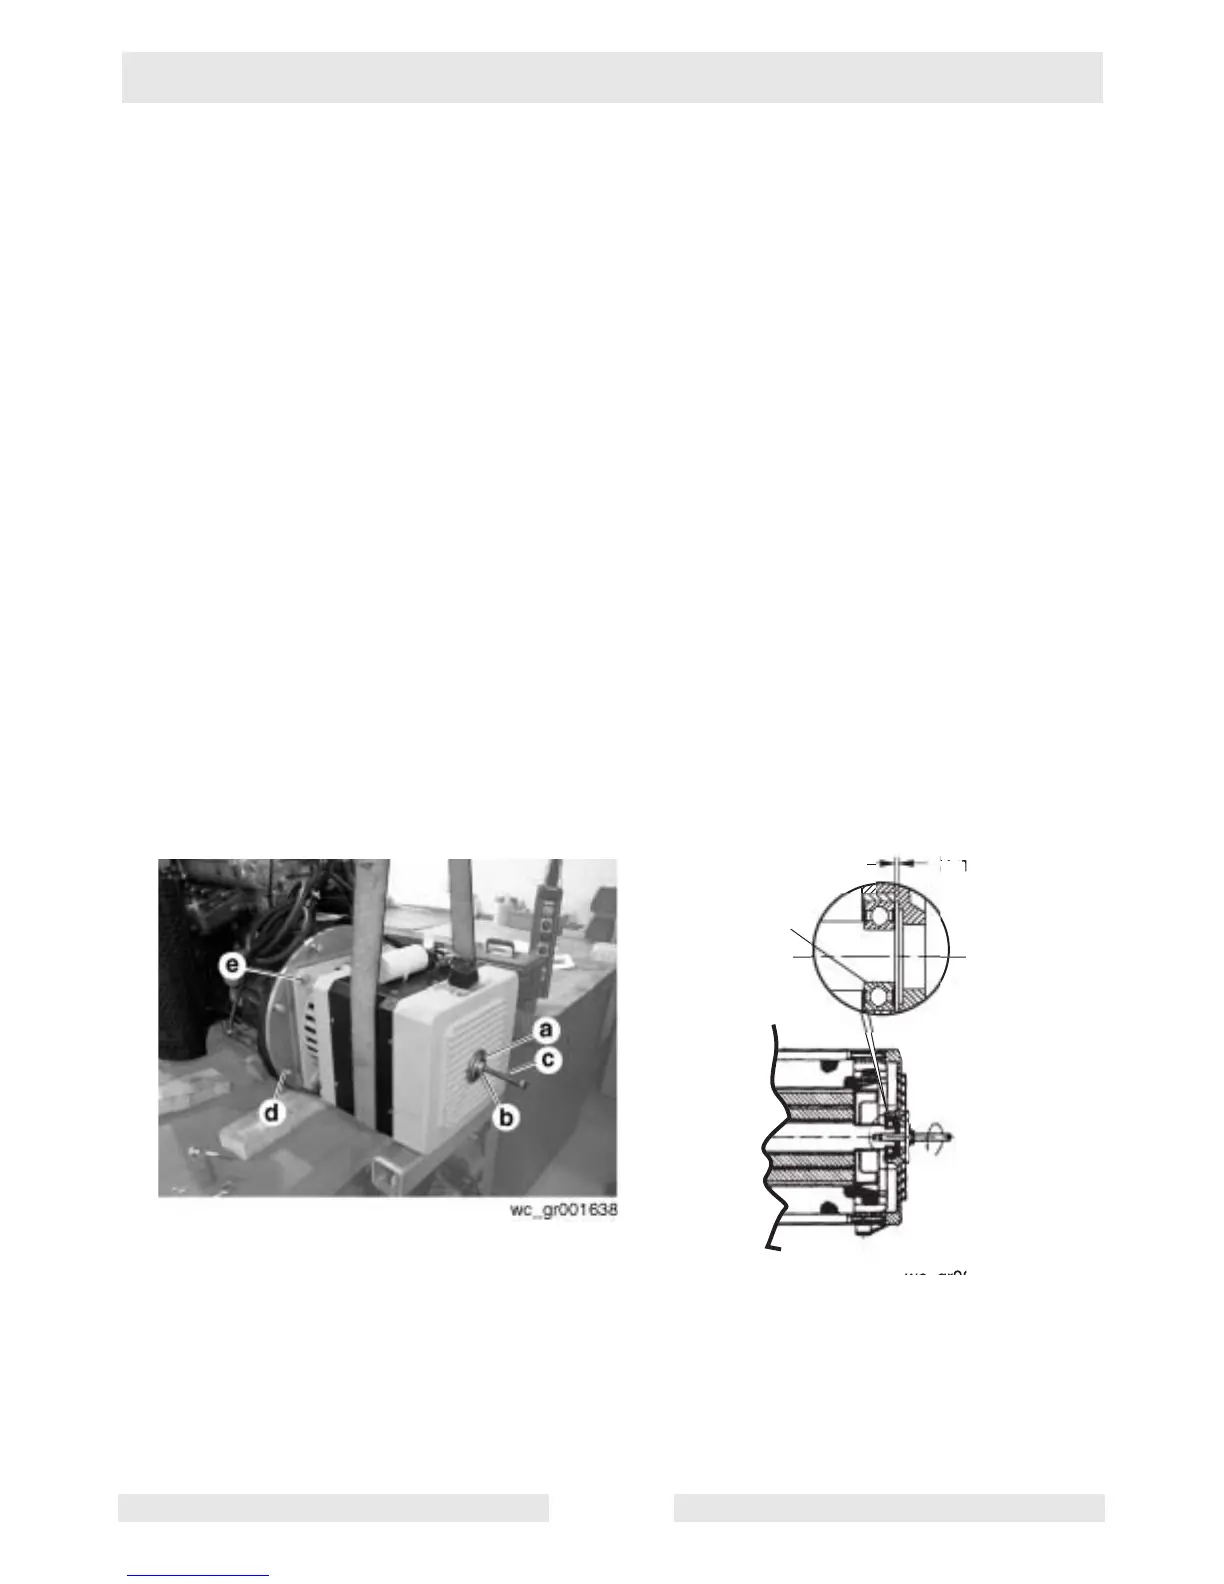
7.32 Remounting Stator Assembly to Rotor/Engine Assembly
See Graphic: wc_gr001638 and wc_gr001642
Note: The fit between the rotor bearing and the stator housing is tight.
The tight fit prevents the bearing from spinning in the housing.
7.32.1 While supporting the stator assembly with an appropriate strap and
hoist, slide the stator assembly over the rotor/engine assembly.
7.32.2 Assemble an M10 nut (a) and washer (b) to an M10x80 bolt (c).
7.32.3 Thread the bolt into the rotor through the hole in the stator housing.
7.32.4 Thread the nut against the stator housing and slowly tighten the nut to
push the stator housing onto the rotor and bearing assembly (f).
Continue until engine adapter flange comes into contact with engine.
Do not overtighten.
7.32.5 Secure the engine adapter flange to the engine with M8 bolts (d).
Torque the bolts to 25 ft.lbs. (35 Nm).
Note: Failure to install the stator in the above manner may result in a
cocked rotor bearing which can result in premature bearing wear or
engine bearing wear. If there is any doubt that the bearing is seated
correctly, place a block of wood over the end of the stator housing and
strike it firmly with a hammer; this will release the bearing.