68 Maintenance Procedures
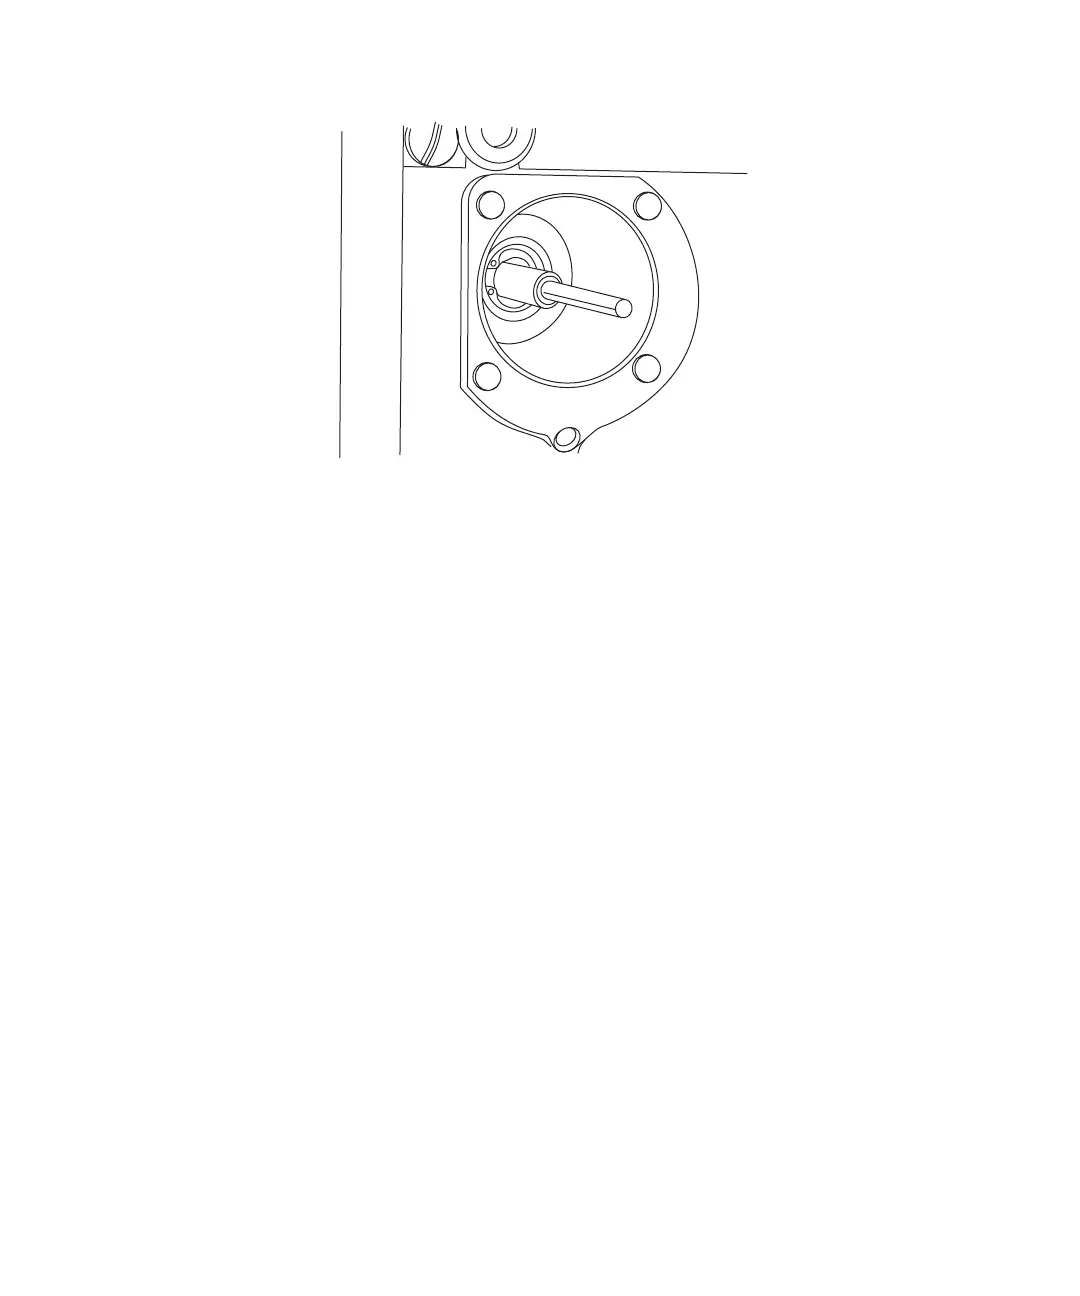
Figure 4-9 Plunger Disassembly
Cleaning the Plunger
7. Inspect the plunger for damage, excessive wear, or mobile-phase debris. (You may
see lateral or rotational scratches and solvent residue.) If the plunger seal has
excessive wear:
• Clean the plunger with a fine pumice to remove any coating.
• Clean the plunger thoroughly to remove all traces of abrasive.
If necessary, replace the pump plunger seals (see Section 4.2.4, Replacing the
Plunger Seal). If this does not extend seal life, replace the plunger.
Installing the Plunger
1. Reassemble the components on the new plunger and insert it into the cavity.
2. Set the flow to 0.3 mL/min to retract the plunger, then shut off the pump.
3. Replace the plunger support assembly with the indicator rod in the upper right
corner of the assembly.
4. Alternately tighten the four screws. Do not overtighten. The support assembly need
only be flush against the front panel.
5. Gently slide the pump head onto the plunger and alternately tighten the two screws
(see Figure 4-5).
6. Turn on the pump and set flow rate to 0.3 mL/min. Pull and release the indicator
rod. If it does not snap back, the pump head is misaligned. Stop the flow. Remove
and rotate the head 1/2-turn for correct alignment.