Chapter 8: Setting Up and Downloading Sensor Data
•
89
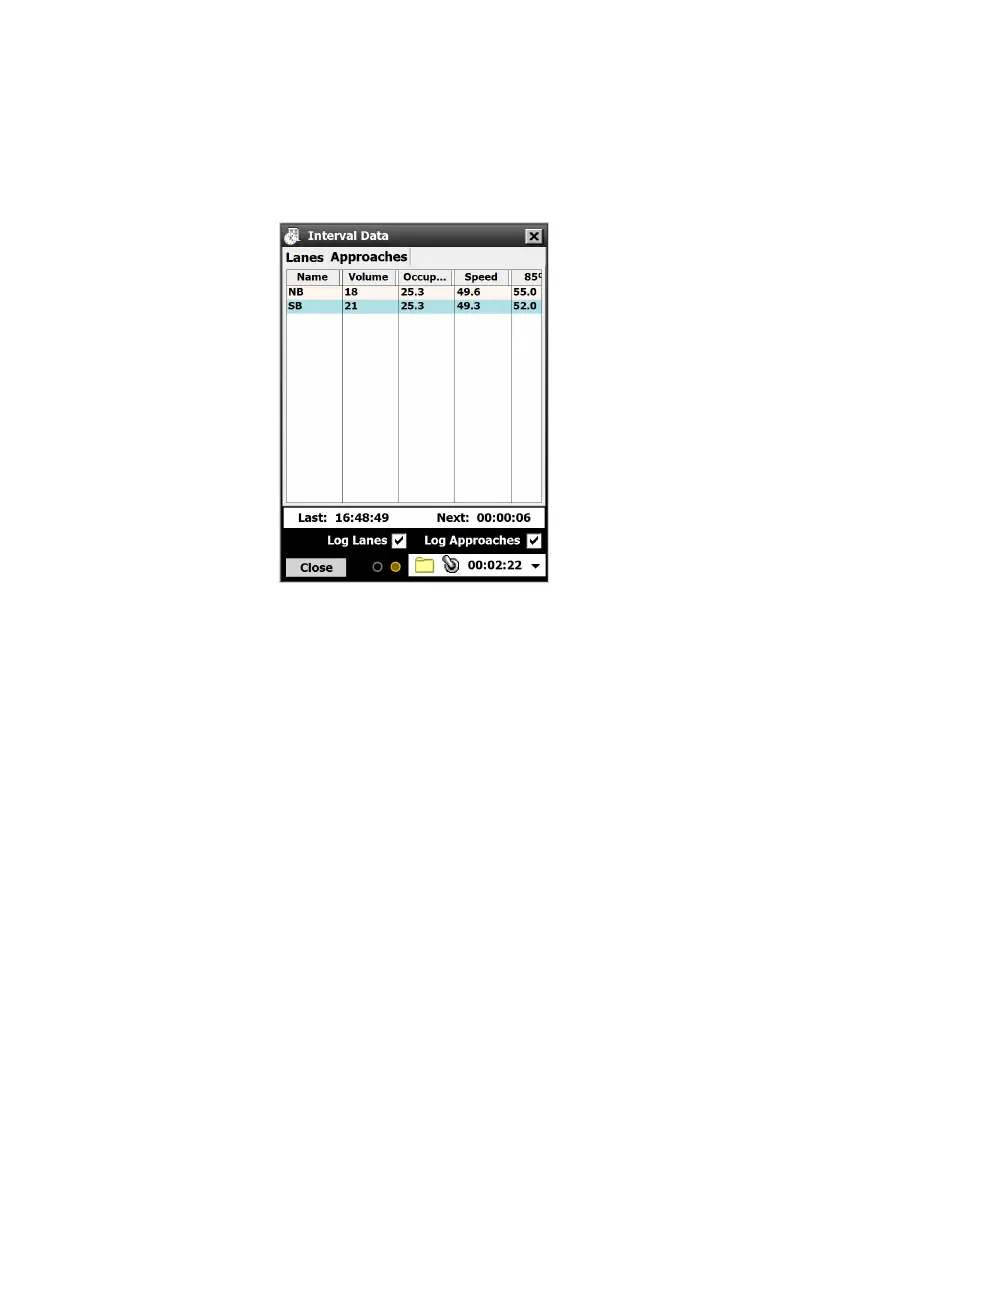
Access the Interval Data screen by clicking the Interval Data
button on the Data screen. This screen lets you log interval data
(data collected about all detections in a given interval of time) for
both lanes and approaches.
Figure 84. Interval Data screen, Approaches tab
Logging interval data
1 In the lower right corner of the Interval Data screen, next to the
word “Logging,” click the upward-pointing arrow. The Logging
area will appear, as seen above.
2 Choose where to store the log file by clicking the folder icon;
the Log File window will open. If you want to change the loca-
tion shown, click the magnifying glass icon next to the file
name.
3 Click OK when done.
4 Click the checkboxes of what you want to log: Lanes,
Approaches, or both. If you don’t click either checkbox, the
resulting log file will be blank.
5 To begin logging, click the switch icon. When you’re done, click
it again to stop.
6 To view the file, navigate to it on your computer. The file that
was created will be a .log file that can be opened in a text
editor.
Interval data
The Lanes and Approaches screens show the following data about
Note. Logging
interval data is useful
for verifying your
sensor setup—just
log a few intervals
then compare with
video or other
recorded data. Or
you can use the
feature at test sites,
where you just
need to examine a
few intervals’ worth
of detections.
Note. The Lanes
and Approaches
tabs let you view
the detected data in
real time. However,
which tab you
have open doesn’t
aect logging.
Note. Keep this
screen open
while you log—if
you close it, the
logging will stop!