2-20
Chapter 2: Installation and Setup
Aug 2012
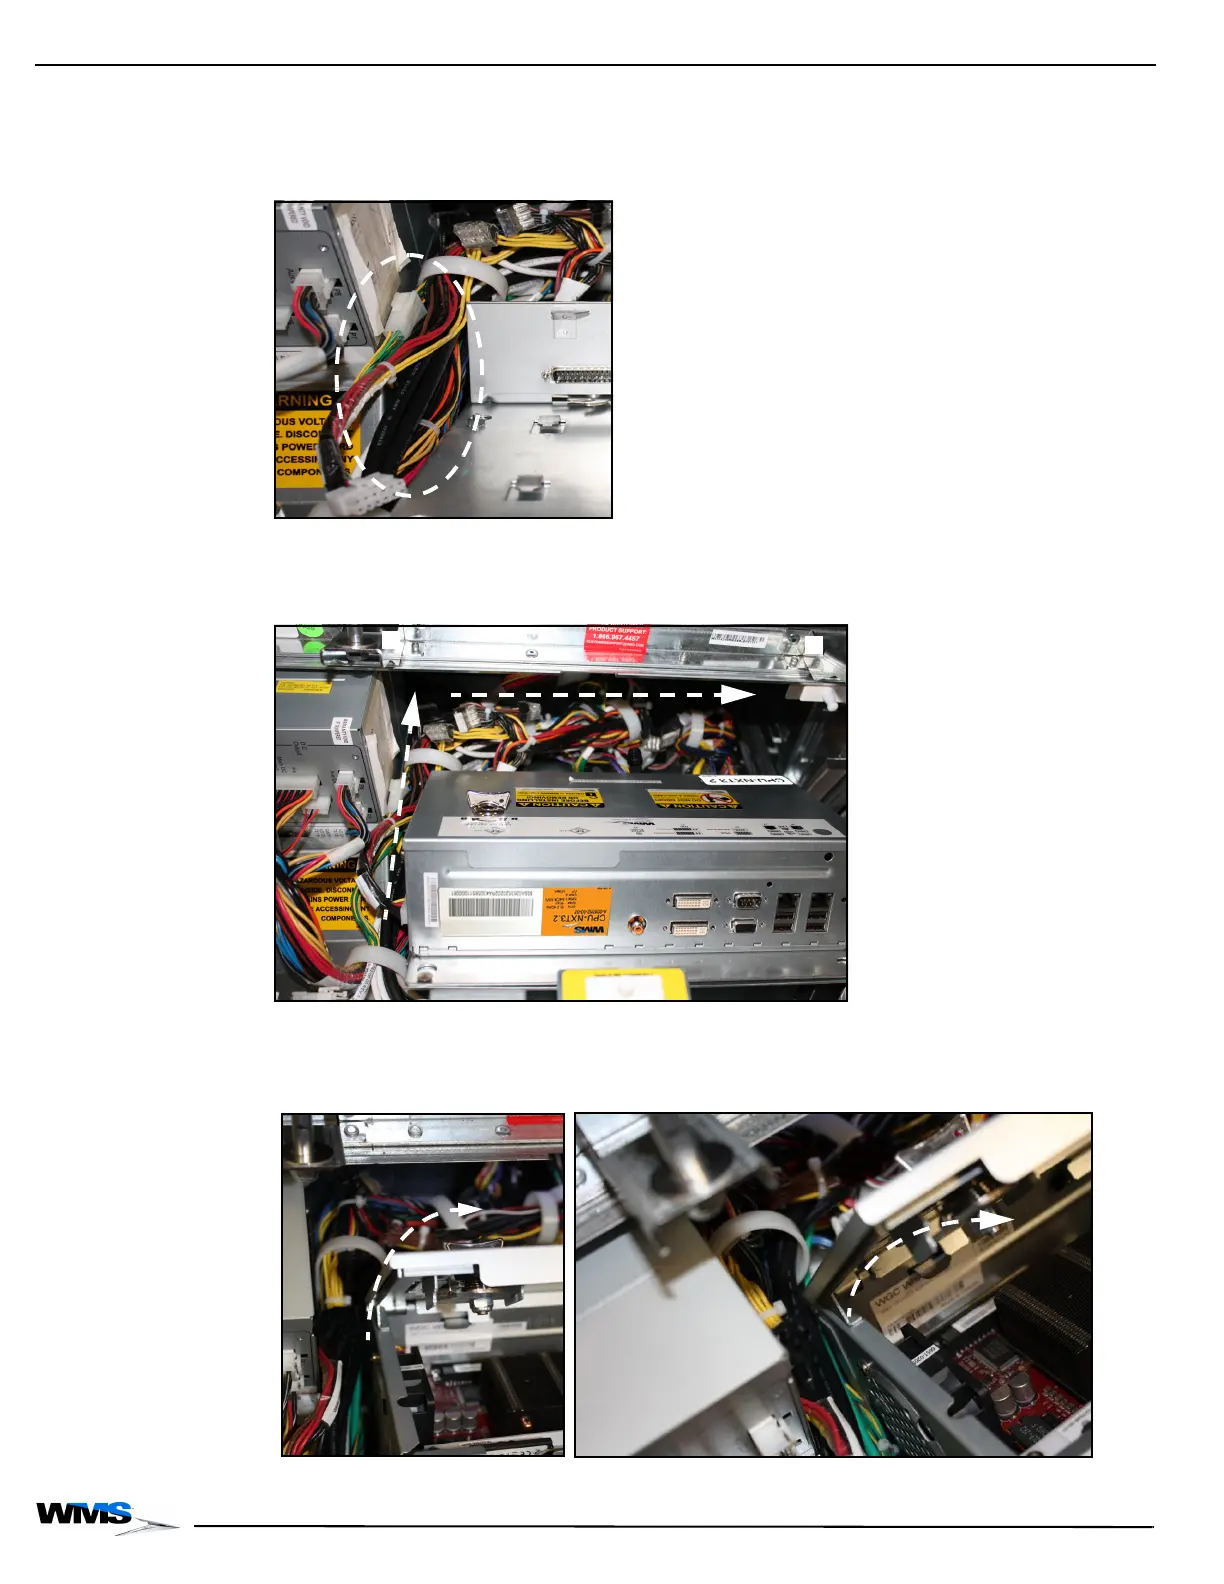
DC Power
Cable Routing
The following images show the proper way to route the DC Power Cable:
1 Confirm no portion of the DC Power Cable with WAGO connectors is laying in the cable
channel, Figure 2-40.
Figure 2-40 Confirming no portion of DC Power Cable with WAGO connectors is in cable channel.
2 Route any excess portion of the DC Power Cable through the cable clamps, Figure 2-41 (A),
and behind CPU-NXT 3.2, Figure 2-41 (B).
Figure 2-41 Routing excess DC Power Cable.
3 To confirm that the excess portion of the DC Power Cable is routed correctly as described in
step 2, check to see that CPU-NXT 3.2 lid opens without interference, Figure 2-42.
Figure 2-42 Confirming CPU-NXT 3.2 lid opens (left) and closeup (right).
 Loading...