January 2016
4-110
WorkCentre WorkCentre 4150/4250/4260WorkCentre 4150/4250/42604150/
REP 7.2
Repairs and Adjustments
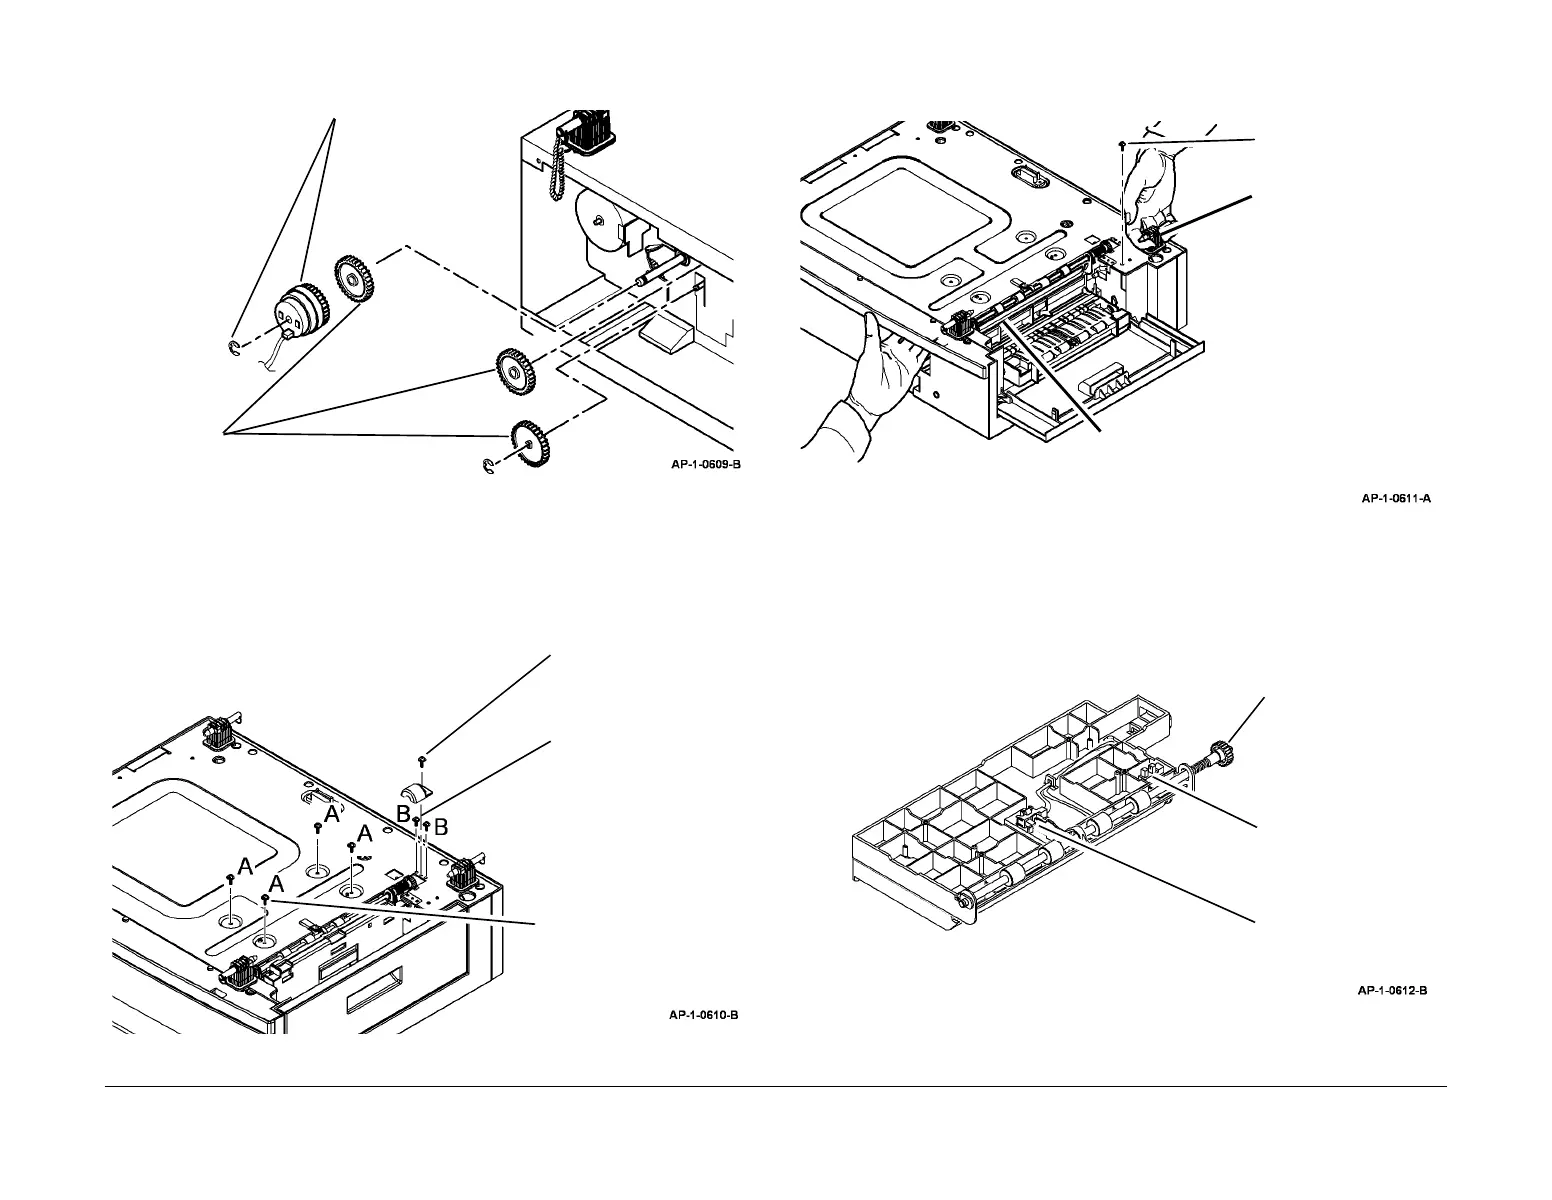
7. Remove the tray pickup clutch and 3 gears, Figure 3.
Figure 3 Clutch removal
8. Remove the feed motor assembly, PL 7.20 Item 9.
9. Disconnect CN7 and CN10 from the tray PWB.
10. Disconnect the connector on the tray elevating motor, PL 7.20 Item 7.
11. Prepare to remove the paper transport and tray feed unit, Figure 4.
Figure 4 Tray frame preparation
12. Open the tray cover door, PL 7.20 Item 20, then the access door, PL 7.20 Item 18.
13. Remove the paper transport and tray feed unit, Figure 5.
Figure 5 Removing the Paper Transport and Tray Feed Unit
14. As necessary, remove the tray feed sensor, tray door sensor or transport roll gear, Figure
6.
Figure 6 Sensors and gear
1
Remove the E-clip,
then the clutch.
2
Remove the E-clip, then the 3 gears.
1
Remove one screw,
then the gear cover.
3
Remove 4 screws
marked A.
2
Remove 2 screws
marked B.
1
Remove one screw.
2
Lift the corner of the tray
module to release the
paper transport and tray
feed unit.
4
Remove the paper trans-
port and tray feed unit.
3
Route the wires attached to
the Paper Transport/Tray Feed
Unit into the Tray Assembly.
Tray feed sensor.
SCF door sensor.
Transport roll gear.

 Loading...


