January 2016
4-185
WorkCentre WorkCentre 4150/4250/4260WorkCentre 4150/4250/42604150/
REP 14.2
Repairs and Adjustments
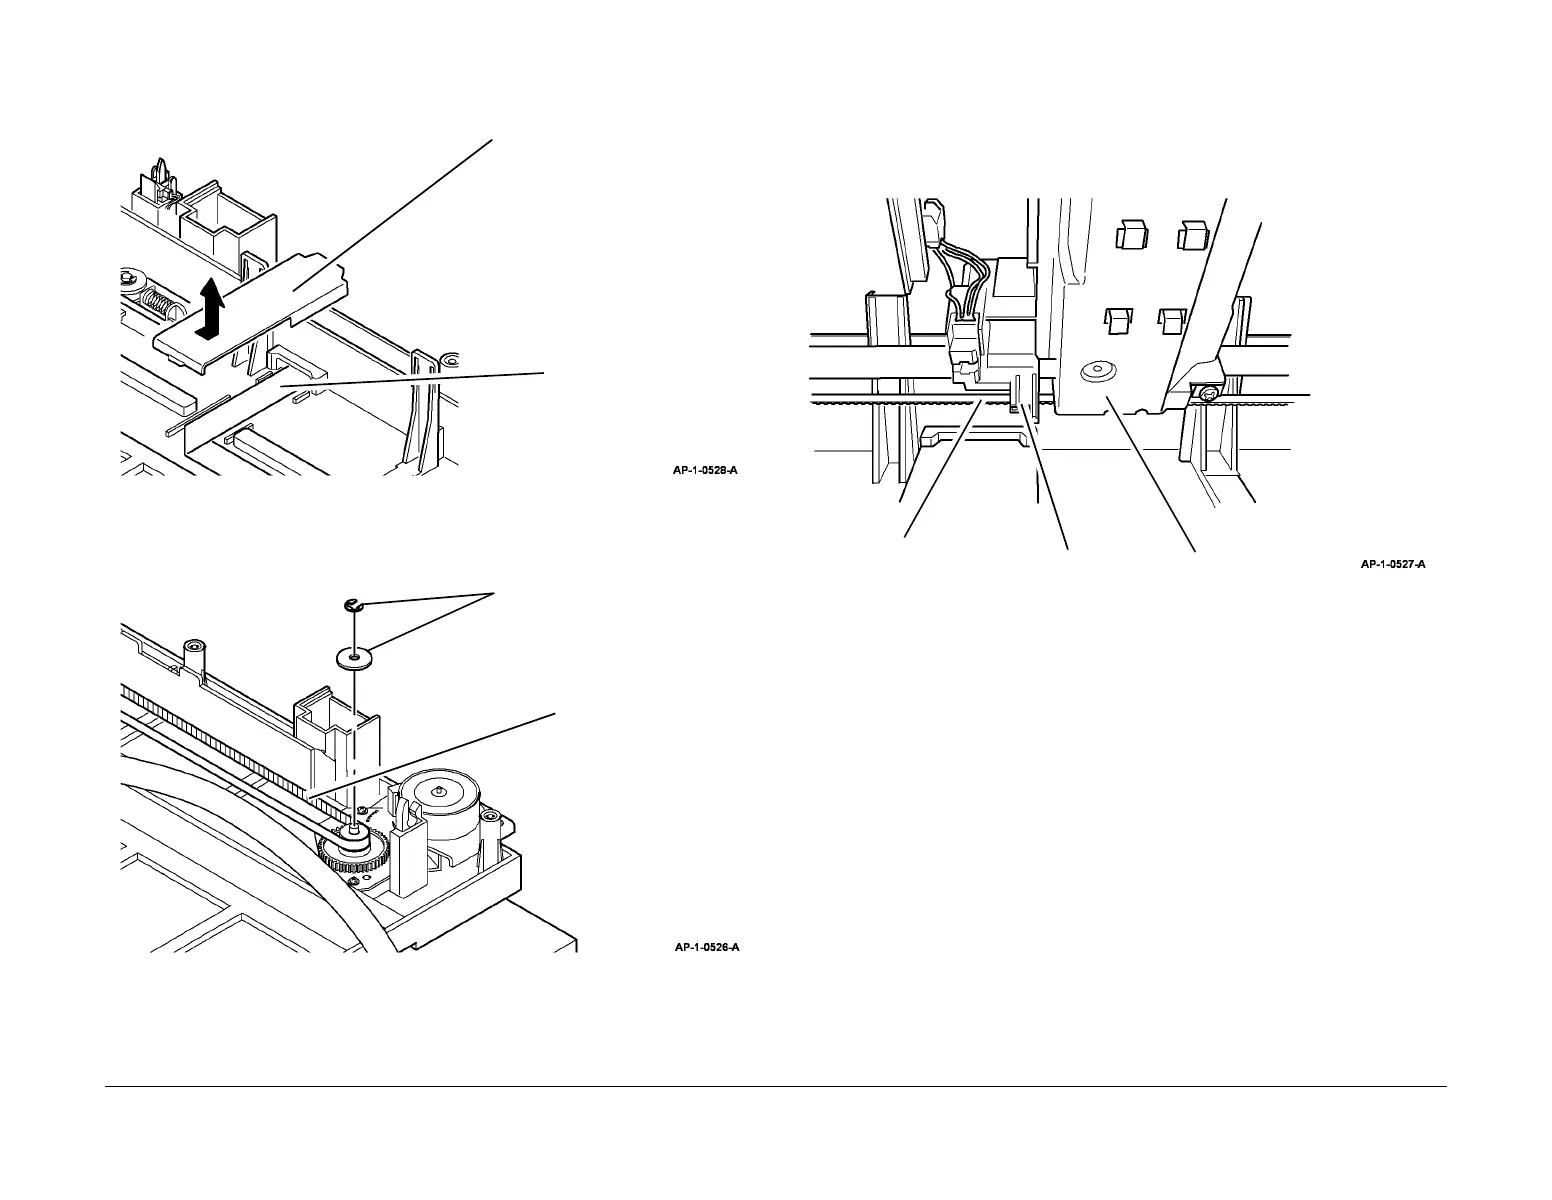
7. Remove the CCD module ribbon cable, Figure 4.
Figure 4 Ribbon cable removal
8. Remove the scanner drive belt, Figure 5.
Figure 5 Drive belt removal
9. Remove the scan motor assembly, (3 screws).
10. Remove the drive belt pulley, PL 14.10 Item 9.
11. Remove the timing gear, PL 14.10 Item 25.
Replacement
1. Replacement is the reverse of the removal procedure.
2. Ensure that the scanner drive belt is installed correctly into the belt clamp on the CCD
module, Figure 6.
Figure 6 CCD module replacement
3. Ensure the CCD ribbon cable is reconnected correctly:
• When connected to the CCD module, the blue flash should face to the left (away
from the CCD module).
• When connected to the main PWB, the blue flash should face up.
4. If a new CCD module was installed, perform ADJ 14.1 Shading Adjustment.
2
Remove the CCD module
ribbon cable.
1
Remove the ribbon
cable cover.
2
Remove the drive belt.
1
Remove 1 E-clip, then
the sheave.
Scanner drive belt
CCD module
Belt clamp

 Loading...


