EasyManuals Logo

Xerox WorkCentre Pro 423 Service Manual

Xerox WorkCentre Pro 423
619 pages
To Next Page IconTo Next Page
To Previous Page IconTo Previous Page
Page #502 background imageLoading...
Page #502 background image
03/02 8.10 FAX Unit
WorkCentre Pro 423/428 8-25 CHAPTER 8 ACCESSORIES
5. Remove the Screws (3) and the Rear Cover.
6. Remove the Screws (7) and the Electrical Cover.
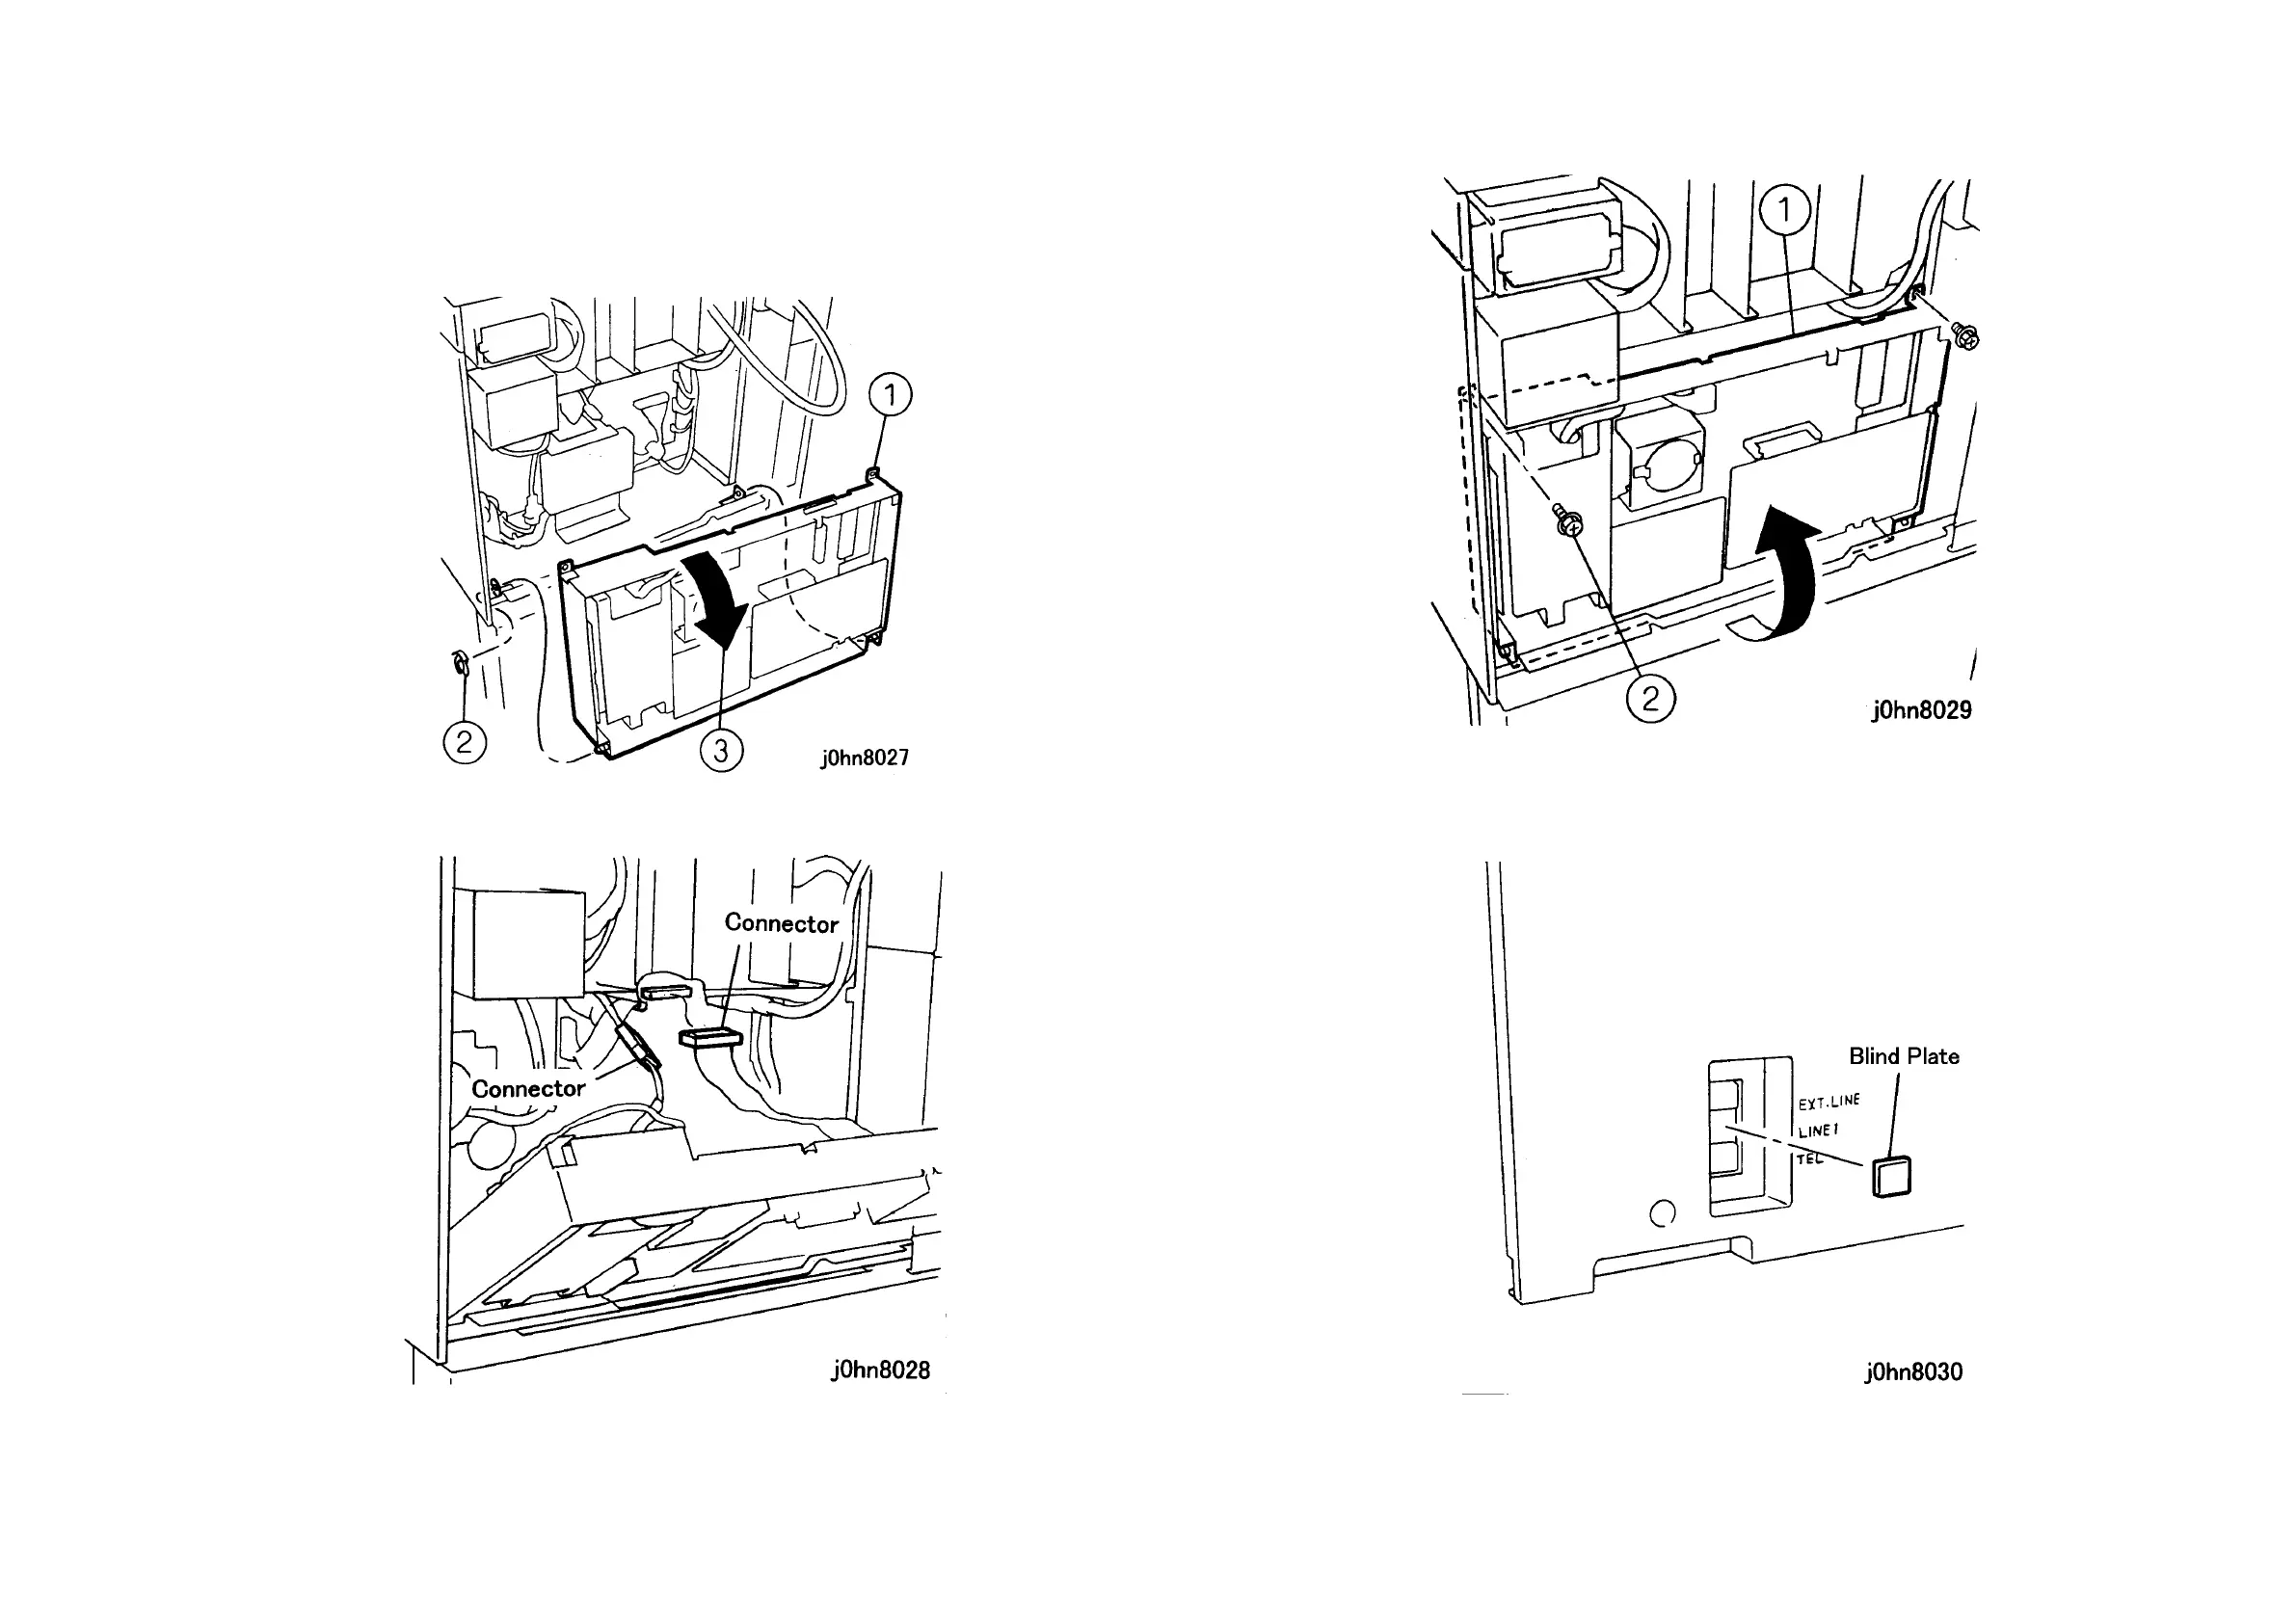
7. Install the MF Box. (Figure-4)
1) Install the MF Box.
2) Secure it with the KL-Clip.
3) Open the MF Box.
(Figure-4) j0hn8027
8. Connect the Connectors (2). (Figure-5)
(Figure-5) j0hn8028
9. Close the MF Box. (Figure-6)
1) Close the MF Box.
2) Tighten the screws (2).
(Figure-6) j0hn8029
10. Provide an access hole in the Rear Cover for a modular jack. (Figure-7)
1) Remove the blind plate of LINE 1.
(Figure-7) j0hn8030

Table of Contents

Other manuals for Xerox WorkCentre Pro 423

Questions and Answers:

Question and Answer IconNeed help?

Do you have a question about the Xerox WorkCentre Pro 423 and is the answer not in the manual?

Xerox WorkCentre Pro 423 Specifications

General IconGeneral
BrandXerox
ModelWorkCentre Pro 423
CategoryAll in One Printer
LanguageEnglish

Related product manuals