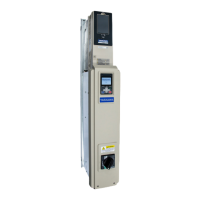
7.10 Peripheral Devices and Options
550 YASKAWA SIEPYAIH6B01A HV600 AC Drive Bypass Technical Reference
A - Shield
B - Sheath
C - Insulate with electrical tape or shrink tubing.
Figure 7.5 Prepare the Ends of Shielded Wire
■ Prepare Network Cables for Non-LonWorks Options
Determine the length of cable required to connect from the option to a network device and attach all connectors to
network cables before you install the option.
The network connection point on the option is designated CN1. CN1 may have 2 ports depending on the option type.
CN1 is the connection point for a customer-supplied network cable with a modular RJ45 connector.
Table 7.25 8-Way Modular Connector (Customer-Supplied)
Male 8-Way Modular Connector Pin Description
1 (Pair 2) Transmit data (TXD) +
2 (Pair 2) Transmit data (TXD) -
3 (Pair 3) Receive data (RXD) +
4 (Pair 1) Not used for 10 Mbps and 100 Mbps networks
5 (Pair 1) Not used for 10 Mbps and 100 Mbps networks
6 (Pair 3) Receive data (RXD) -
7 (Pair 4) Not used for 10 Mbps and 100 Mbps networks
8 (Pair 4) Not used for 10 Mbps and 100 Mbps networks
Communication Protocol Description
EtherNet/IP
Only use cable recommended for EtherNet/Industrial Protocol (EtherNet/IP™). Using a cable not specifically recommended may
cause the option or bypass to malfunction. Refer to the ODVA website for more information on network cabling (www.odva.org).
Modbus TCP/IP
Only use cable recommended for Modbus TCP/IP. Using a cable not specifically recommended may cause the option or bypass to
malfunction. Refer to the Modbus-IDA website for more information on network cabling (www.modbus.org).
PROFINET
Only use cable recommended for PROFINET. Using a cable not specifically recommended may cause the option or bypass to
malfunction. Refer to the PROFIBUS and PROFINET International (PI) website for more information (www.profibus.com).
■ Install the Option
1. Remove the bypass cover.
2. Put the option into port CN5 on the bypass PCB.
Latch release
1 2 3 4 5 6 7 8
 Loading...