1.11 Auto-Tuning
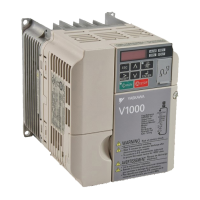
YASKAWA ELECTRIC SIEP C710606 10A YASKAWA AC Drive - V1000 PRELIM. Programming Manual 251
Parameter Details
1
■ Test Run with the Load Connected
After performing a no-load test run, connect the motor and proceed to run the motor and load
together.
Notes on Connected Machinery
• Clear the area around the motor.
• The motor should come to a complete stop without problems.
• Connect the machinery.
• Fasten all installation screws properly. Check that the motor and connected machinery are
held in place.
• Confirm that the Fast Stop circuit or mechanical safety measures operate correctly.
• Be ready to press the STOP button in case of emergency.
Checklist Before Operation
• The motor should rotate in the proper direction.
• The motor should accelerate and decelerate smoothly.
Operating the Motor under Loaded Conditions
Test run the application similarly to the no-load test procedure when connecting the
machinery to the motor.
• Check monitor parameter U1-03 to ensure there is no overcurrent.
• If the application permits running the load in the reverse direction, try changing motor
direction and the frequency reference while watching for abnormal motor oscillation or
vibration.
• Correct any problems that occurs with hunting, oscillation, or other control-related issues.
◆ Input Data for Auto-Tuning
The T1- parameters are used to set the Auto-Tuning input data.
Note: For motors that are to be operated in the field weakening range, first perform the Auto-Tuning
with the base data, i.e. the frequency at which the motor is operating with its rated voltage (base
frequency). After Auto-Tuning is complete, change the maximum frequency E1-04 to the
desired value.
■ T1-00: Motor 1 / Motor 2 Selection
Selects the motor to be tuned when motor 1/2 switching is enabled, i.e., a digital input is set
for function H1- = 16. This parameter is not displayed if motor 1/2 switching is
disabled.
 Loading...
