Verifying the New Time Setting
After pressing ENTER , the display will indicate “Entry accepted” and the new time value will be saved to the Real-Time
Clock (RTC).
If there is a problem with the entered time, the operator will indicate “Input error” and the screen will return to the time setting
display.
Canceling the Input
Pressing the ESC key will display “Aborted” on the operator, and no value will be saved to the RTC. Pressing OFF will abort
the setting process without any display, and no setting changes will be saved to the RTC.
Exiting from the Time Setting Screen Without Making Any Changes
If no changes are entered, the display will exit Real Time Clock Adjustment Display after a few seconds and no changes will
be saved.
n
Real-Time Clock Setting at Initial Power-up of a New Drive
Setting the Real-time clock is required at power-up of a new drive or after digital operator battery replacement.
Table 4.4 illustrates how to set the Real-Time Clock at initial power-up of a new drive.
Table 4.4 Clock Adjustment Procedure at Power-up of a New Drive
Procedure Display
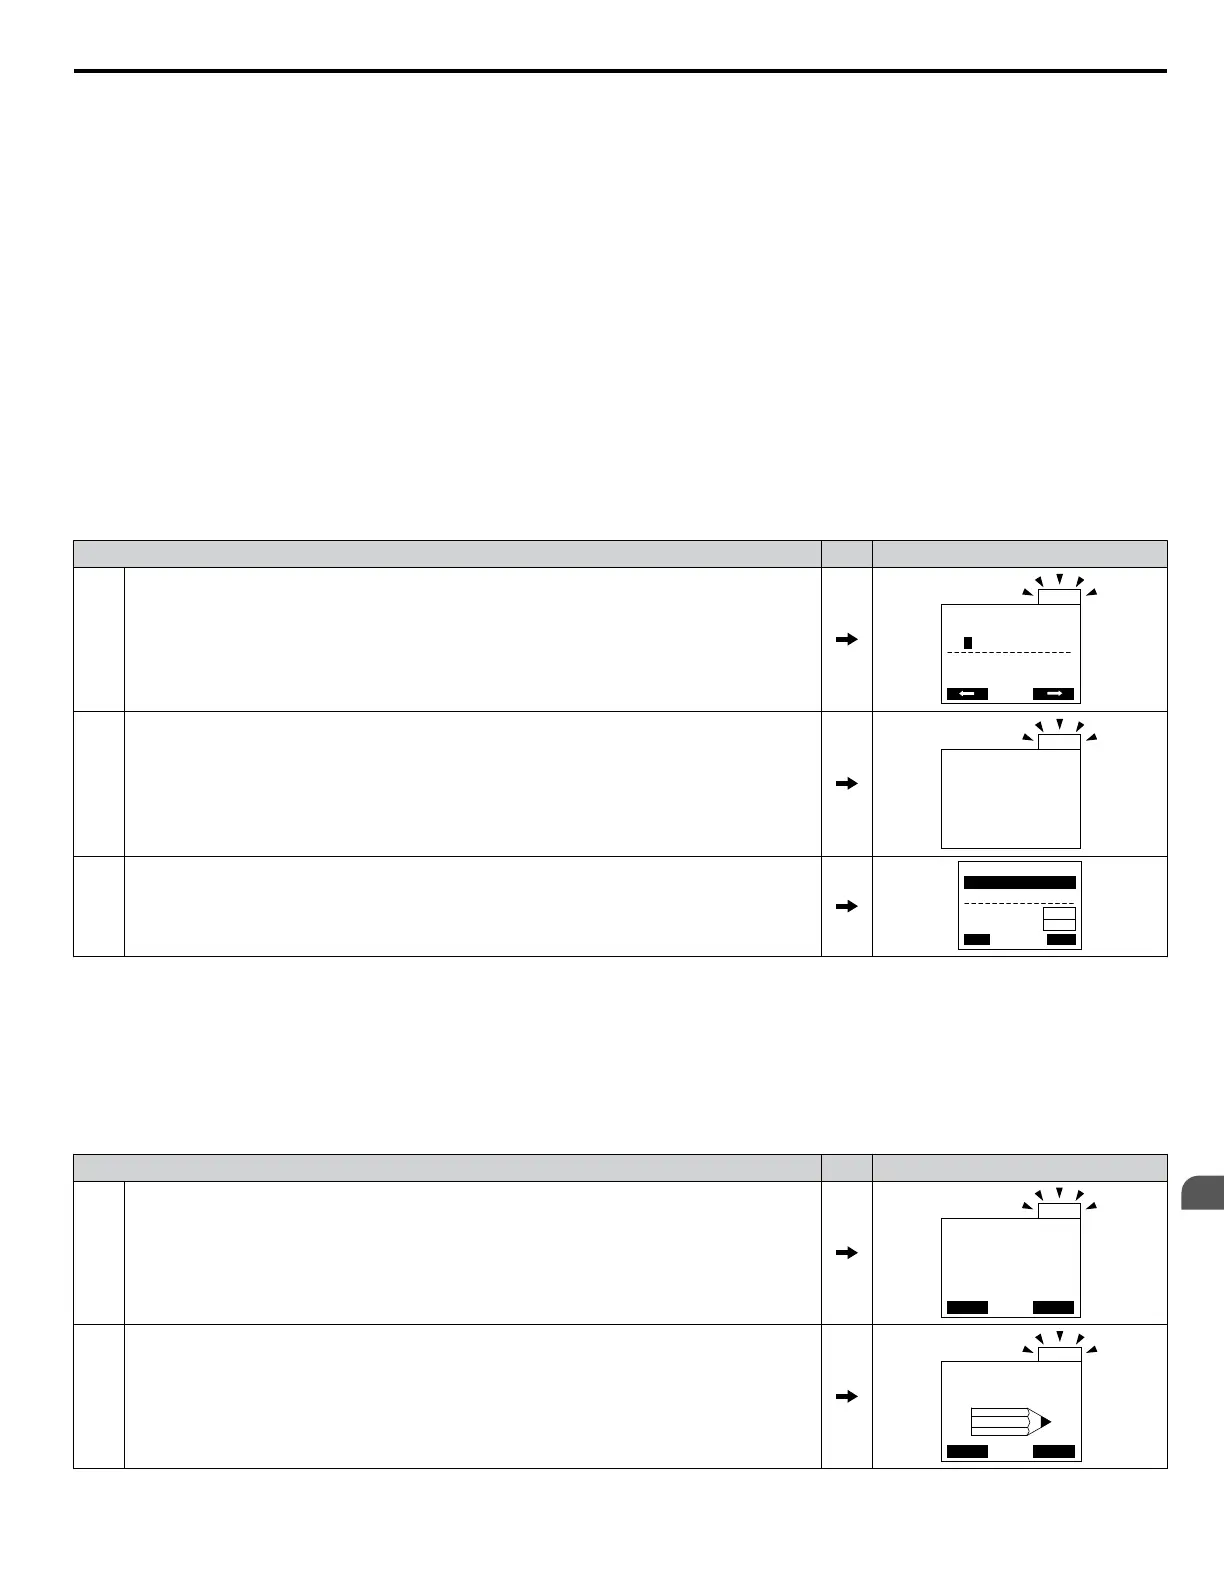
1
Turn the power on. The Real Time Clock Adjustment Display will appear. Use the right arrow
key to select the desired digit, then set the correct date and time using the up and down arrow
keys.
ALM
20 10/01/01 00:00
Second per month
+ 0 sec
YYYY/MM/DD HH:MM
ALM
2
After entering the Real-Time Clock data, press the ENTER key to save the changes.
The display will indicate “Entry Accepted” and return to the initial display in step 3 and the alarm
LED will be OFF.
3 Initial display.
- MODE -
U1-01= 0.00Hz
U1-02= 0.00Hz
U1-03= 0.00 A
DRV
Freq Ref (AI)
Rdy
FWD
LSEQ
LREF
n
Manual Clock Adjustment by Setting o4-17 to 1
The following actions are possible in the Clock Adjustment Mode:
• Set the current time
• Check the time set to the drive Real-Time Clock
Table 4.5 illustrates how to set the Real-Time Clock manually.
Table 4.5 Manual Clock Adjustment Procedure by Setting o4-17 to 1
Procedure Display
1
The “Time Not Set” (TIM) display will appear if the Real-Time Clock data is not entered within
30 seconds of power-up on a new drive.
Refer to 143 for details on the TIM display.
- MODE -
Time Not Set
RESET
DRV
ALM
TIM
FWD
ALM
2
Use the up and down arrow keys to scroll through display menu until the screen shows
“Programming”.
- MODE -
DATAHELP
PRG
ALM
Programming
FWD
4.2 The Drive, Programming, and Clock Adjustment Modes
YASKAWA ELECTRIC TOEP YAIP1U 01B YASKAWA AC Drive - P1000 Quick Start Guide
83
4
Start-Up Programming &
Operation
 Loading...