< 7. Calibration >
7-2
IM 12F5A1-01E
7.2.1 MethodofZeroCalibrationusingOpenInputCircuitMethod
This section describes zero calibration using open input circuit method.
Note: Thissectionalsoexplainshowtostoptheindicator electrode when electrode mechanism block is moved. It is not
necessary to stop the indicator electrode for the purpose of calibration, but rather _ before lifting out the electrode
mechanism block or moving the unit _ to eliminate the chance of the electrode hitting something while rotating.
(1) Before lifting the electrode mechanism block from the measuring tank, stop the electrode
rotation. In <CELL> mode of Operation Level ( “CELL.ON” displayed in message display ),
press the
NO
key. Stopping the electrode rotation (turning drive motor power OFF) results in
the “CELL” display disappearing.
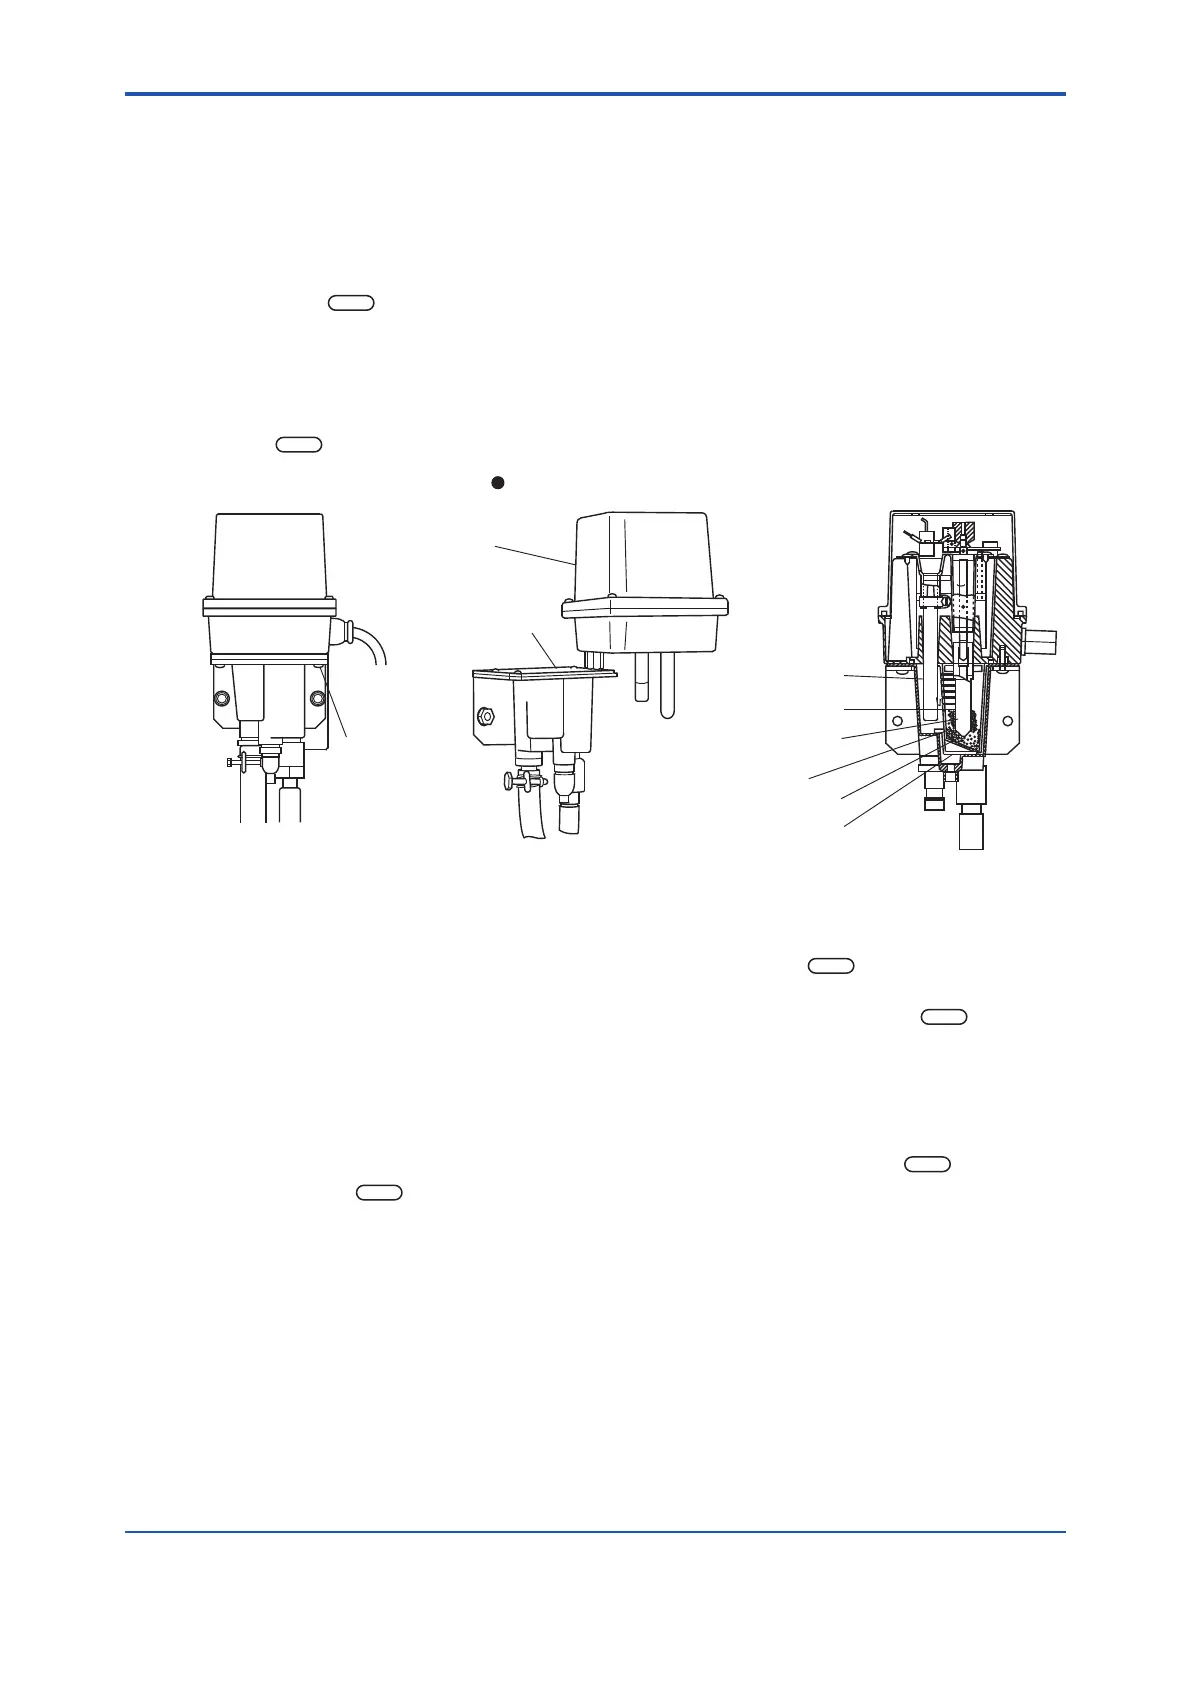
(2) Place the electrode in its maintenance position (see Figure 7.1) and start it rotating again.
Loosenthetwoscrewsthatxtheelectrodemechanism block to the measuring tank, and lift
it vertically to remove it from the tank. After resting the block in its maintenance position, pressing
the
YES
key in <CELL> mode restarts electrode rotation, and the “CELL” display is lit.
F6.1e.ai
Electrode mechanism
block
Measuring tank
Fixing screws
( 2 pcs )
In maintenance position
Counter electrode
(reference electrode)
Indicator electrode
(rotating electrode)
Beads case
Ceramic beads
Beads case cover
The bottommost notch
of the beads case
Figure7.1 ElectrodeMechanismBlockinmaintenance
(3) Select <CAL> mode (“ZERO” displayed on message display)
Note: IfServiceLevelcode08issetto“1”for“initializeelectrodesensitivity”,thenplacingtheunitin<CAL>moderesultsin
“NO.CHNG”or“CHANGE”beingdisplayed.Inresponse(seeSec.7.3)pressthe
keyand“ZERO”isdisplayed.
(4) Perform zero calibration
Check that the data displayed on the data display has stabilized, then press the
YES
key.
While calibration is being performed, a blinking “mg/l” or “ppm” is displayed. When calibration
endsnormally,“ZR.END”isdisplayed.
Note: Duringcalibration,ifanabnormalityoccursthen“END.E6”or“END.E7”aredisplayed.RefertoSec.7.4foradescription
ofhowtoxtheproblem.
(5) Exitingzerocalibration
Conrmthatanormal“ZR.END”ratherthananerrormessagethenpressthe
YES
key.
Pressing the
YES
key switches the display to “SPAN”. After stopping the indicator electrode,
reverttheelectrodetoitspositioninthemeasuringtank.Afterxingtheelectrodemechanism
block to the measuring tank, restart electrode rotation. Perform span calibration (see Sec. 7.3)
after performing zero calibration.

 Loading...