<Toc> < 2. Initial Settings >
2-13
IM 05D01C02-41E 3rd Edition: May 31, 2006-00
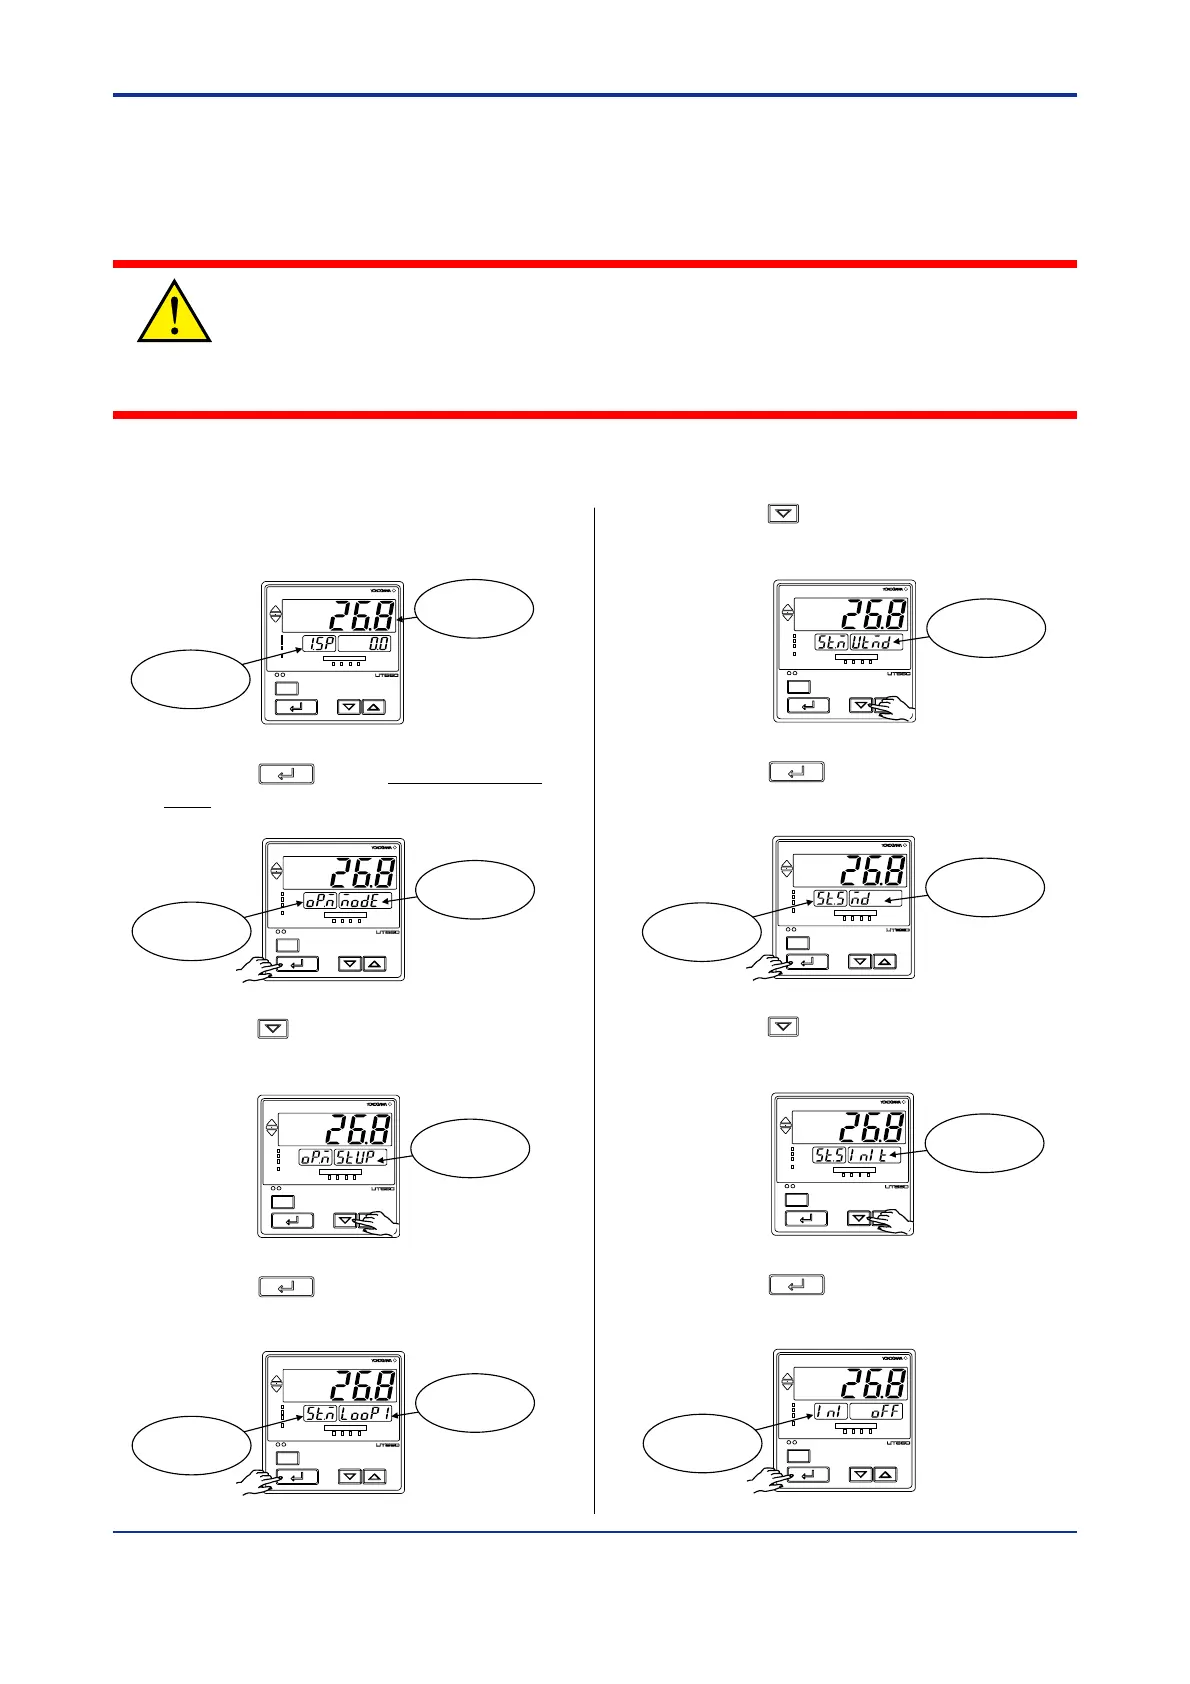
1. Bring the operating display into view
(display appears at power-on).
SET/ENT
A/M
PV
AL1 2 3 4
REM
CAS
MAN
LP2
Displays PV
Displays
target setpoint-1
“
1.SP
”
.
2. Press the
SET/ENT
key for more than 3 sec-
onds to call up the main menu “MODE”.
SET/ENT
A/M
PV
AL1 2 3 4
REM
CAS
MAN
LP2
Displays main
menu “MODE”.
Displays
symbol “OP.M”.
3. Press the key once to display the main
menu “STUP”.
SET/ENT
A/M
PV
AL1 2 3 4
REM
CAS
MAN
LP2
Displays main
menu “STUP”.
4. Press the
SET/ENT
key once to display the
main menu “LOOP1”.
SET/ENT
A/M
PV
AL1 2 3 4
REM
CAS
MAN
LP2
Displays main
menu “LOOP1”.
Displays
symbol “ST.M”.
5. Press the key once to display the main
menu “UTMD”.
SET/ENT
A/M
PV
AL1 2 3 4
REM
CAS
MAN
LP2
Displays main
menu “UTMD”.
6. Press the
SET/ENT
key once to display the
submenu “MD”.
SET/ENT
A/M
PV
AL1 2 3 4
REM
CAS
MAN
LP2
Displays
symbol “ST.S”.
Displays
submenu “MD”.
7. Press the key twice to display the
submenu “INIT”.
SET/ENT
A/M
PV
AL1 2 3 4
REM
CAS
MAN
LP2
Displays
submenu “INIT”.
8. Press the
SET/ENT
key once to display the
parameter “INI”.
SET/ENT
A/M
PV
AL1 2 3 4
REM
CAS
MAN
LP2
Displays
parameter “INI”.
2.6 Initializing Parameters
Be sure to follow the steps below after a change of setting has been made to the data item
PV Input Type, PV Input Range or PV Input Scale.
CAUTION
Initializing the above parameter setpoints may initialize the registered operating/setup
paraemters. Check that they are correct. If any of them has been changed to its initial
value, set it to a required value.

 Loading...


