8
IM 01B08B02-01EN
8
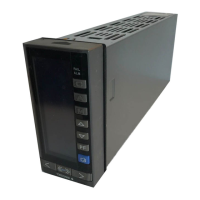
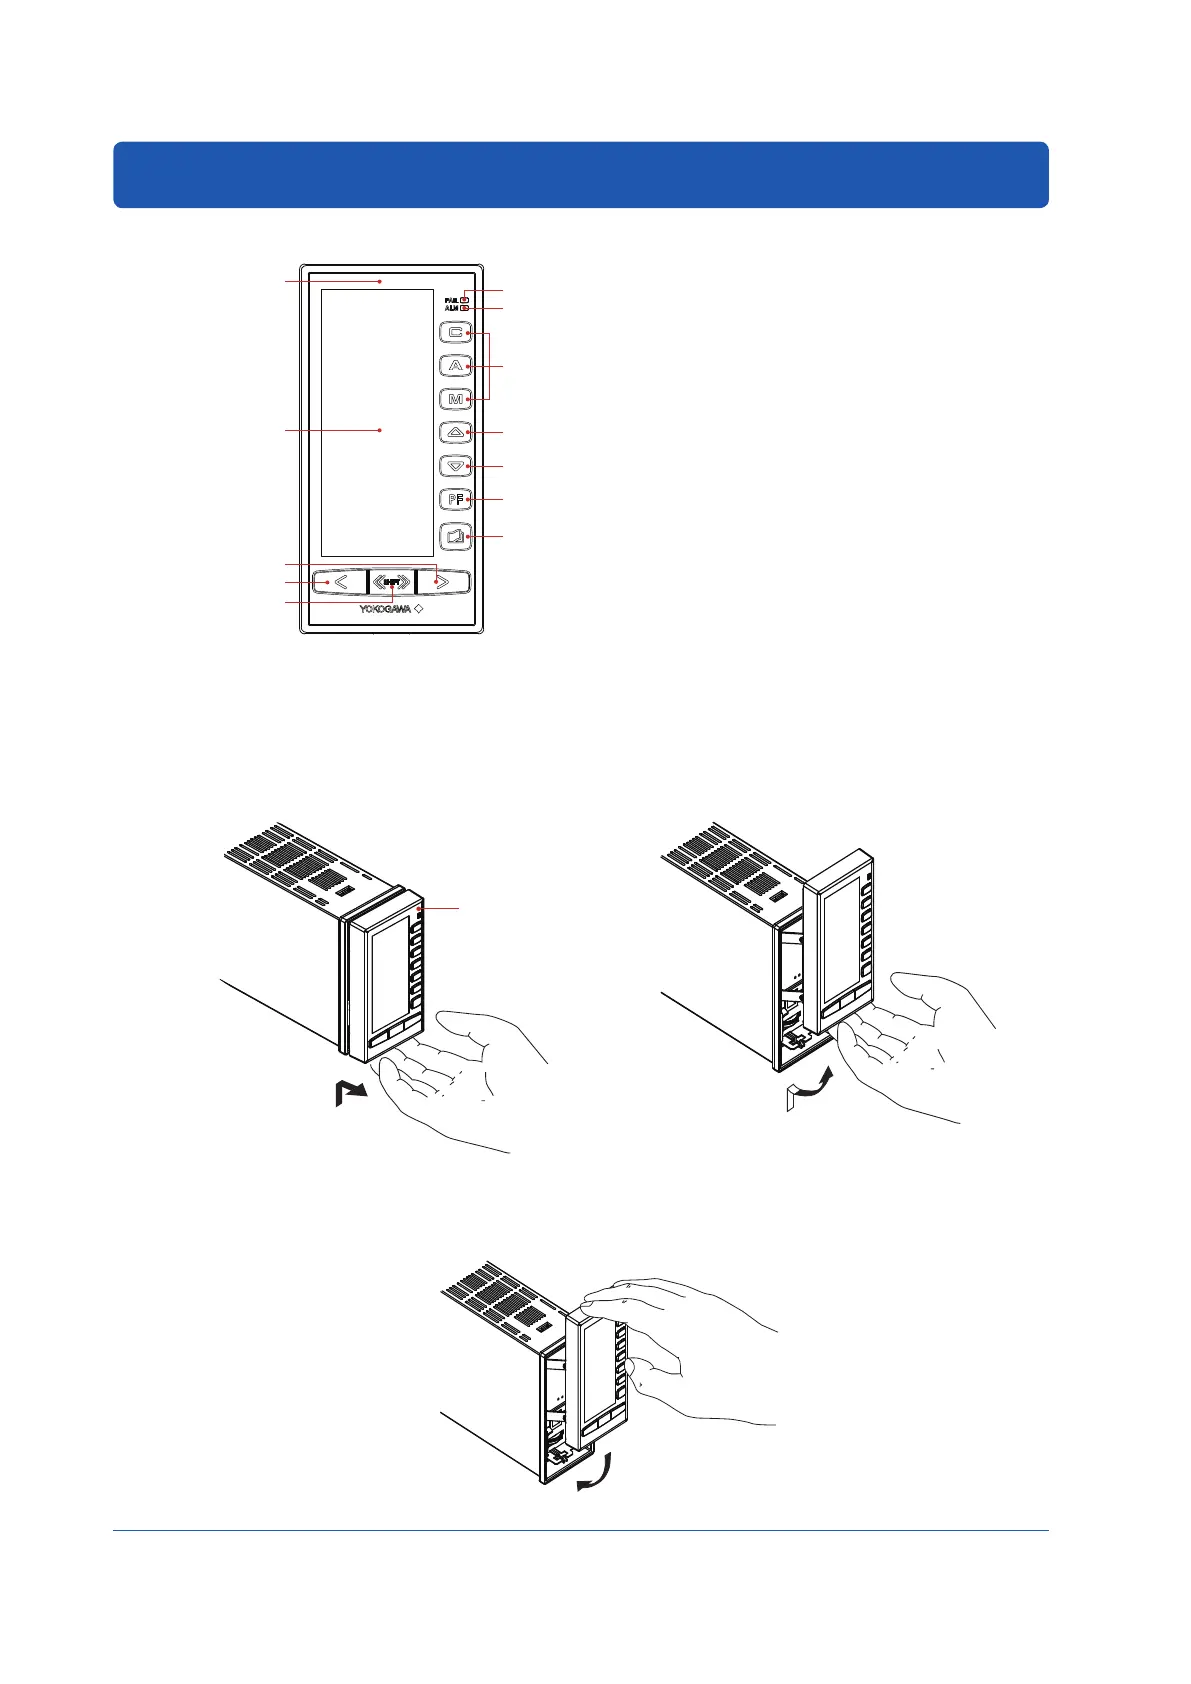
Part Names
Front Panel Part Names
(2)
(3)
(4)
(5)
(6)
(7)
(8)
(12)
(1)
(9)
(10)
(11)
Figure 2.1
(1) Color LCD display: 120 × 320 dots
(2) FAIL lamp (LED: red)
(3) ALM lamp (LED: yellow)
(4) C mode key, A mode key, M mode key, and LED indicators
(C: green, A: green, M: yellow)
(5) SV increase key
(6) SV decrease key
(7) PF key and LED indicator
(8) Page key
(9) MV increase key
(10) MV decrease key
(11) Fast-change key/SHIFT key
(12) TAG label (recommended position to attach label)
► Forthefunctionsofeachpart:see“MonitoringandControl
of Regular Operations (Operation Display)” in this manual.
Swinging the Front Panel Up and Down
Swinging up the front panel
1.
Press upwards in the center of the bottom of the front panel. You can draw the front panel toward you until you feel a slight
resistance and the movement of the front panel will stop.
(You can swing up the front panel more smoothly if hold the top and bottom of the front panel.)
2.
Swing the front panel up and out from that position.
Figure 2.2
Figure 2.3
Swinging down the front panel
Push down on the center of the top of the front panel. When you feel a slight sense of resistance, stop pushing. Slide it forward
from that position. It will click into place, indicating that it is locked.
Figure 2.4
 Loading...