JOHNSON CONTROLS
11
SOLUTION XT UNIT MODEL NOMENCLATURE
FORM 102.20-N1
ISSUE DATE: 7/06/2016
LIST OF TABLES
TABLE 1 - Definition of Segment IDS .....................................................................................................................18
TABLE 2 - TSP and Drain Trap ...............................................................................................................................62
TABLE 3 - Maximum Current ..................................................................................................................................71
TABLE 4 - Koch Filter Clips - Single Filter Application ............................................................................................96
TABLE 5 - Koch Filter Clips - Pre-Filter / Final Filter Application ............................................................................ 96
TABLE 6 - AAF Clips for Filter Frames - Single Filter Application ...........................................................................97
TABLE 7 - AAF Pre-Filter/Final Filter Application ...................................................................................................97
TABLE 8 - Visual Control Filter Clamps for HEPA Filters .....................................................................................105
TABLE 9 - SI Metric Conversion ...........................................................................................................................107
FIGURE 140 - Trap Detail for Drain Pan in Positive Environment (Blow Through) ................................................. 90
FIGURE 141 - Combining Drain Lines ....................................................................................................................90
FIGURE 142 - Recommended Discharge Duct Arrangement when Turns are Required ........................................91
FIGURE 143 - Duct Arrangement for Flange and Raw Edge Ducts ........................................................................ 92
FIGURE 144 - Duct Penetration of Roof .................................................................................................................93
FIGURE 145 - Roof to Duct Installation (Horizontal Discharge) ..............................................................................93
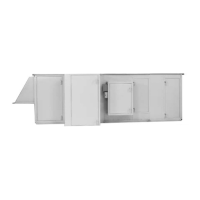
FIGURE 146 - Typical Filter Types ..........................................................................................................................94
FIGURE 147 - Filter Latches ...................................................................................................................................95
FIGURE 148 - Correctly Installed Latch Pin (P/N 026-35788-702) .........................................................................98
FIGURE 149 - Fully Installed Filter ..........................................................................................................................98
FIGURE 150 - Correctly Installed Latch Pin (P/N 026-35788-604) .........................................................................98
FIGURE 151 - Place the End of the Latch Over the Filter Frame ...........................................................................99
FIGURE 152 - Correctly Installed Cartridge Filter ...................................................................................................99
FIGURE 153 - Correctly Installed Latch Pin (P/N 026-35788-604) .......................................................................100
FIGURE 154 - Correctly Installed Cartridge with Pleats ........................................................................................100
FIGURE 155 - Correct use of Knockouts ..............................................................................................................100
FIGURE 156 - Correct Latchout/Knockout Conguration ......................................................................................100
FIGURE 157 - Frame with Four Latches Installed on the Sides............................................................................101
FIGURE 158 - Spring Latch Pulled and Fastened in Filter Hole ...........................................................................101
FIGURE 159 - Correct Latchout/Knockout Conguration (P/N 026-35788-612) ................................................... 101
FIGURE 160 - Spring Latch Pulled and Fastened in Filter Hole ...........................................................................102
FIGURE 161 - Installing Pre-Filter Latch ............................................................................................................... 102
FIGURE 162 - Position Pre-Filter in Front of Final Filter .......................................................................................102
FIGURE 163 - Spring End of Latch .......................................................................................................................102
FIGURE 164 - Completed Assembly ..................................................................................................................... 102
FIGURE 165 - Installation of Koch HEPA Filters ...................................................................................................103
FIGURE 166 - Koch HF .........................................................................................................................................104
FIGURE 167 - Hepa Filter (Cross Section) ...........................................................................................................104
FIGURE 168 - Visual Control Filter Clamps ..........................................................................................................105
FIGURE 169 - Installing Hepa Filter ...................................................................................................................... 105
FIGURE 170 - Installing Welded Bevel Seal Filter ................................................................................................106
LIST OF FIGURES (CONT'D)