14
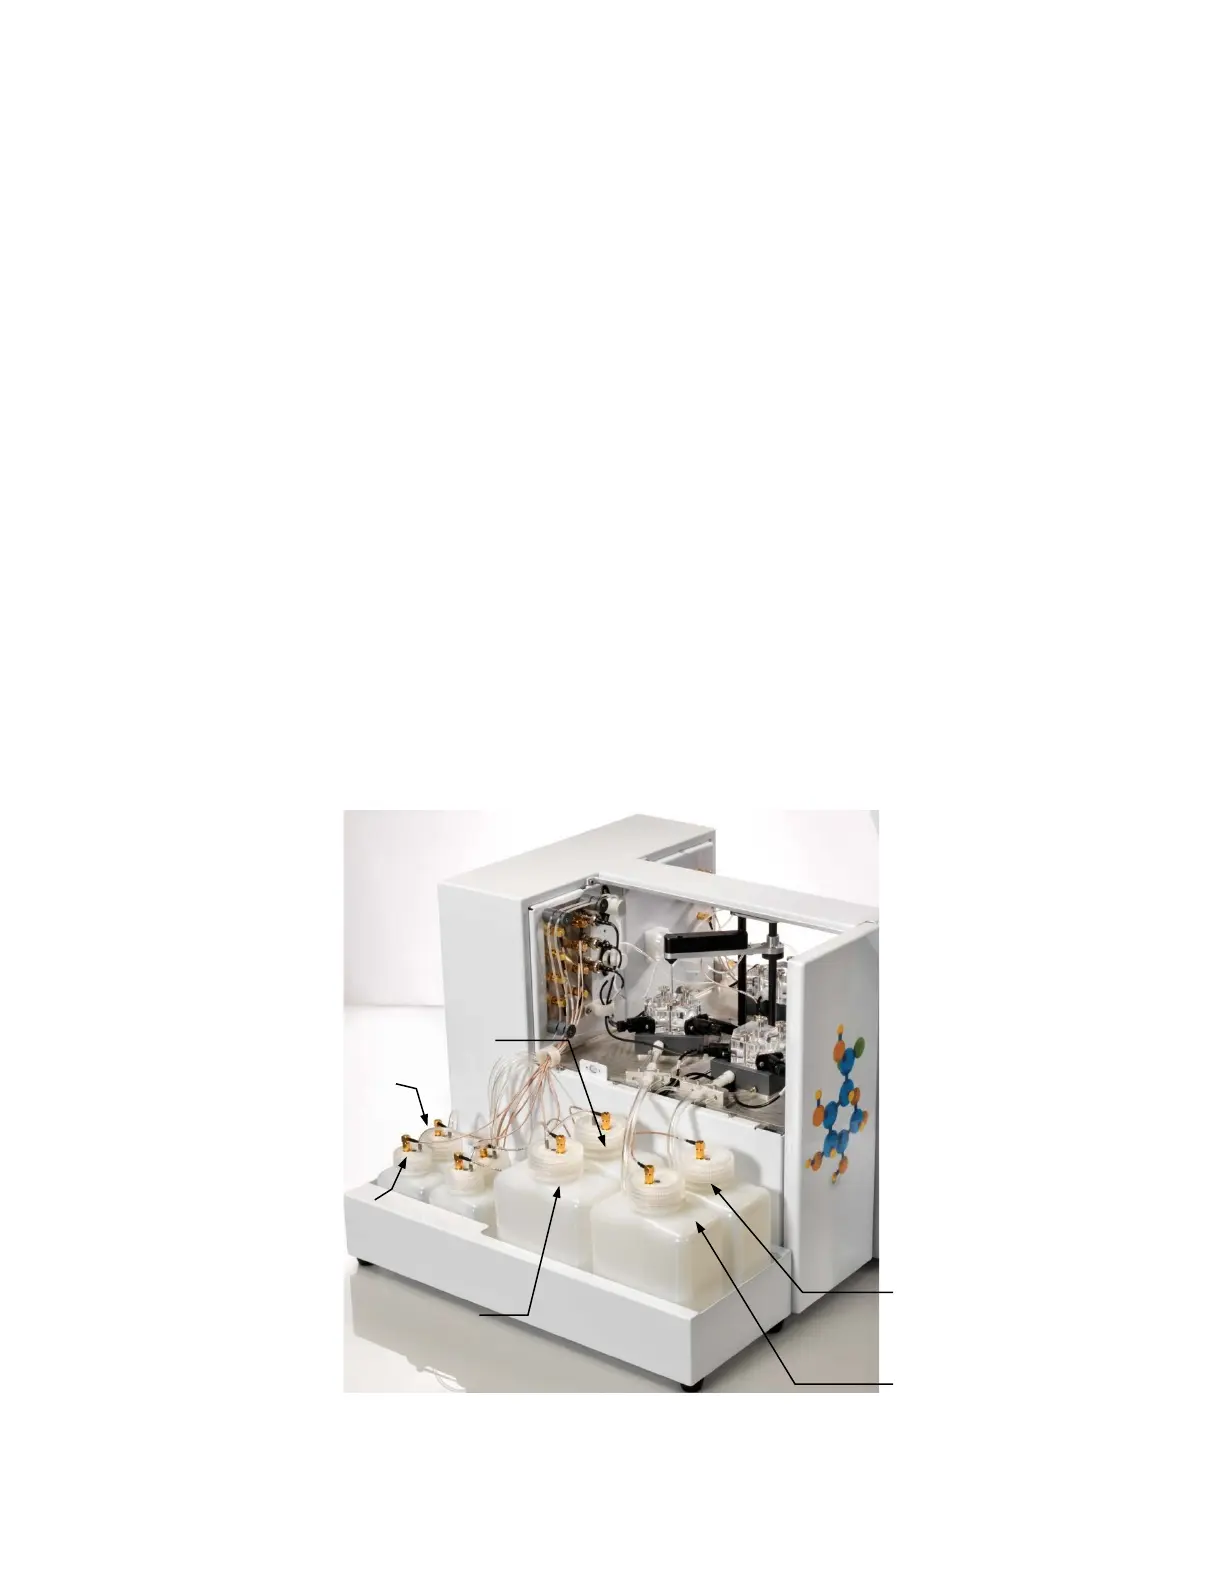
4.1.2 Left Side (2950 models only)
1. Install the YSI 2936 Bottle Rack with Reagent Level Sensing onto the left side of the instrument by sliding the
slots in the tray over the pins on the side of the instrument.
2. If you are not using the reagent level sensing option, place the YSI 2937 Bottles on the left side of the instrument.
3. Then remove the packing material holding the tubing to the left side of the instrument.
4. Next, connect bottle tubing and cables
a. Insert the large diameter waste tubing into the holes in waste bottles 2 and 3.
b. Connect one end of a long cable to the threaded fitting on the waste bottle 2 cap and connect the other
end to the W2 (top left) fitting on the instrument.
c. Connect one end of a long cable to the threaded fitting on the waste bottle 3 cap and connect the other
end to the W3 (top right) fitting on the instrument.
d. Connect the tubing marked “B2” and one end of a long cable to the fittings on the buffer 2 bottle cap and
connect the other end of the cable to the B2 (2
nd
from top on left) fitting on the instrument.
e. Connect the tubing marked “B3” and one end of a long cable to the fittings on the buffer 3 bottle cap and
connect the other end of the cable to the B3 (2
nd
from top on right) fitting on the instrument.
f. Connect the tubing marked “C2A” and one end of a short cable to the fittings on the calibrator 2A bottle
cap and connect the other end of the cable to the 2A (bottom left) fitting on the instrument.
g. Connect the tubing marked “C2B” and one end of a short cable to the fittings on the calibrator 2B bottle
cap and connect the other end of the cable to the 2B (3
rd
from top on left) fitting on the instrument.
h. Connect the tubing marked “C3A” and one end of a short cable to the fittings on the calibrator 3A bottle
cap and connect the other end of the cable to the 3A (bottom right) fitting on the instrument.
i. Connect the tubing marked “C3B” and one end of a short cable to the fittings on the calibrator 3B bottle
cap and connect the other end of the cable to the 3B (3
rd
from top on right) fitting on the instrument.
Figure 4.2
CAL 3A
CAL 2A