3D printing workow
68
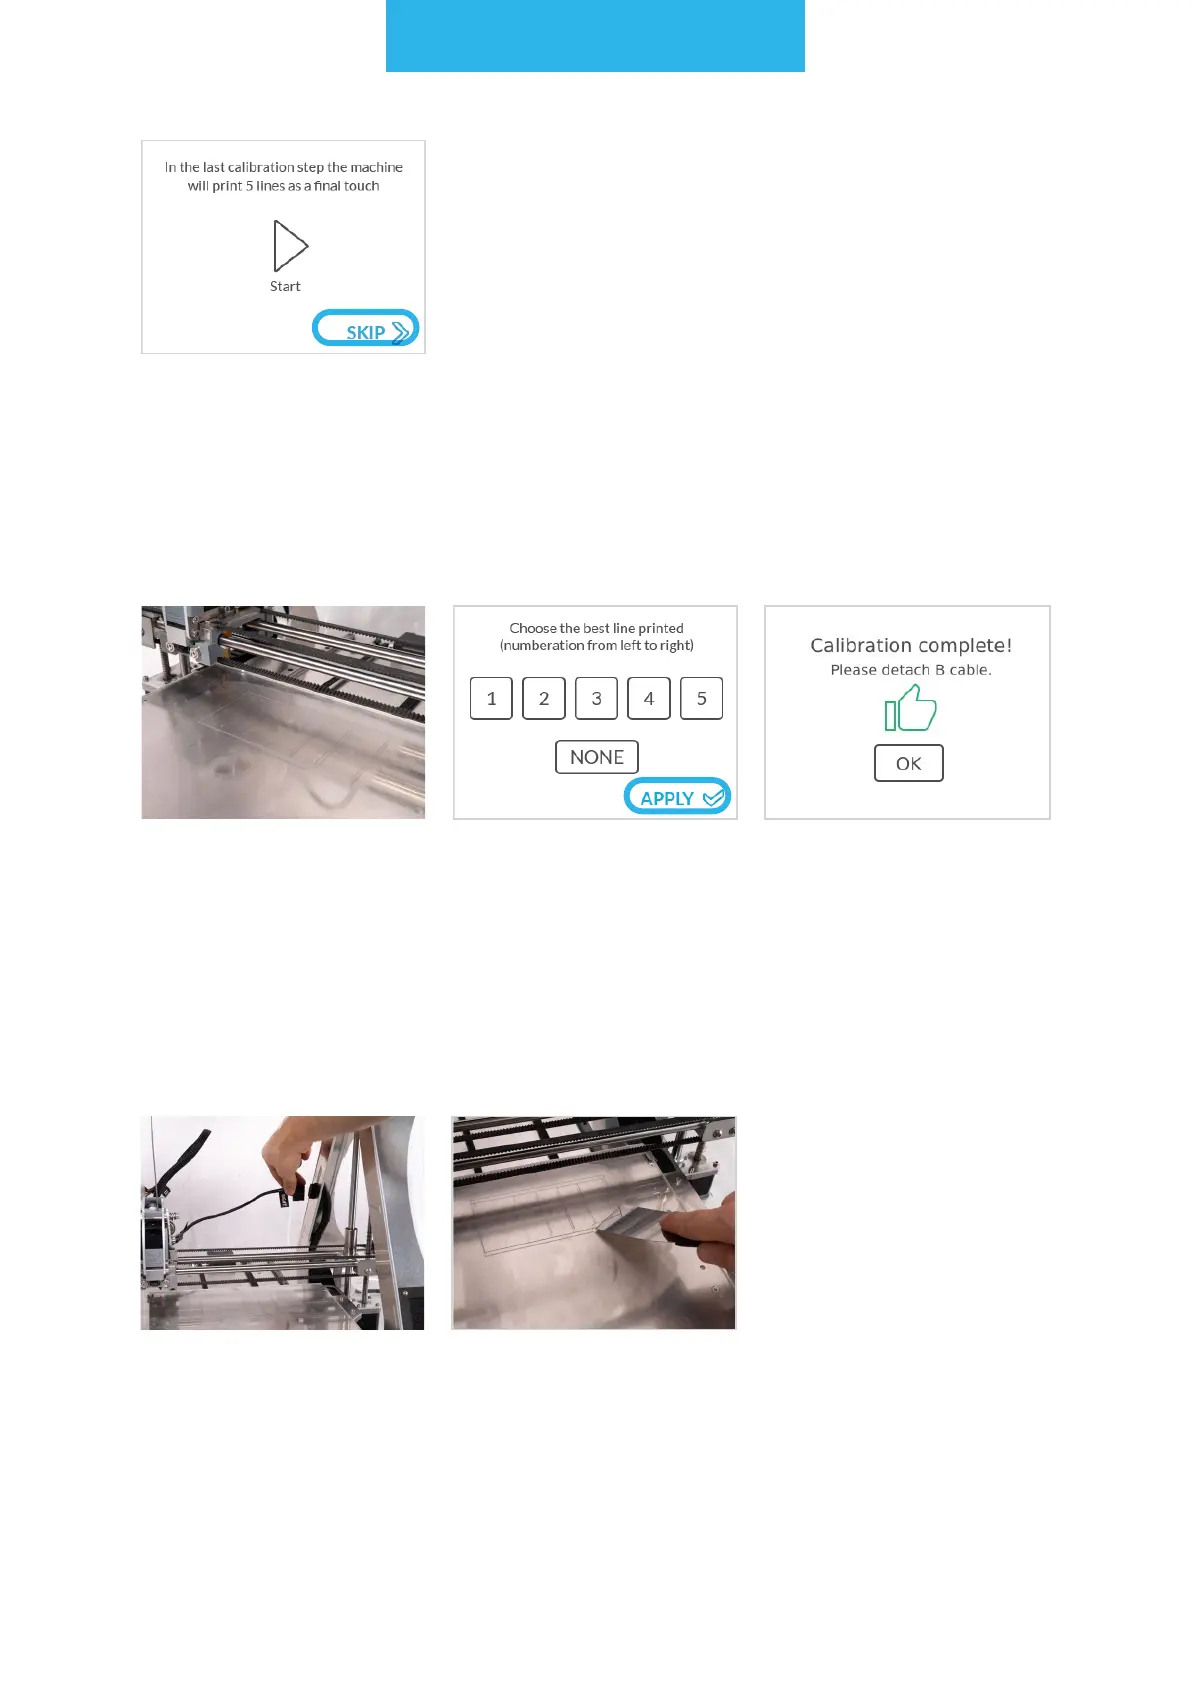
NOTE: by pressing the
'SKIP' button the user is
approving the automatic
calibration without visual
validation. After that the
calibration process ends.
NOTE: Each one of those lines
is printed on a slightly different
height (+/- 0.05 mm) with the
middle line being the result of
the automatic calibration pro-
cess.
Detach the autocalibra-
tion cable
Clean the bed. Your
machine is ready for your
rst print!
Look at printed lines
and select the best one
on the screen. A correct
line is the one that sticks
to the table after gen-
tly touching it with the
nger, but can be easily
ripped off with a nger-
nail.
Apply your choice. ZMorph VX calibration is
complete.