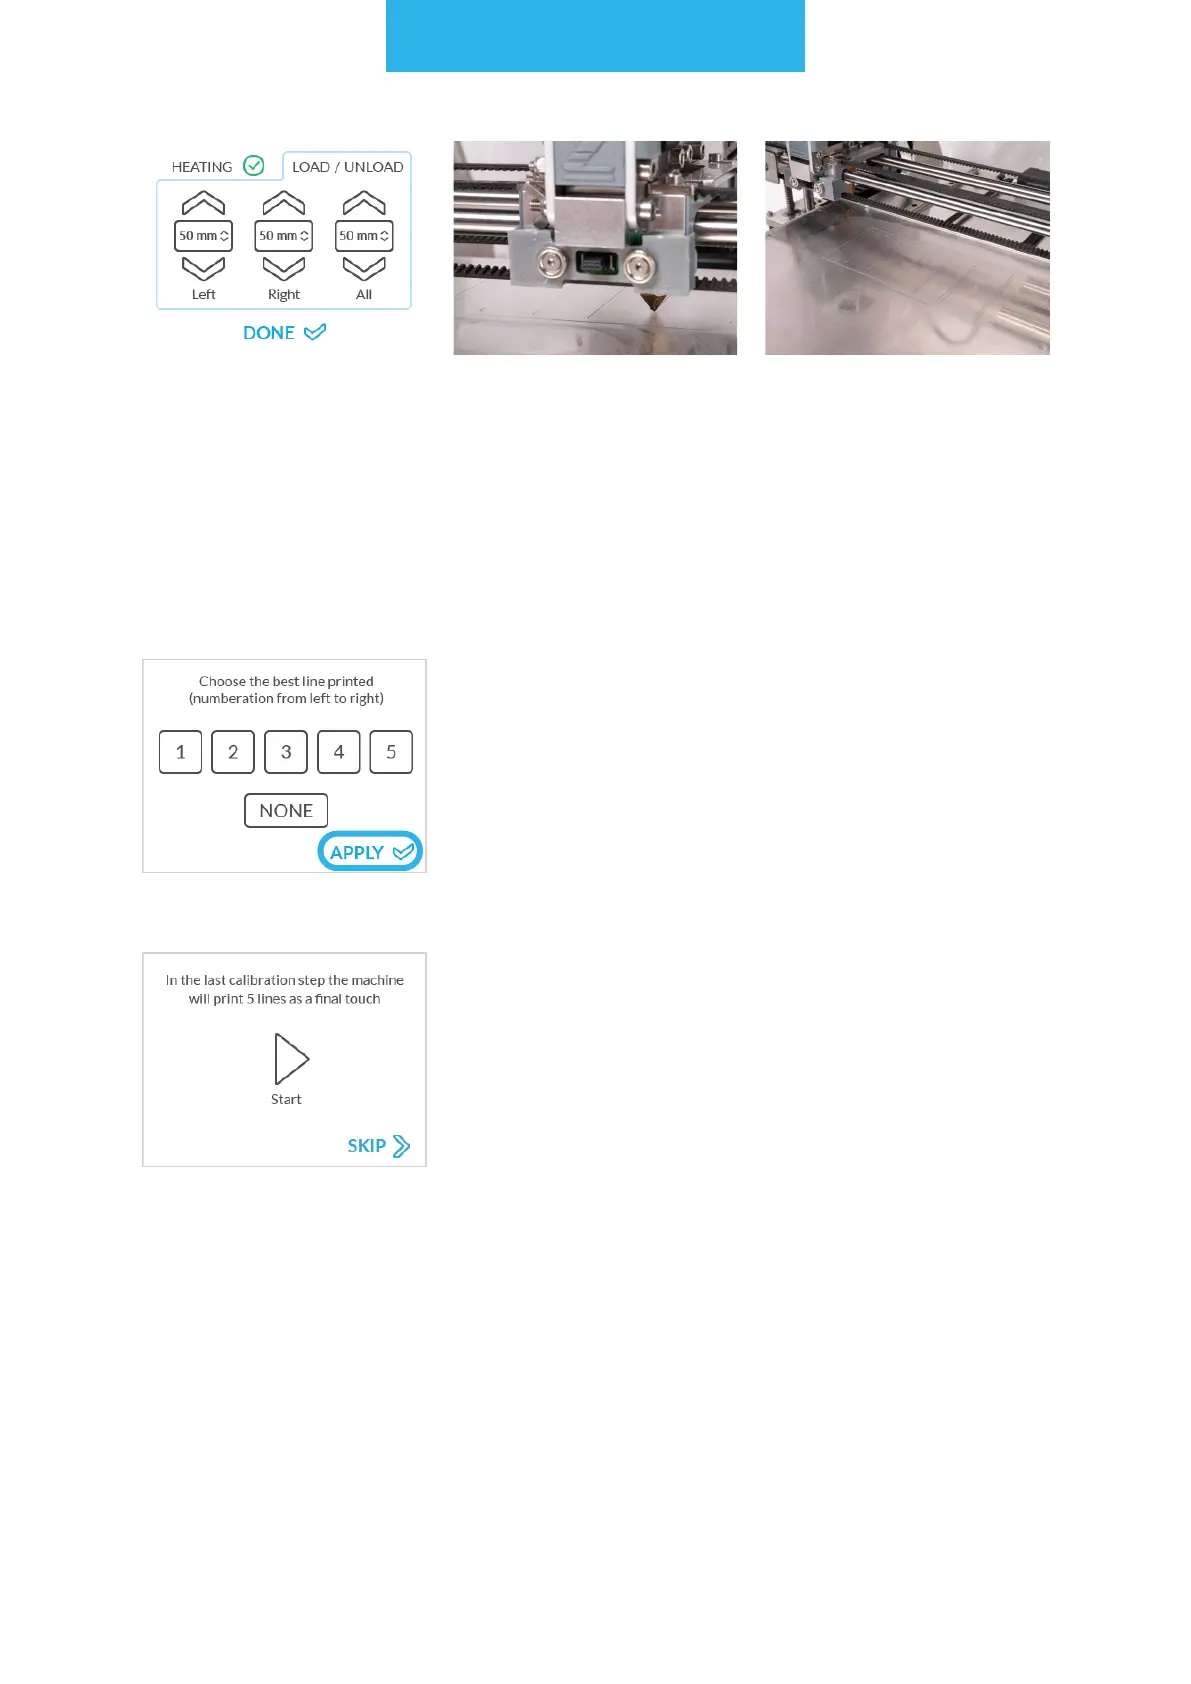
3D printing workow
71
Apply your choice.
Use the arrow buttons
on the screen to feed the
material on both sides
of the extruder until it
start to pour out from the
nozzle. (it might take a
couple times), after that
press the "NEXT" button.
Wait for the machine to
nish printing pattern.
Look at printed lines
and select the best one
on the screen. A correct
line is the one that sticks
to the table after gen-
tly touching it with the
nger, but can be easily
ripped off with a nger-
nail.
NOTE: by pressing the
'SKIP' button the user is
approving the automatic
calibration without visual
validation. After that the
calibration process ends.
NOTE: Each one of those lines
is printed on a slightly different
height (+/-0.05 mm) with the
middle line being the result of
the automatic calibration pro-
cess.