5
1
INSTRUCTIONS FOR USE – Wells, Buttons, & DisplayInterpretation
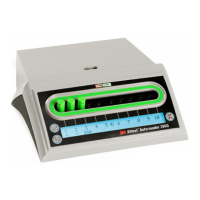
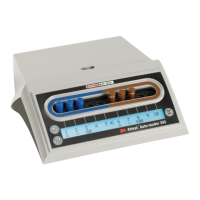
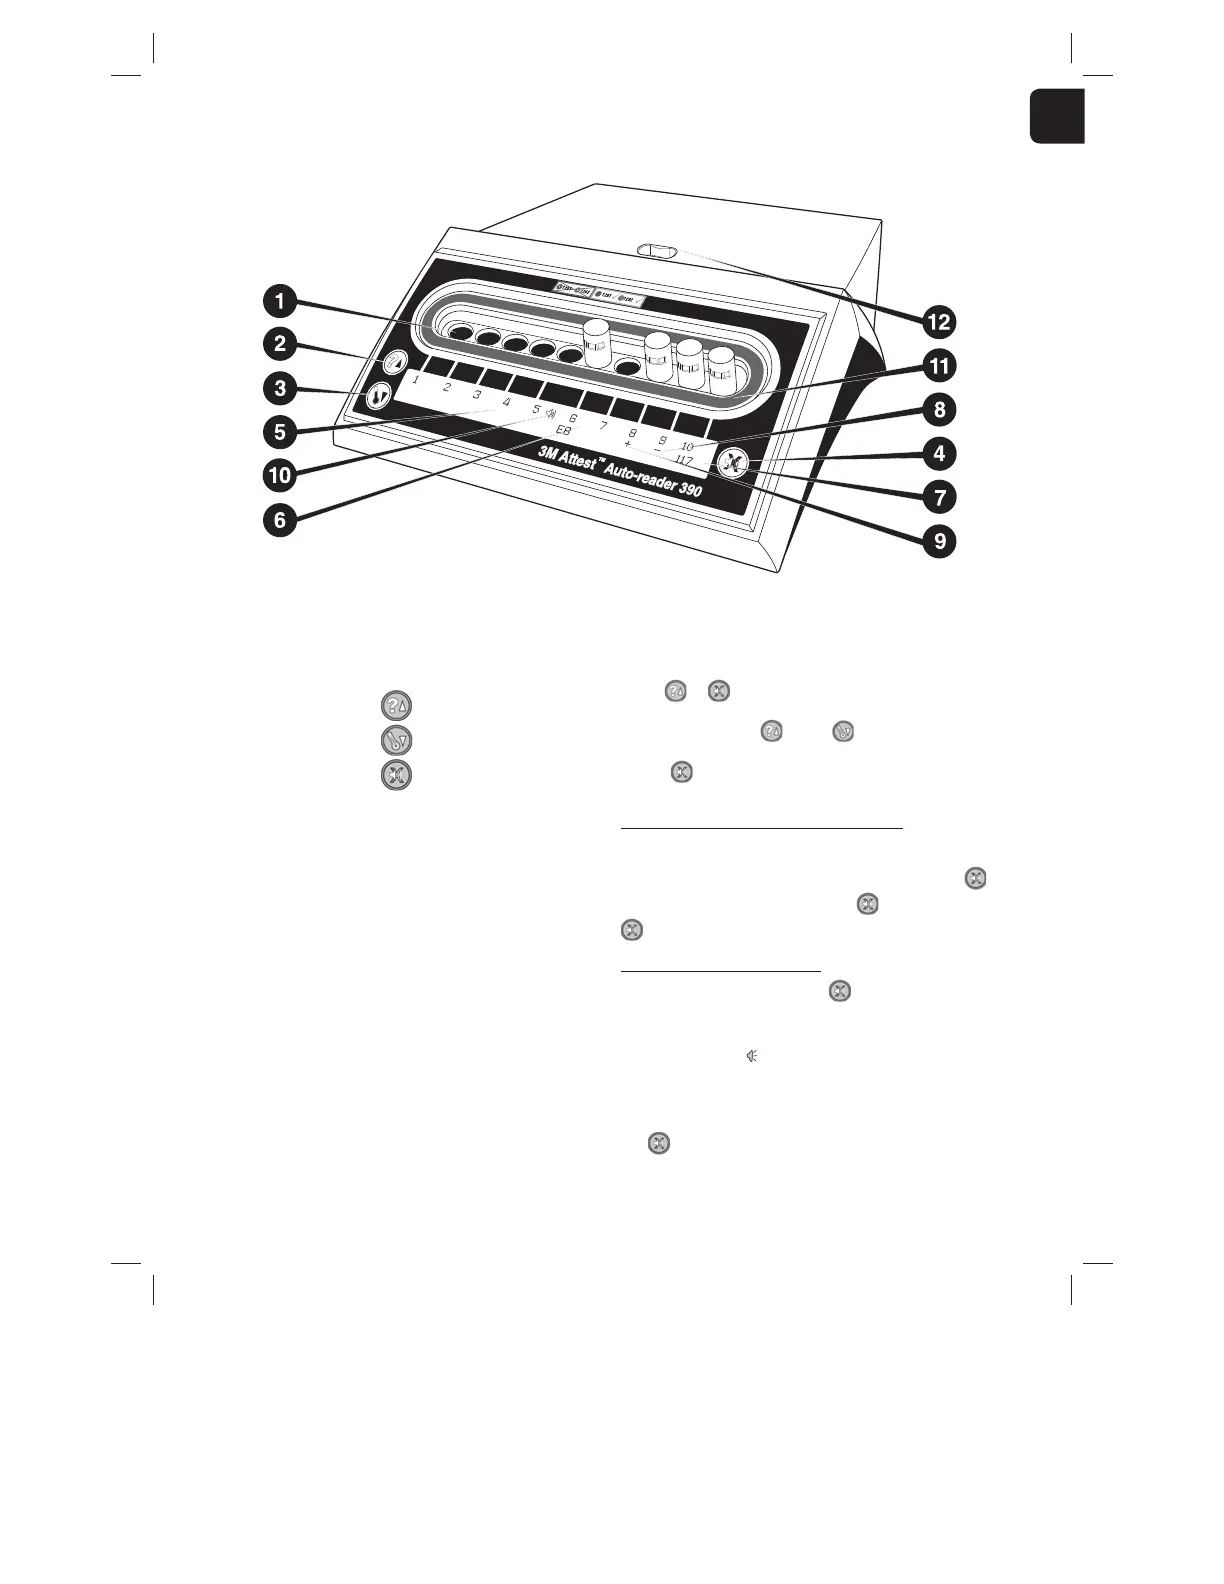
Please familiarize yourself with the face of the 3M™Attest™ Auto-reader390:
Wells
1. Incubation/Reader Wells – The 3M™Attest™ Auto-reader390has ten
incubationwells.
Buttons
2. Information / Up ArrowButton
3. Temperature / Down ArrowButton
4. Buzzer Alarm OFF / EnterButton
InformationDisplay
5. LCD Display – Display isbacklit.
6. LCD Display – Example of Error Message for well#6
7. LCD Display – Example of Remaining Incubation Time, in minutes, for well#10
8. LCD Display – Example of Negative ( - ) BI result for well#9
9. LCD Display – Example of Positive ( + ) BI result for well#8
10. LCD Display – Alarm EnabledIndicator
Color-Coded ConfigurationIndicator
11. Color-coded incubation well configurationsticker
BICrusher
12. BI CrusherWell
INSTRUCTIONS FOR USE –
3M™Attest™Auto-reader390Configuration
Note: Ideally, the 3M™Attest™ Auto-reader390should be empty (i.e., have no
incubating BIs) when it isreconfigured.
Press the and buttons on the front of the 3M™Attest™
Auto-reader390simultaneously for 3seconds to enter configuration mode. Once in
configuration mode, use the Up and Down buttons to set the 3M™Attest™
Auto-reader390clock, audible alarm, and incubation well configuration as desired.
The button acts as an “Enter” key and moves the flashing cursor to the next
changeablesetting.
Setting the 3M™Attest™ Auto-reader390Clock
The 3M™Attest™ Auto-reader390date and time are displayed in this format:
YYYY-MM-DD HH:MM, with the time displayed using a 24hour clock. To change the
year, if necessary, push the up or down buttons to set desired year, then press to
advance to the month, adjust as necessary and press
to advance to the day. Use the
button to move to the time and set the hours andminutes.
Setting the Audible AlarmFunction
Move across the top row of text by pushing the button. The flashing “B” in Buzzer
indicates this is a changeable setting. It is recommended this be set at “Buzzer Enabled”
to audibly alert the operator to a positive BI but it may be set to “Buzzer Disabled” by
using either the up or down button. Note: If Buzzer Disabled is selected, and the changes
accepted, the speaker icon (
) will disappear from the LCD panel and the alarm will be
disabled for all positive 3M™Attest™ Rapid Readout Biological Indicators, error codes,
and caution code alarm warnings. Note: The 3M™Attest™ Auto-reader390display
backlight flashes whenever an audible alarm sounds. Disabling the audible alarm does
NOT disable the LCD display backlightflashing.
Press
to select the desired option and advance to the bottom row oftext.
Rendered on 5/8/2013 10:56:36 AM

 Loading...