10 11
1
1
Using the ConfigurationPage
Certain set-up and configuration options are available on the password-protected 3M™Attest™ Auto-reader390G Web App Configuration page. Ideally, the 3M™Attest™
Auto-reader390G should be empty (i.e., have no incubating BIs) when it is reconfigured. Navigate to the Configuration page by enteringeither:
1) http://attestxxxxxx/protect/config.htm (where xxxxxx is the 6-digit unit serial number),or
2) http://xxx.xx.xxx.xx/protect/config.htm (where xxx.xx.xxx.xx is the IPaddress)
in the web browser address bar and pressing Go or Enter. A security screen will appear. Fillin the fields asfollows:
User name:manager
Password:Attest
and pressOK.
Click on the desired radio buttons to changesettings.
Language
Selected setting indicates language in which text on 3M™Attest™ Auto-reader390G Web App pages will appear on the PC/mobile device
screen.
Pushbutton Configuration
Selecting Enable
allows the user to configure the 3M™Attest™ Auto-reader390G from the buttons on the unititself.
Selecting Disable
prevents the user from being able to configure the 3M™Attest™ Auto-reader390G from the buttons on the unit
itself.
Buzzer Configuration
Selecting Enable
enables the audible alarm. The speaker icon will appear on the 3M™Attest™ Auto-reader390G LCDpanel.
Selecting Disable
disables the audible alarm. The speaker icon will disappear from the 3M™Attest™ Auto-reader390G LCD panel.
AttestAuto-reader 390G Nickname
Naming the 3M™Attest™ Auto-reader390G may be useful in facilities with multiple units. The assigned nickname will appear on the
3M™Attest™ Auto-reader390G Web App Status page.
Enable DHCP
Default: Setting is checked indicating the Web App will usethe Dynamic IP address automatically assigned when the 3M™Attest™
Auto-reader390G is connected to the network. Remove the checkif you wish to use a Static IP address assigned by your facility IT.
IP Address Enter Static IP address assigned by IT.
Gateway Enter Gateway.
Subnet Mask Enter Subnet Mask.
Primary DNS Enter Primary DNS.
Use Computer Time Check this box if you wish to set the clock on-board the 3M™Attest™ Auto-reader390G using the computer’s clock.
Attest Auto-reader390G Time
Alternatively, leave the Use Computer Time box uncheckedand complete the date and time boxes to set the
3M™Attest™Auto-reader390G clock.
After changing desired settings, click on Save Config button to save your changes. Anew screen confirming the settings were successfully changedappears.
c) Historypage
Status
History
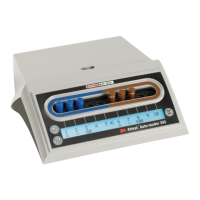
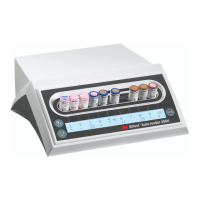
3M™ Attest™ Auto-reader 390G
Well# and Configuration
#4 1294
#3 1294
#3 1294
#4 1294
#5 1294
#1 1294
#4 1294
#4 1294
Start Time
2012-10-30 12:31:25
2012-10-30 09:57:01
2012-10-30 07:51:51
2012-10-30 16:15:55
2012-10-30 16:01:07
2012-10-30 15:58:18
2012-10-30 11:52:27
2012-10-30 11:42:26
Result
---
---
+
–
–
+
–
C2
ID
1
2
3
4
5
6
7
8
The 3M™Attest™ Auto-reader390G stores results for the last 100incubated BIs on
embedded software. The 3M™Attest™ Auto-reader390G Web App History page provides
a summary of these last 100results.
d) Configurationpage
This page allows the configuration of the 3M™Attest™ Auto-reader390G’s network and
language settings from the 3M™Attest™ Auto-reader390G WebApp.
Documenting BI Results using the 3M™Attest™ Auto-reader390G
WebApp
Status
History
3M™ Attest™ Auto-reader 390G
AT TE ST 1294 AT TE ST 1294
1 2 3 4 5
229 231–––
6 7 8 9 10
SN
100122
2012-10-30 16:06
1. Open the Results Detailpage
After inserting a new 3M™Attest™ Rapid Readout BI in the 3M™Attest™
Auto-reader390G, it is a best practice to open the 3M™Attest™ Auto-reader390G
Web App Results Detail page for that BI by clicking on the appropriate well number
from the Statuspage.
2. Enter the specific information for that BI (e.g., BI Lot #, sterilizer/load number,
Technician name, etc.) in the provided editable fields. Use the Notes section to capture
information not prescribed in the provided row titles; for example, you may wish to use
this field to record loaditems.
3M™ Attest™ Auto-reader 390G Results Detail
Status
History
Print
Result
Start Time
Well# and Configuration
390G Serial Number
Control?
BI Lot#
Load#
Sterilizer#
Technician
No
2014-11AD
1
2
sdf
223
2012-10-30 15:58:18
#1 1294
100122
3. The entered information is saved automatically to temporary web browser storage on
the user’s PC every 60seconds, or by leaving the Results Detailspage.
4. Print/File. Once the BI result is available, print or file the Results Detail page to create
a record. The page may be physically printed and/or saved as an electronicfile.
Important! Data is only stored for the last 100incubatedBIs.
Embedded software in the 3M™Attest™ Auto-reader390G saves the data from the
auto-populated (i.e., green highlighted) fields. The application relies on the temporary
storage in the user’s web browser to save the data in the user-populated fields. In both
cases, data is only stored for the last 100records, i.e., the 101st incubated BI will erase
the information saved for the 1st incubated BI. To retain the Results Detail information for
future reference it is best practice to print the page or save to an electronic file as soon as
the BI result isavailable.
Using the BI HistoryPage
Status
History
3M™ Attest™ Auto-reader 390G
Well# and Configuration
#4 1294
#3 1294
#3 1294
#4 1294
#5 1294
#1 1294
#4 1294
#4 1294
Start Time
2012-10-30 12:31:25
2012-10-30 09:57:01
2012-10-30 07:51:51
2012-10-30 16:15:55
2012-10-30 16:01:07
2012-10-30 15:58:18
2012-10-30 11:52:27
2012-10-30 11:42:26
Result
---
---
+
–
–
+
–
C2
ID
1
2
3
4
5
6
7
8
To view or print an individual record, click on the ID number of the desired record to
navigate to the Results Detail page for thatBI.
Note 1: Column 1, “ID” is the assigned ID number with ID 1representing the newest
record and ID 100representing the oldest record. For convenience, all columns are
sortable; to help find a particular record, simply click once on the column heading to sort
in ascending order and click a second time to reverse theorder.
Note 2: The History page refreshes less frequently than the Status page. Until the BI result
is available, the History page displays ••• in the Results column indicating incubation is
stillin-process.
Rendered on 9/12/2013 10:34:26 AM
 Loading...