MN1941WEN Operation 5-15
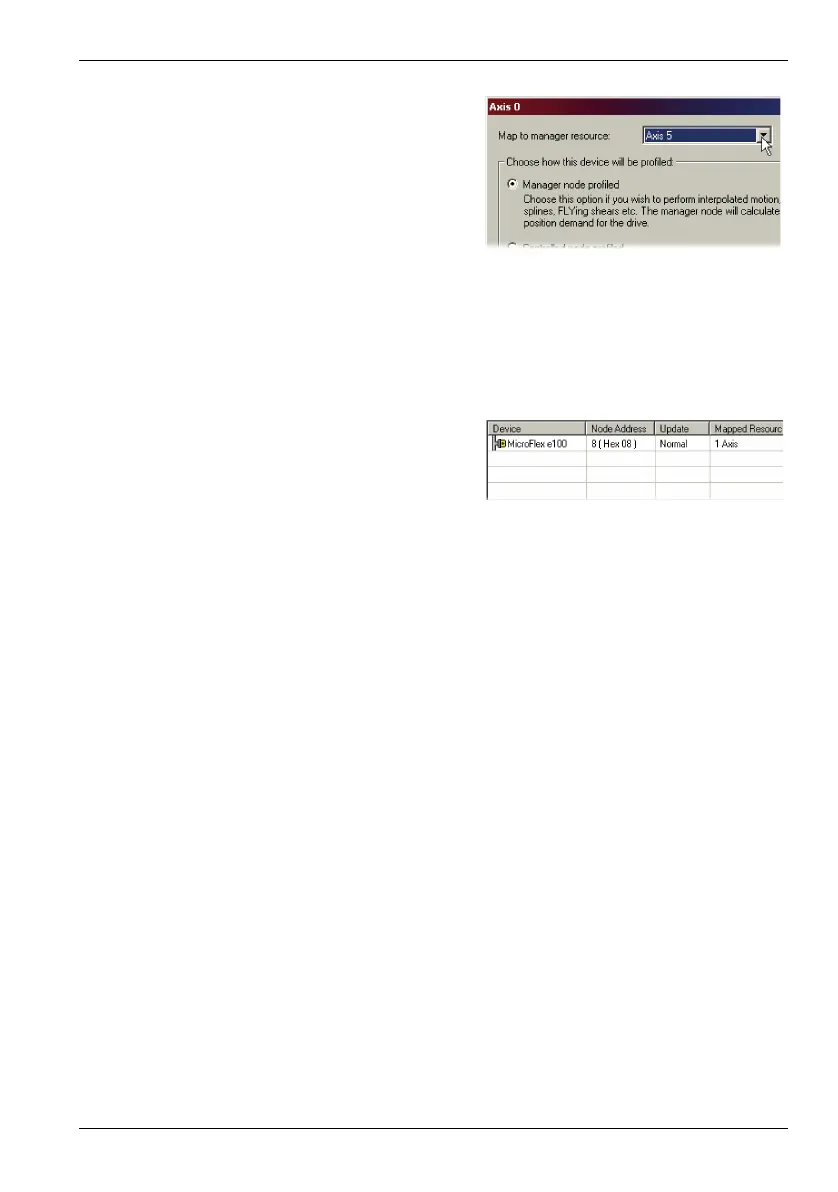
5. In the Map to manager resource drop
down box, select one of the available axis
numbers and click OK. This is the axis
number that NextMove e100 will use to
reference the EPL device’s axis
hardware.
The three radio button options refer to the
way the remote axis will be controlled -
see section 5.4.1.
In this example, the remote axis has been assigned axis number 5. This means that
when a Mint program running on the NextMove e100 contains a statement such as
MOVER(5)=20, the NextMove e100 will send a demand to the remote axis (5) to move
20 units.
6. Click Close in the Resource Mapping
window. The EPL device is now listed in
the EPL Devices page.
Note: As shown in the preceding example, the EPL device’s assigned axis number (5)
and node ID (8) do not have to be the same. However, in small networks it may
be beneficial to assign the same node ID and axis number to simplify
identification of a particular node / axis.
See the Mint WorkBench help file for full details of the device mapping process, and also
examples of Mint basic code that can perform the network configuration at startup.