MN1941WEN Operation 5-39
5.10 Local digital input/output configuration
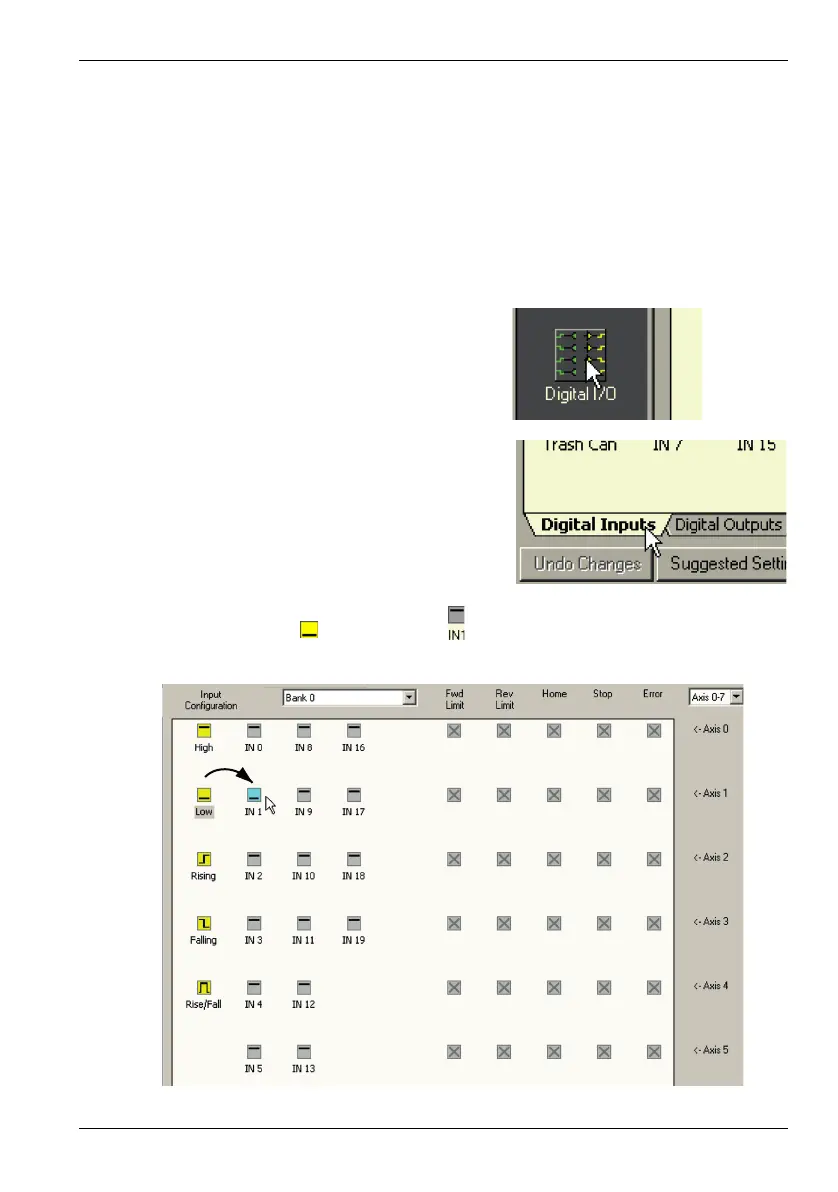
The Digital I/O window can be used to setup other digital I/O on the NextMove e100.
5.10.1 Digital input configuration
The Digital Inputs tab allows you to define how each digital input will be triggered, and if it
should be assigned to a special purpose function such as a Home or Limit input. There is one
<- Axis x row for each local axis configured in section 5.4.3. In the following example, digital
input 1 will be set to trigger on an active low input, and allocated to the forward limit input of
axis 0:
1. In the Toolbox, click the Digital I/O icon.
2. At the bottom of the Digital I/O screen, click
the Digital Inputs tab.
The left of the screen shows a column of
yellow icons - High, Low, Rising, Falling and
Rise/Fall. These describe how the input will
be triggered.
3. Drag the Low icon onto the IN1 icon . This will setup IN1 to respond to a low input
.