STEP 2 – Amplifier Settings
• When the amplifier is turned on, push the POWER button to turn off the amplifier (back to
Low Energy standby mode);
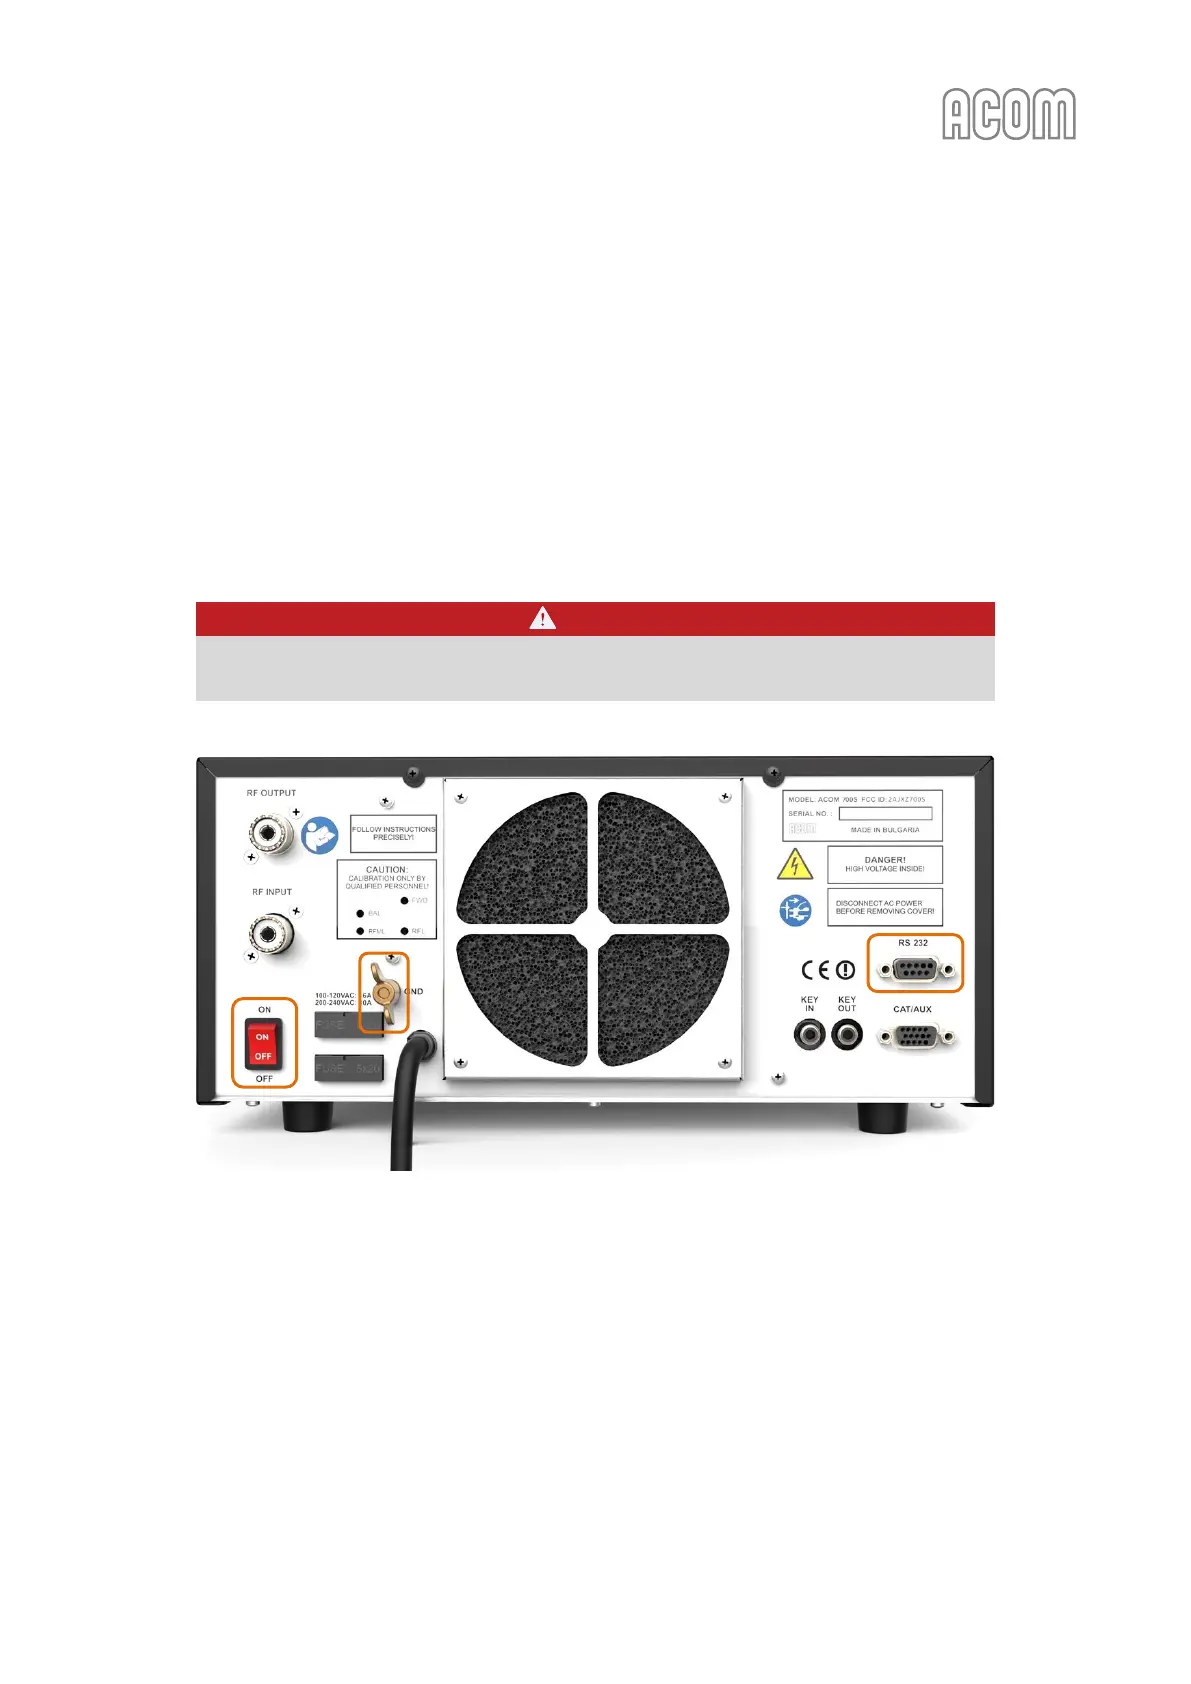
• Switch off the amplifier via Main Power Rocker Switch (see Figure 2-4 | Rear panel -
Connections, Pos. 1); Make sure the Main Power Rocker Switch is in OFF position;
• Pull the amplifier's line (mains) plug out of the outlet;
• Do not disconnect GND connection;
• Disconnect all cables (except GND connection) from the rear panel of the amplifier –
transceiver, antennas, etc.
DANGER
Remove the GND connection last (see Figure 2-4 | Rear panel - Connections, Pos. (a)) and
wait 30 minutes for safety.
Figure 7-8 | Rear panel – RS-232 port
Figure 7-8 | Rear panel – RS-232 port
• Connect the amplifier to the PC via RS-232 interface on the rear panel of the amplifier (see
Figure 7-8 | Rear panel – RS-232 port).
- If your PC has a built-in RS-232 port, you have to use an RS-232 cable (see Table 7-2 |
RS-232 connection cable wiring) to connect an amplifier to the PC.
- If your computer does not have a built-in serial RS-232 interface use an "USB to RS-
232" converter (see Figure 7-2 | Examples of "USB to RS-232" converters).
• Check whether the rear panel mains rocker switch (marked ON/OFF) is turned off (must be).
Insert amplifier's mains plug into the wall outlet;