• Switch on the amplifier via Main Power Rocker Switch
(see Figure 2-4 | Rear panel - Connections, Pos. 1);
• Push and hold for 1-2 seconds the POWER button to start the amplifier and enter STANDBY
mode.
If the amplifier starts normally there will be a couple of beeps from the amplifier.
STEP 3 – Using Terminal S software for Firmware Update
• Exit all programs running on your computer and DISABLE/DEACTIVATE any antivirus software;
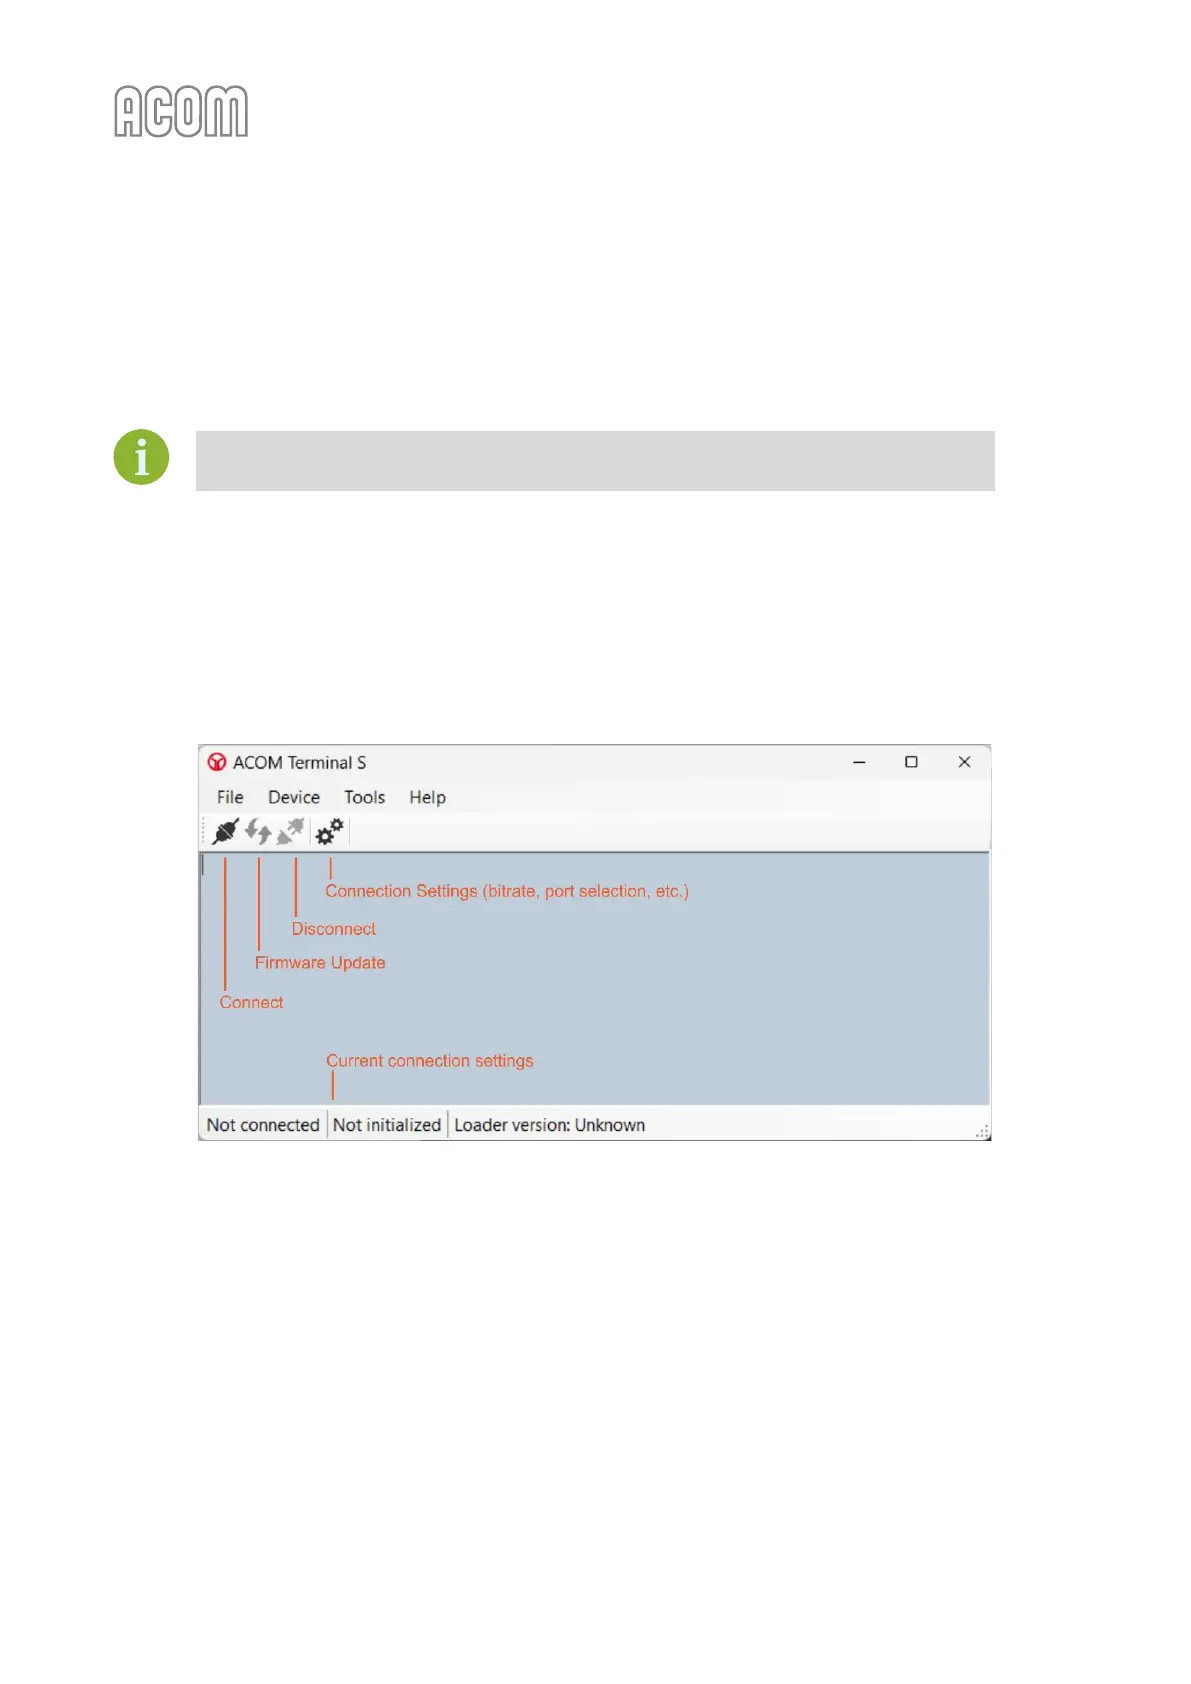
• Start ACOM Terminal S software (We assume that you downloaded Terminal S software
from www.acom-bg.com and installed it on your PC);
Figure 7-9 | ACOM Terminal S screenshot
Figure 7-9 | ACOM Terminal S screenshot
• Open the Settings window by clicking on the Settings icon (two gears) or use Tools ->
Settings from the menu bar. In the Settings window -> tab General, configure the settings as
shown in Figure 7-10 | Terminal S - Tools -> Setting -> General menu:
- Command timeout (ms) 10000;
• In the Settings window -> tab Serial port, configure the settings as shown in Figure 7-11 |
Terminal S - Tools -> Setting -> Serial port menu. For actual serial port number see STEP 1 – RS-232
Interface Settings on your PC:
- Serial port settings 9600, 8, None, 1;