261
ADOBE PREMIERE 5.0
User Guide
Using the Fade control
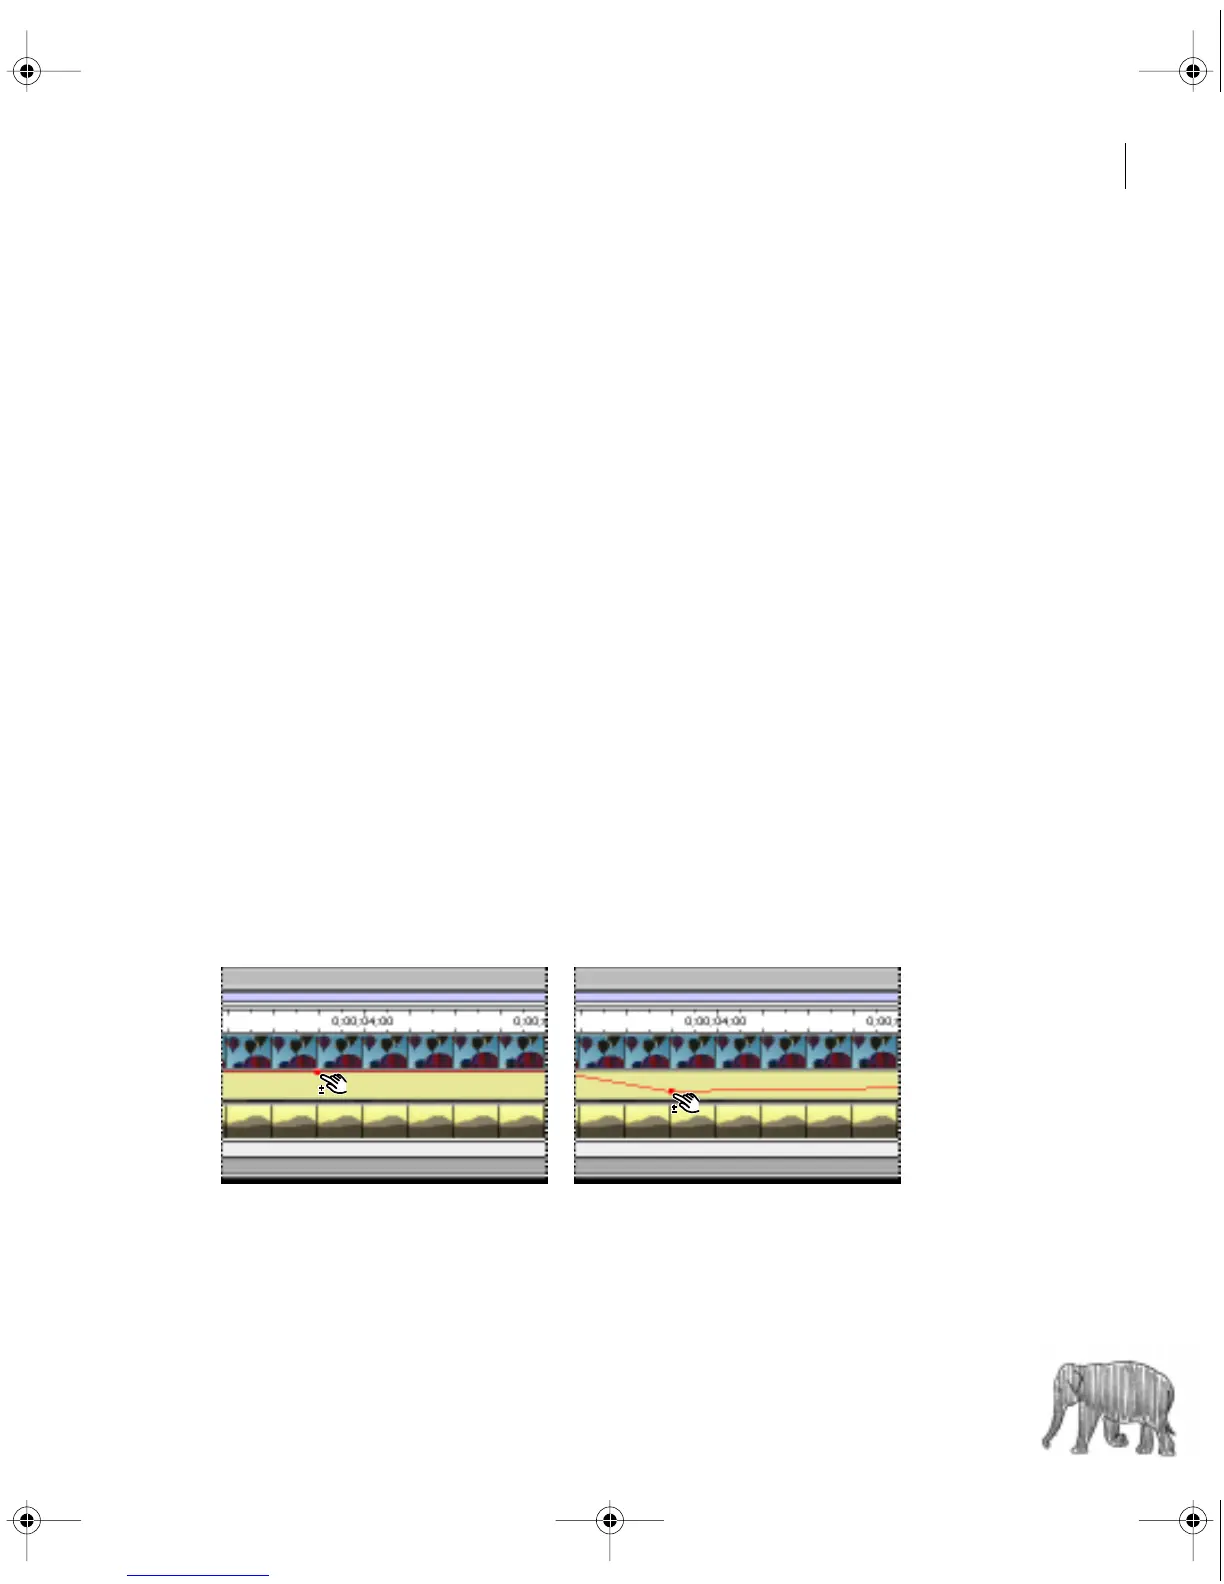
When you place a clip in a superimpose track, a Fade control appears beneath it (you must
expand the superimpose track to display the Fade control). The Fade control specifies the
opacity of the entire clip. By adding handles and adjusting this control over time, you can
fade a clip in or out.
The Fade control adjusts opacity after any keys have been applied. In other words, moving
the Fade control adjusts the opacity for opaque, transparent, and semitransparent regions
in the clip.
To adjust fading:
1
Place a clip in a superimpose track. If necessary, click the triangle to the left of the track
name to expand the track.
2
With the selection tool selected, position the pointer over the top line in the Fade control.
The pointer changes to a pointing finger with red plus and minus signs.
3
Click to create a handle (a small red square), and drag the handle up or down to adjust the
fading in 10% increments. The opacity percentage appears in the Info palette and updates as
you drag a handle. Press the Shift key with a handle selected to view the opacity percentage and
to change the percentage in 1% increments for finer gradations.
When the handle is at the top of the Fade control area, the image is fully opaque; when the
handle is at the bottom of the panel, the image is transparent. The line between two handles
indicates the direction, length, and speed of the fade. The steeper the angle, the more sudden
the change.
c00.book for PS Page 261 Tuesday, March 31, 1998 1:28 PM
 Loading...