43
ADOBE PREMIERE 5.0
User Guide
The Camera Blur filter appears in the Current column of the Filters window. Filters listed in
this column are applied to the currently selected clip.
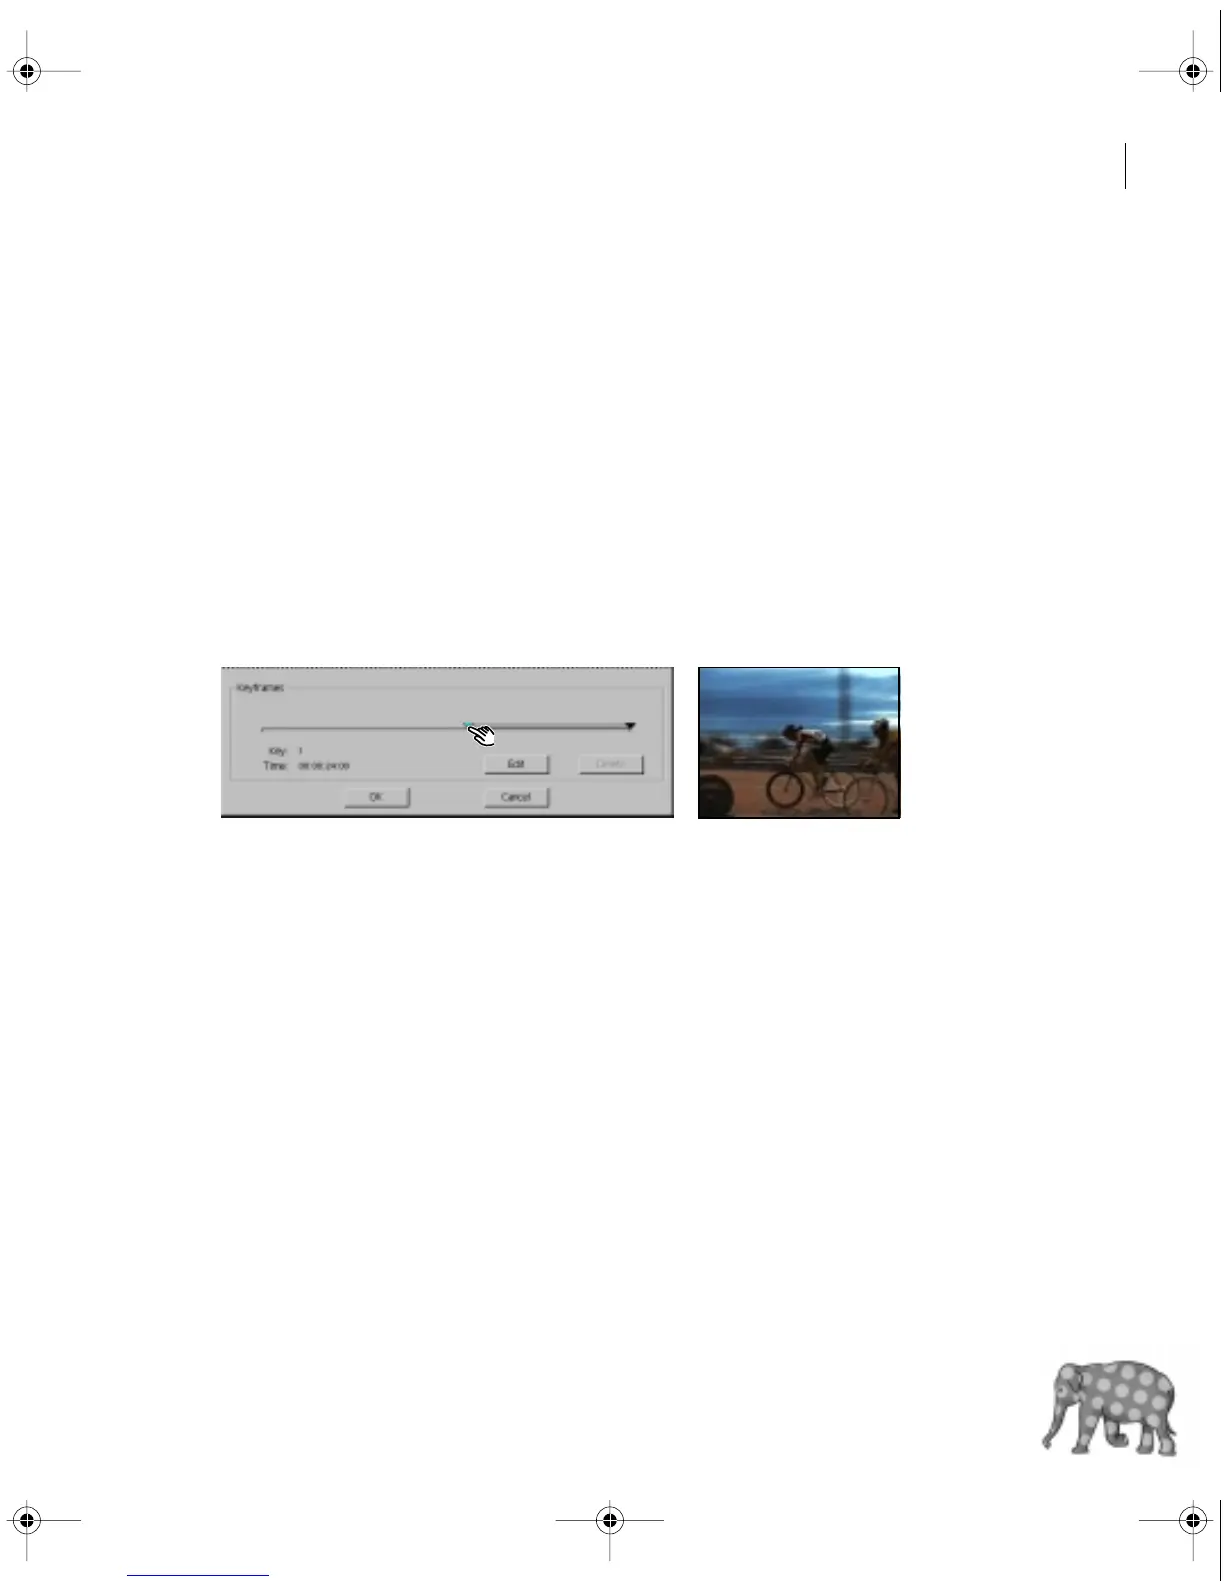
To create an effect of changing focus, you can vary the Camera Blur effect over time. To do this,
you set keyframes. A keyframe specifies a control value at a specific point in time.
The lower portion of the Filters window now displays a timeline, representing the duration
of the Finale.mov clip. The triangular keyframes at each end of the timeline control when the
effect begins and ends, and with what amount of blurring. Since you’d like the blurring to start
about midway through the Finale.mov clip, you move the first keyframe. Moving a keyframe
scrubs the clip in the Program view of the Monitor window.
6 Arrange the Filters window so that the program view in the Monitor window is visible. Then
drag the first keyframe (the triangle on the left) to the right until you reach the point in the clip
where the bikes are perpendicular to the camera.
7 Click the Edit button.
8 Make sure the slider is set at zero. Click OK.
Now you’ll create a new keyframe and increase the amount of blurring.
9 In the Filters window, click in the middle of the two keyframes.
A new keyframe is created and selected, and the Camera Blur Settings edit box appears.
c00.book for PS Page 43 Tuesday, March 31, 1998 1:28 PM