Upgrade Kit, 3250/4250
Suffix D to E
For additional information or technical assistance,
please contact Advanced Instruments Hot-Line
®
Service Center (U.S. 1-800-225-4034, outside
North America +US 1-781-320-9000).
325025PM Rev2
(3255 Service Manual)
Page 1 of 6
Kit Contents:
Reference: Use this kit to upgrade a Model
3250 Osmometer or Model 4250
Cryoscope to Serial Suffix E.
Note: This upgrade may only be per-
formed on a Serial Suffix D
instrument. Serial Suffix C and
earlier may not be upgraded.
Tools Needed: Phillips screwdriver, small
wire cutter, static grounding
(earthing) wrist strap (includ-
ed).
Warning-Hazardous Voltage
Warning-Internal components may be
damaged by static electricity.
CAUTIONS:
• Power cord must be disconnected to
prevent electric shock.
• Never unpack, touch or handle any
integrated circuit without wearing a
grounding (earthing) strap to mini-
mize your static charge.
• Instrument calibration and all cus-
tomized settings will be lost when
the main control board set or
processor board is replaced.
Therefore, make sure the current
sample and block probe bin num-
bers and the sample stir amplitude
are recorded in the service log so
that you can reset these vital num-
bers into the replacement board set.
• Make sure that Option Switch
Configuration is set for proper
model selection.
Qty Part No. Description
1 325250 Main harness
1 325605 Control board set
1 89900 Wrist strap, anti-static
4 TIW375 Tie wrap, 4-inch
1 325026PM Label, updated to revision
1 325025PM Instruction, Upgrade Kit
3250/4250 Suffix D to E
GENERAL INSTRUCTIONS:
1. Power up the instrument and record cur-
rent sample and block probe bin numbers,
sample stir amplitude, and any other cus-
tomized settings that may need to be reset
after this procedure.
Note: Present settings may be found printed
on unit initialization header during
power-on sequence.
2. When display shows “Press START to
Continue”, turn off the power and unplug
the instrument.
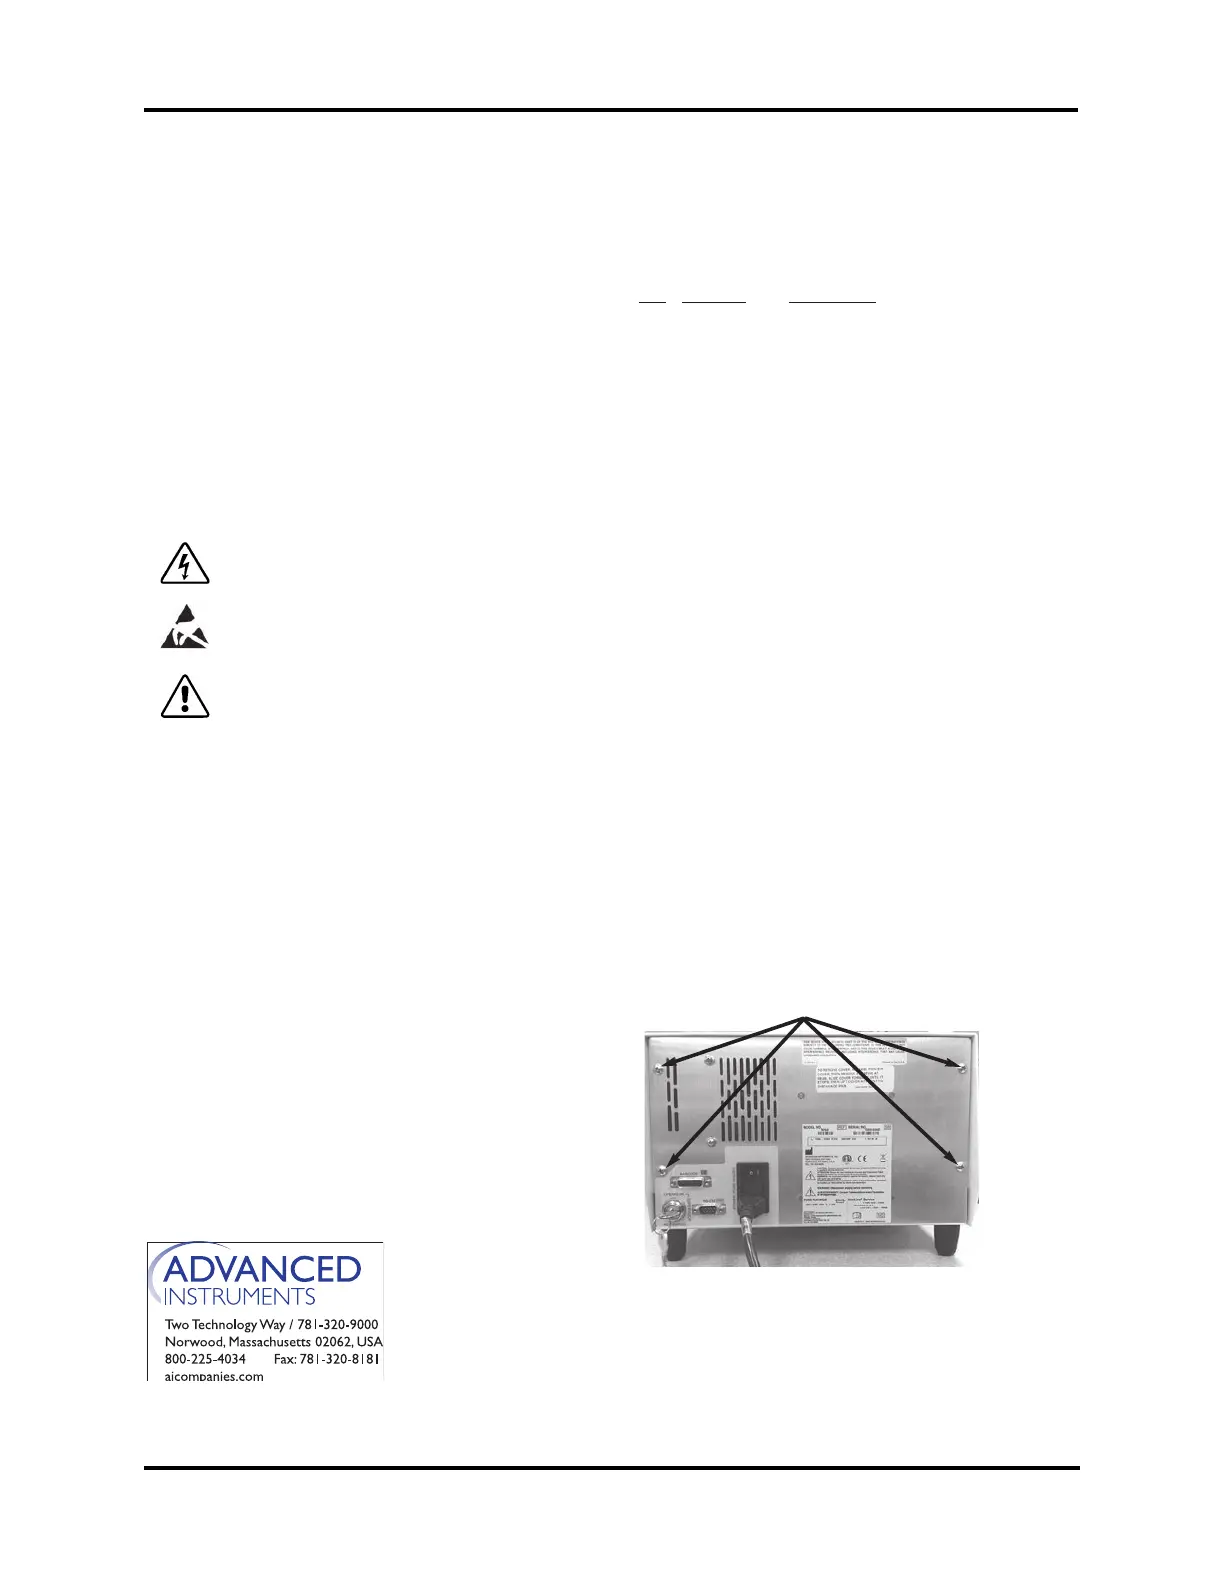
3. Remove the screws securing the head
cover, then remove the head cover.
Remove the screws (A) securing the
instrument cover, and remove the cover.
A