Printer Assembly Replacement
325420R
Reference: Use this instruction to install part
325420R. This part should only
be used with 3250/4250 instru-
ments with serial suffix D or
higher.
Tools Needed: Phillips screwdriver, static
grounding (earthing) wrist
strap (included), 3/16 L-shape
Allen wrench, 7/64 L-shape
Allen wrench.
Warning-Hazardous Voltage
Warning-Internal components may be
damaged by static electricity.
CAUTIONS:
• POWER CORD MUST BE DIS-
CONNECTED TO PREVENT
ELECTRIC SHOCK.
• NEVER UNPACK, TOUCH OR
HANDLE ANY PCB WITHOUT
WEARING A GROUNDING
(EARTHING) STRAP TO MINI-
MIZE YOUR STATIC DIS-
CHARGE.
Instruction:
1. Turn off the power and unplug the instru-
ment.
CAUTION: IT IS CRITICAL THAT THE
INSTRUMENT BE UNPOW-
ERED THROUGHOUT THIS
REPLACEMENT PROCE-
DURE. ALWAYS UNPLUG
THE INSTRUMENT FOR
PERSONAL PROTECTION
FROM HAZARDOUS VOLT-
AGES AND TO PREVENT
For additional information or technical assistance,
please contact Advanced Instruments Hot-Line
®
Service Center (U.S. 1-800-225-4034, outside North
America +US 1-781-320-9000).
POTENTIAL DAMAGE TO
THE INSTRUMENT.
2. Remove the screws securing the head
cover and remove the cover.
3. Release the printer cover, remove the
screws securing the instrument cover, then
slide the cover forward, then up and off to
remove. Tilt the keypad forward to pro-
vide access and clearance to the printer
assembly. Remove the installed paper roll
from the printer assembly.
4. Locate the 325420 printer assembly
mounted between the deck and the main
PCB support. This includes the mounting
bracket, the printer mechanism, printer
control PCB, the printer interface PCB,
and interconnecting cable.
5. Attach the static grounding strap to your
wrist and stick the adhesive end to a suit-
able bare-metal ground, such as the rear
panel.
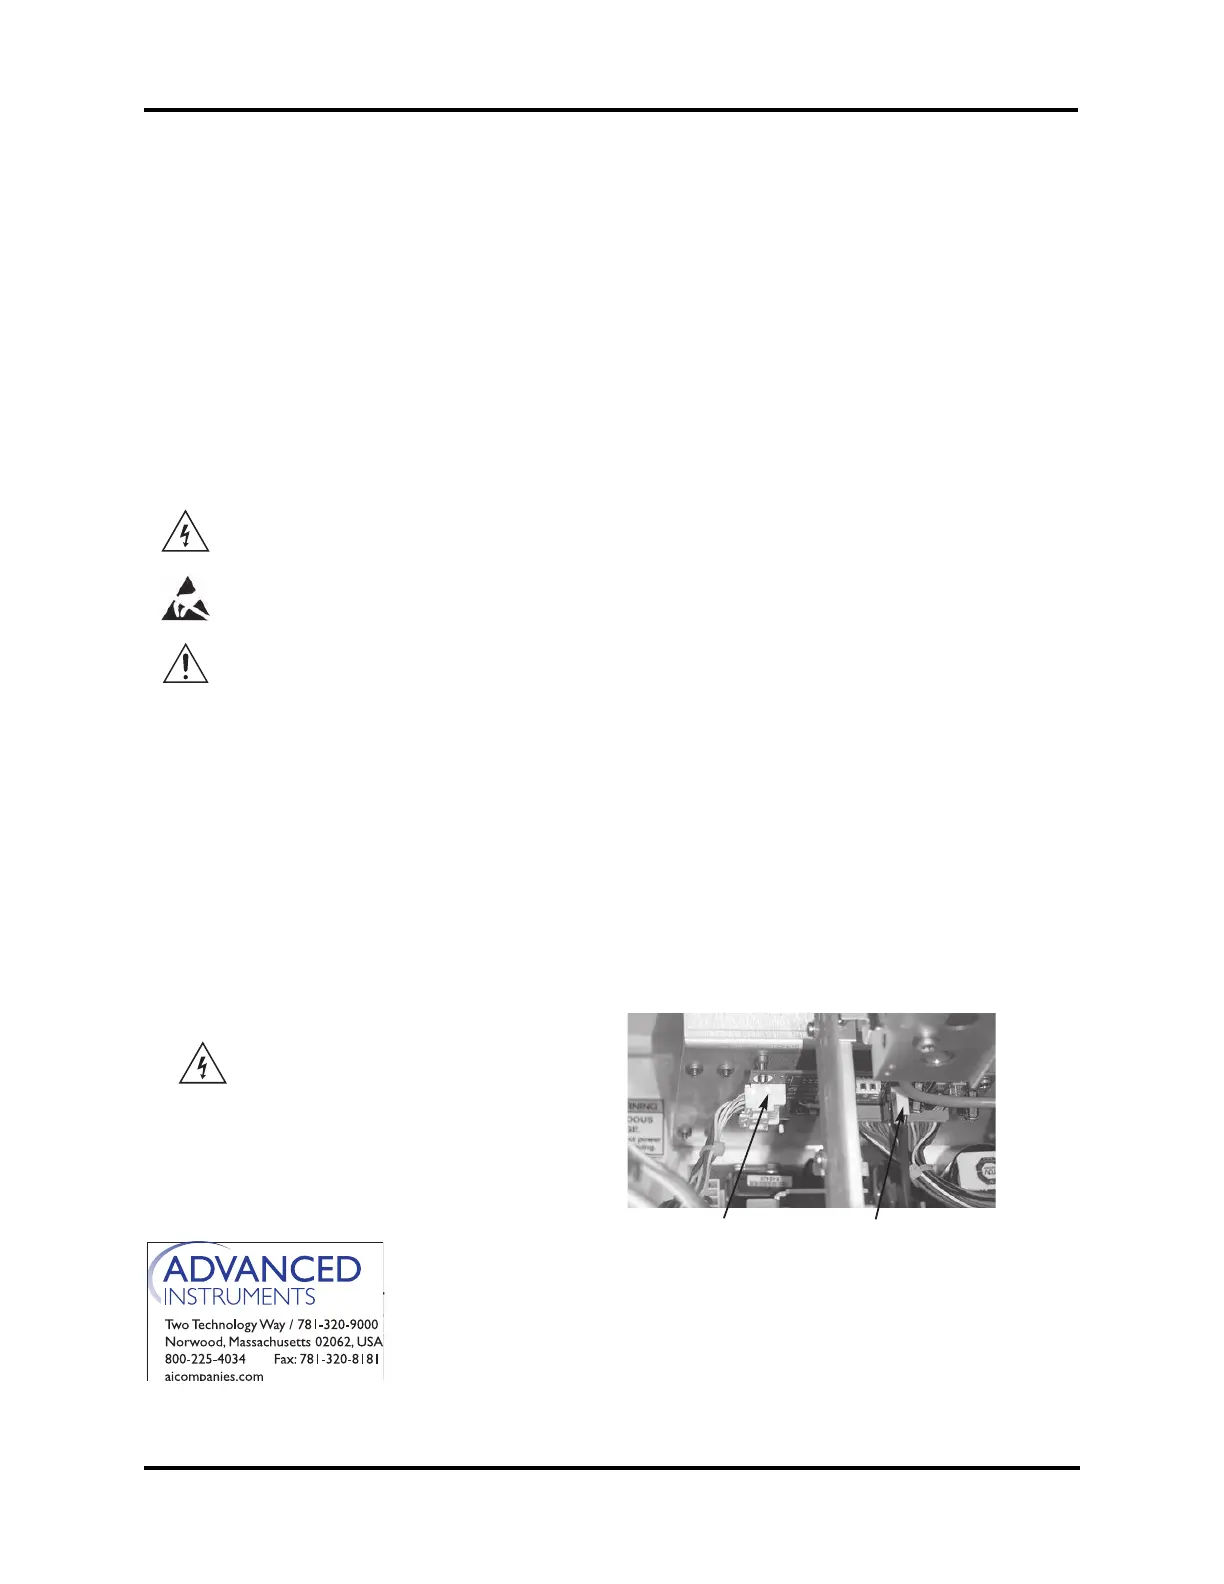
6. Release cable end latch and disconnect the
printer data cable (A) attached at the
lower rear of the printer assembly, then
disconnect the printer power connection
(B) located in the middle side of the print-
er interface PCB, towards the sample
cooling assembly and head.
325420PM Rev1
(3255 Service Manual)
Page 1 of 3
A
B