1
325404PM
Rev 1
Hot-Line Technical Service: Advanced Instruments and worldwide distributor
network provides 24/7 comprehensive customer service and technical support.
©2018 Advanced Instruments.
All trademarks are the property of their respective companies.
Two Technology Way / 781-320-9000
Norwood, Massachusetts 02062, USA
800-225-4034 Fax:781-320-8181
aicompanies.com
The management system governing
the manufacturing of this product is
ISO 9001 certified.
Replacement Procedure
325404PM
Replacing the Printer Mechanism
Scope
Use this instruction to install part 325404R. This part
should only be used with 3250/4250 instruments with
serial sux D or higher, or with FLM300 instruments.
Tools required
• Phillips screwdriver (#0)
• Custom wrench (included)
• Static grounding (earthing) wrist strap (included)
Safety notices
WARNING: Hazardous voltage. Power cord must be
disconnected to prevent electric shock.
NOTICE: Internal components and replacement
parts may be damaged by static electricity. A static
grounding wrist strap must be worn during this
replacement procedure.
NOTICE: Improper connections may cause damage
to the instrument.
Procedure
1. Turn o the power and unplug the instrument.
2. Release the printer cover and remove the installed
paper roll. Remove the screws securing the
instrument cover.
• [3250/4250]: Slide the instrument cover forward,
then up, tilting the cover up to clear the operating
head cover, and o to remove.
• [FLM300]: Remove the 20-sample heater block
from the instrument cover. Lift the cover high
enough to clear the instrument, then rotate it 90
degrees counterclockwise and place it on its side to
the left of the instrument.
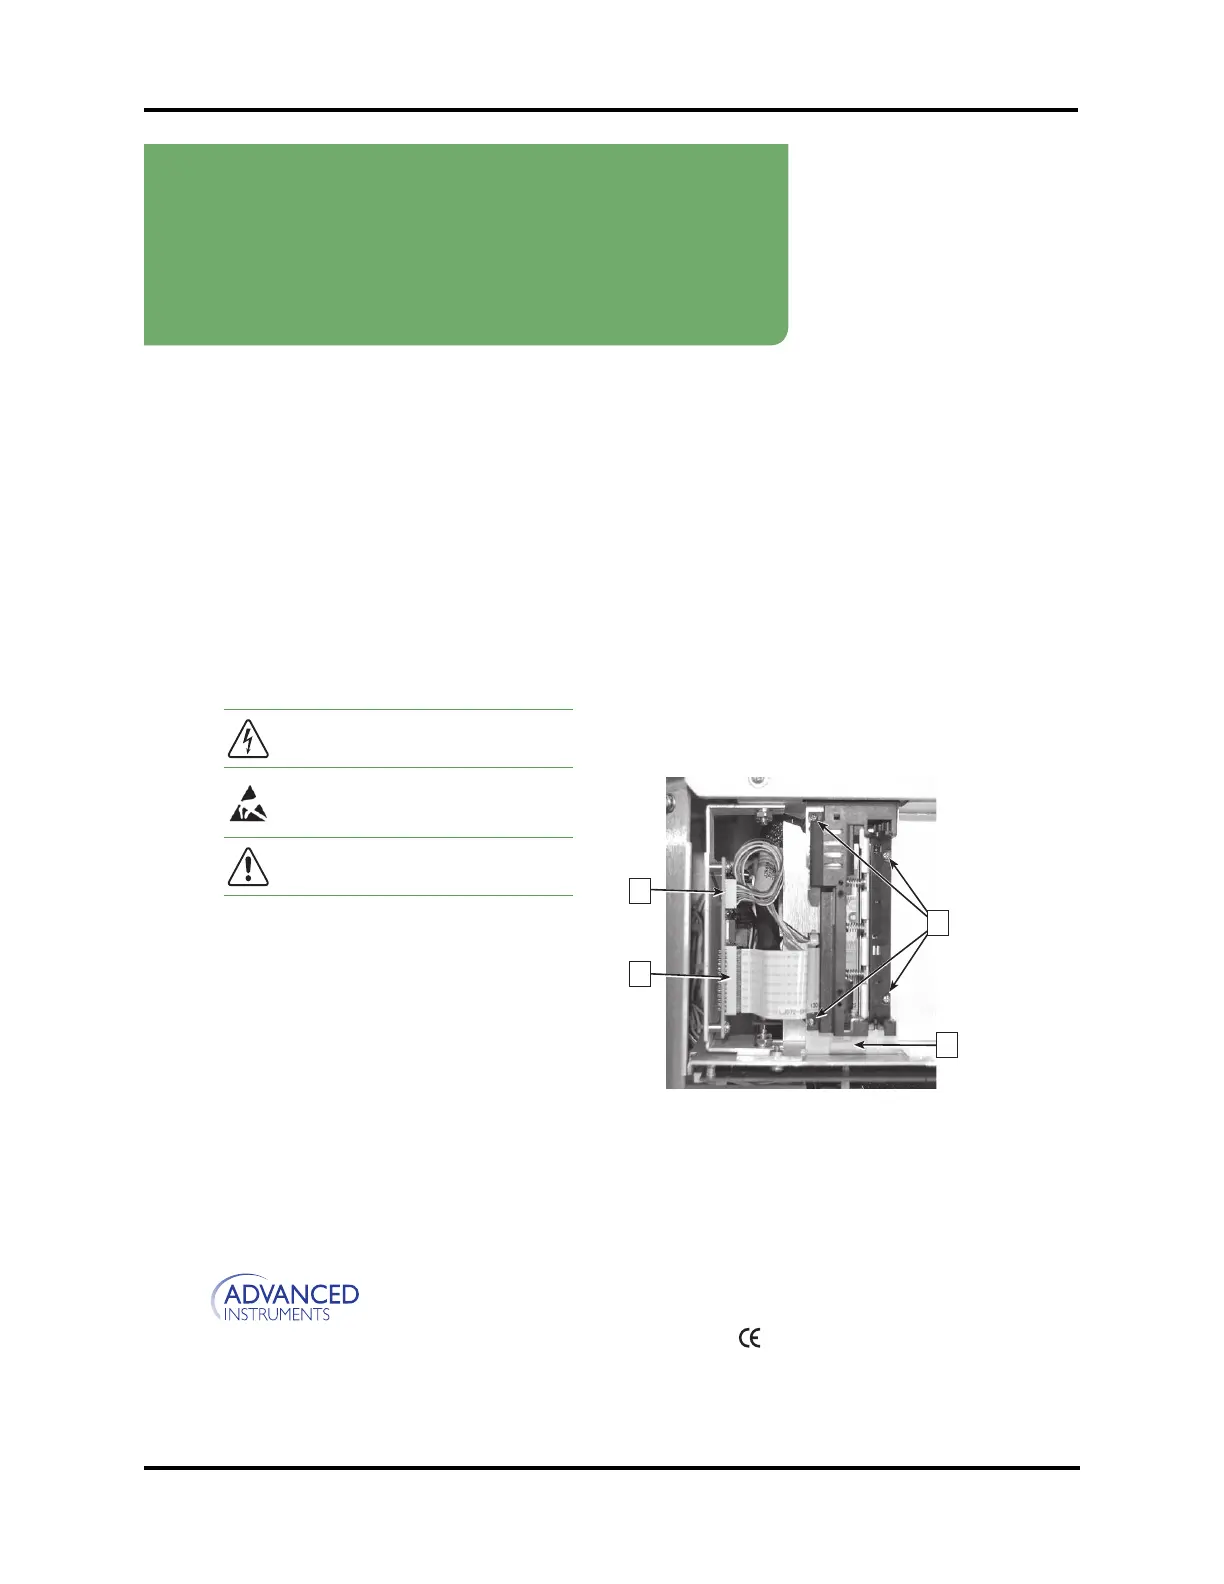
3. Disconnect the printer flex cable [A], and then
disconnect the printer power connection [B] located
at the rear top of the printer controller PCB.
4. Remove the four mounting screws, nuts, washers, and
lock washers [C] that attach the printer mechanism
to the printer mounting bracket. Use a finger to trap
and retain the nuts and washers and prevent them
from falling into the instrument below the printer.
These can be used to mount the replacement printer
mechanism, although additional hardware is supplied.
5. Remove the printer platen mounting screws, then
remove the printer platen from the printer door.
6. Release the printer platen from the replacement
printer assembly by pressing the printer door release
lever [D] on the printer. Install the replacement
printer platen onto the printer door.
A
B
D
C
7. Install the replacement printer mechanism onto the
printer mounting bracket using four (4) 2-56 x 3/8
screws, with a flat washer, lock washer and nut for
each. A custom wrench has been supplied to help
hold and position these nuts and washers until the
screw threads have engaged. Do not tighten the
screws at this time.