Printer Assembly Replacement
325400R
(Models 3250/4250 Serial Suffix A - C, only)
Reference: Use this instruction with part
325400R Printer Assembly.
NOTE: Printer assembly FL2401 is obso-
lete. All printers are upgraded by
this kit to 325400.
Tools Needed: Phillips screwdriver, flat-
bladed screwdriver.
Warning-Hazardous Voltage
Warning-Internal components may
be damaged by static electricity.
CAUTION: Improper connections
may cause damage to the instrument.
Instruction:
1. Turn off the power and unplug the instru-
ment.
2. Remove the screws securing the head
cover, and remove the cover.
3. Remove the screws and slide the instru-
ment cover up and off.
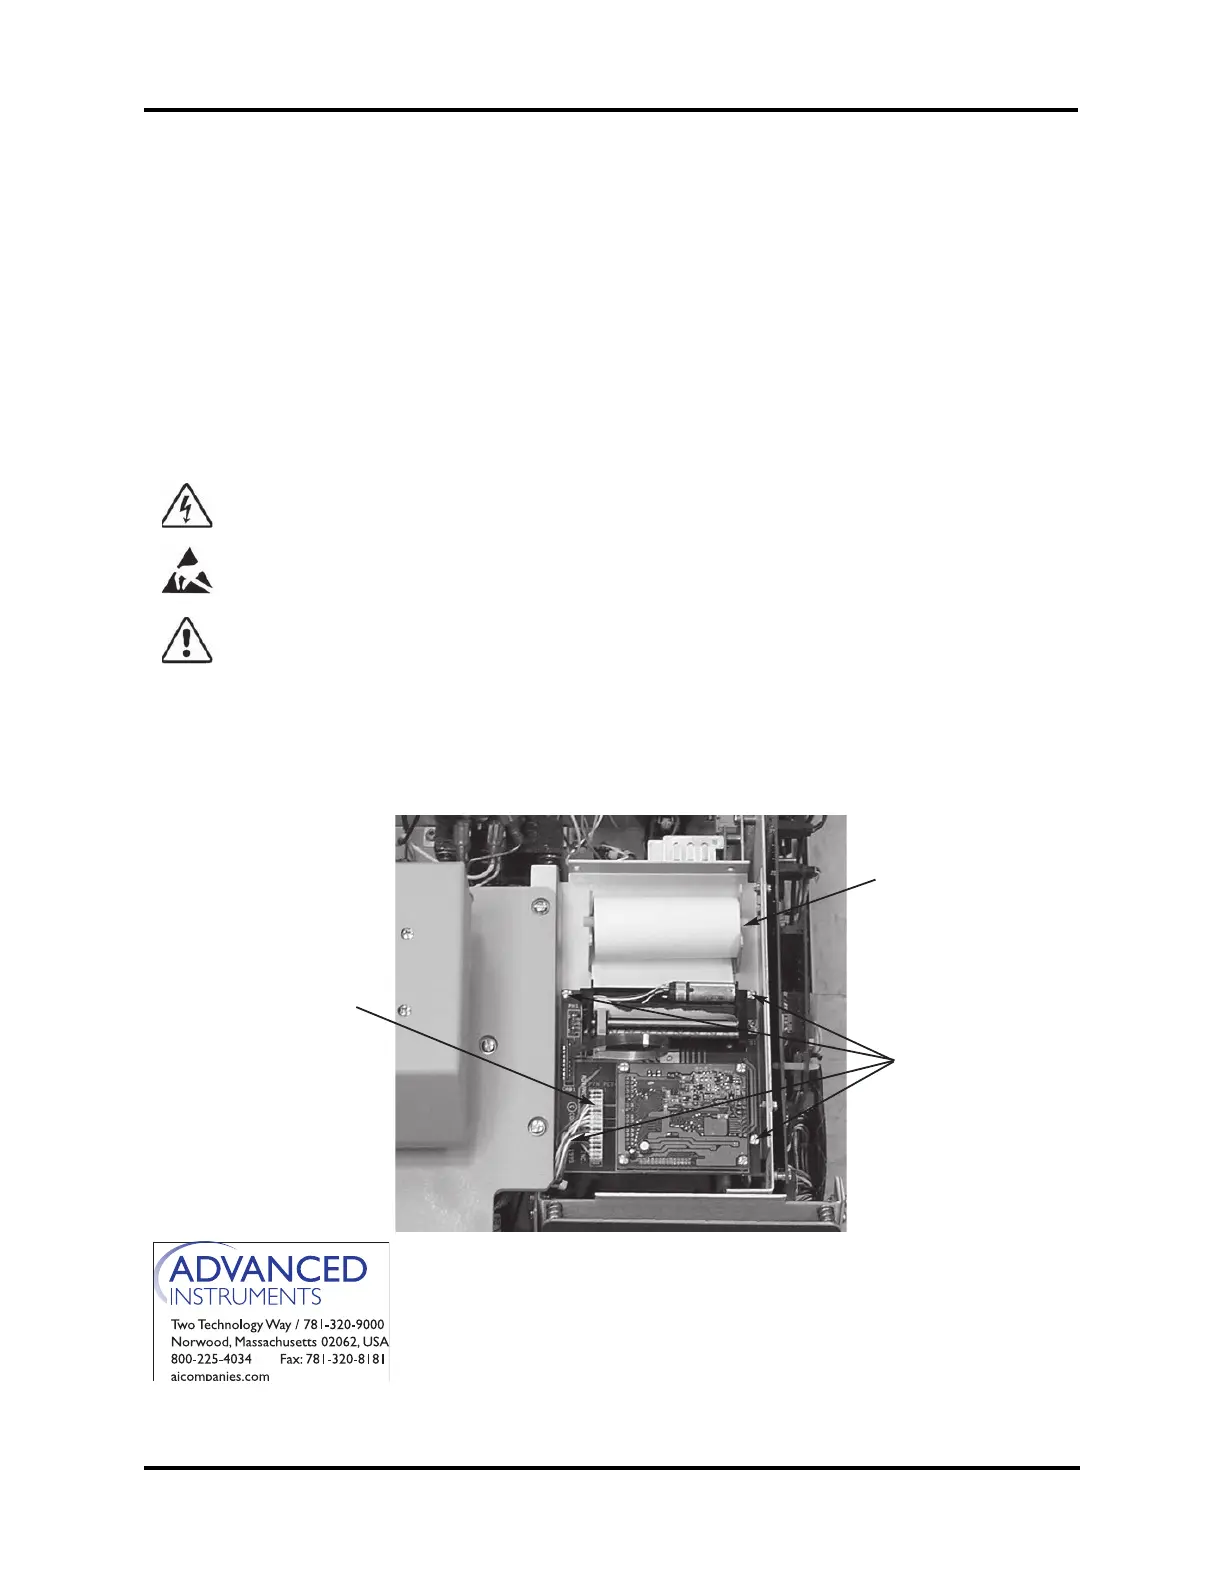
4. Remove the printer paper holder (A) and
the printer paper by tearing the paper
from the roll. Pull the remaining paper
forward through the printer.
5. Disconnect the printer from the main har-
ness (B).
6. Remove the four screws and nylon wash-
ers (C) from the printer base.
A
B
C
For additional information or technical assistance,
please contact Advanced Instruments Hot-Line
®
Service Center (U.S. 1-800-225-4034, outside
North America +US 1-781-320-9000).
325P401 Rev2
(3255 Service Manual)
Page 1 of 2